A Complete Guide to Campervan Electrics Kits (2026)
- Shane Monks O'Byrne

- Sep 16, 2025
- 33 min read
In this guide, I’m going to share everything I’ve learned about campervan electrics kits – those all-in-one packages that promise to simplify your van’s electrical system. As someone who’s built several campervan electrical setups over the years (and made plenty of mistakes along the way), I can tell you these kits have come a long way. In fact, on my latest van build, I ditched the old piecemeal approach in favor of a complete kit – and it was a game-changer.
In my early conversions I bought components individually from various suppliers, and the result was often chaos. I ended up with mismatched parts, multiple last-minute orders for forgotten fuses or wires, and a ton of guesswork and stress. Sound familiar? This time around, I decided enough was enough – I wanted a one-stop solution that would save me time and ensure every piece was compatible. Enter the modern campervan electrics kit. By the end of this guide, you’ll understand what these kits include, their pros and cons, how to choose one, and whether going with a kit is right for you. I’ll also share my honest experiences (the good and the bad) and highlight some of the top kit providers out there. Let’s dive in!

Shane is an NCC-certified electrical installer. He has built, taught, and lived in campervans since 2019.
This post contains affiliate links. We may earn a commission at no extra cost to you. To understand our policies on content, affiliate commissions, and liability, please review our Terms of Use.


In this guide
Shane, the founder of The Van Conversion, is a campervan professional and NCC-certified electrical installer. Since 2020, he’s lived on the road full-time, completing several van builds along the way. He’s the author of Roaming Home and the creator of The Van Conversion Course, which have helped thousands build their own vans. Shane also writes The Van Conversion Newsletter, where he shares hands-on tips and practical insights. He’s passionate about empowering others to make their vanlife dreams reality.
This post contains affiliate links, which means that if you click a product link and buy anything from the merchant (Amazon, eBay, etc.) we will receive a commission fee. The price you pay remains the same, affiliate link or not. By using these links, you are helping me to continue writing free educational content! To understand our policies on content, affiliate commissions, and liability, please review our Terms of Use.
Did you know you can get a free electrical wiring diagram by signing up for The Van Conversion Newsletter?
What Is a Campervan Electrics Kit (And Why Use One)?
A campervan electrics kit is essentially a complete bundle of components for your van’s electrical system, delivered as a package. Think of it as a turn-key power system for your camper. Instead of sourcing a battery from one place, a charger from another, wires and fuses elsewhere, etc., the kit provides everything you need in one go. This typically includes not just the “big-ticket” items like batteries and inverters, but also all the wiring, fuses, busbars, connectors, and detailed instructions to put it together. The goal is to remove the headache of figuring out compatibility and to ensure no critical piece is missing on install day.

Why consider a complete kit?
From my experience, the biggest draws are convenience and peace of mind. Everything in the box is designed to work together safely. Good kits come with a wiring diagram and installation guide tailored to the included components, so you’re not left guessing which wire goes where. Some companies such as Nohma even provide video tutorials when you are stuck. This is huge if you’re new to van electrics – even as someone experienced, I appreciated having a clear roadmap rather than juggling random datasheets and forum diagrams. Vunked, for example, includes a personalized wiring diagram and step-by-step guide specific to your setup, so you know fuse ratings, cable sizes, and connections right out of the box. In short, a kit turns what can be an overwhelming project into a manageable (dare I say, enjoyable) job.
There’s also the compatibility factor. In DIY van circles, we’ve all seen (or built) electrical systems that were a bit of a Frankenstein – maybe a charger that wasn’t quite the right size for the battery, or an inverter that didn’t play nicely with the charger. A well-designed kit is engineered as a whole, meaning the battery, solar panels, charger, inverter, etc., are properly matched in capacity and voltage. This reduces the risk of blown fuses, undercharged batteries, or fried appliances due to mismatched components. As one kit supplier (Nohma) puts it, their ready-to-go kits are “designed by engineers to be safe and robust,” and they even include a free wiring diagram and guide with each purchase. It’s about doing it right the first time.
Finally, let’s not forget time savings. Sourcing dozens of parts for a full electrical system can take weeks of research and shopping around. With a kit, you make one order and get one delivery containing everything – saving you countless hours. No more scrolling through endless spec sheets or waiting on backordered parts from five different stores. If you value your time (or are trying to finish your van in time for that big summer trip), a kit can be really attractive.
Inside a Campervan Electrical Kit: Key Components
So, what exactly do you get in a complete electrics kit? While exact contents vary by supplier and system size, most comprehensive kits will include the following core components required to generate, store, and use power in your campervan:
Leisure Battery/Batteries:
The heart of the system, storing energy for use when you’re off-grid. Kits may include traditional deep-cycle AGM batteries or more advanced lithium (LiFePO₄) batteries, usually sized in amp-hours (Ah). Lithium batteries offer more usable capacity and longer life for a higher price. For example, a mid-range kit might come with a ~200Ah lithium battery, whereas a budget kit might include a 100Ah AGM. Choose battery type/size based on your power needs and budget (more on that later). I recommend you read our comprehensive guide to leisure batteries to learn more on the differences.

Solar Panels:
To harness renewable energy, most kits include roof-mounted solar panel(s) plus the mounting brackets and cabling. Solar wattage can range from a modest 100–200W panel in a basic kit up to 400W+ in an off-grid kit. Rigid panels are common for durability, though some kits offer semi-flexible panels for stealth or weight savings. The kit should also provide MC4 connectors and entry gland for wiring the panels to the inside. Check out our guide to campervan solar systems here.

Solar Charge Controller (MPPT or PWM):
This device sits between the solar panels and the battery to ensure your batteries charge efficiently and safely from solar. Quality kits will include an MPPT controller (Maximum Power Point Tracking) which is far superior to older PWM controllers in harvesting energy. The controller is rated by max amps; e.g. a 30A MPPT might accompany ~400W of solar, whereas a 15A controller suffices for ~200W. The controller prevents overcharging the battery and often has Bluetooth/app monitoring in newer models. We have an MPPT sizing calculator here.

Alternator Charging Device:
Virtually all kits will include a way to charge from your van’s alternator while driving. This is either a split charge relay (voltage-sensitive relay) in simpler setups, or a DC-DC charger in modern setups (also called a battery-to-battery charger). A DC-DC charger is the preferred option for most builds these days, especially if your van has a smart alternator. It regulates the current (commonly 20–30A in smaller kits, or up to ~50A in bigger kits) from the vehicle alternator to properly charge your leisure battery. This protects both the alternator and the battery. The kit will include the unit itself (e.g. a Victron Orion 30A or 50A) and the wiring to connect it to your starter battery/alternator circuit. You can check out our extensive guide to split charging here.

AC Inverter (and Charger):
If you want standard household 110V/230V outlets in your van for appliances like laptops, kitchen gadgets, or AC units, you need an inverter. Many kits include a pure sine wave inverter sized to your needs – common sizes are 500W for very basic needs, 1000–1500W for moderate use, and ~2000–3000W for high-end builds running heavy appliances (e.g. induction cooktops or power tools). High-end kits might use a combination inverter/charger unit, like the Victron MultiPlus, which doubles as a shore power charger. An inverter/charger lets you recharge your batteries from campground hookups or a generator as well, usually at 30–120A charging rates depending on the model. If a kit includes shore hook-up, it should also provide a shore inlet plug and possibly an AC breaker box/RCD for safety. For much more information on Victron's excellent MultiPlus inverter/chargers, check out our new in-depth guide.

Power Distribution & Fusing:
A safe electrical system needs proper fuses, breakers, busbars, and switches. A good kit will come with fuse blocks for your 12V circuits and appropriate mega fuses or MIDI fuses for each major high-current component (inverter, solar, charger, etc.). Expect heavy-duty battery isolator switches to disconnect the battery or solar panels for maintenance. Busbars or a fused power distribution hub (like the Victron Lynx Distributor) might be included to neatly connect all the big cables. Essentially, all the little bits that are easy to overlook – fuse holders, properly rated fuses, wiring blocks, grounding lugs – should be in the kit so you don’t have to run to the hardware store mid-install.

Wiring & Connectors:
This is a big one. A complete kit will supply all the cables needed – of the correct gauge, length, and with proper lugs or connectors. For instance, kits often include lengths of 25mm², 35mm², or larger cable for battery-to-inverter connections, pre-crimped with heavy-duty copper lugs, as well as plenty of 6mm² or 10mm² cable for connecting chargers, fuse boxes, and earth (ground) points. Quality kits use marine-grade tinned copper cable for low resistance and corrosion resistance. In my kit, I received ultra-flexible. battery cables (95mm² and 70mm² for the big runs) cut to length, plus smaller wiring looms for the accessories. (My only minor gripe was I needed a bit more length for a couple of runs due to my specific layout – so you may need to get an extra length or two if you have an especially large van or complicated circuits like me). The kit should also include all the crimp terminals (I needed Vunked to send me out a few more lugs that were missing, and again they were most obliging), MC4 solar connectors, and heat shrinks. In other words, all the “little” stuff that is essential to finishing the job.

System Monitor (Optional):
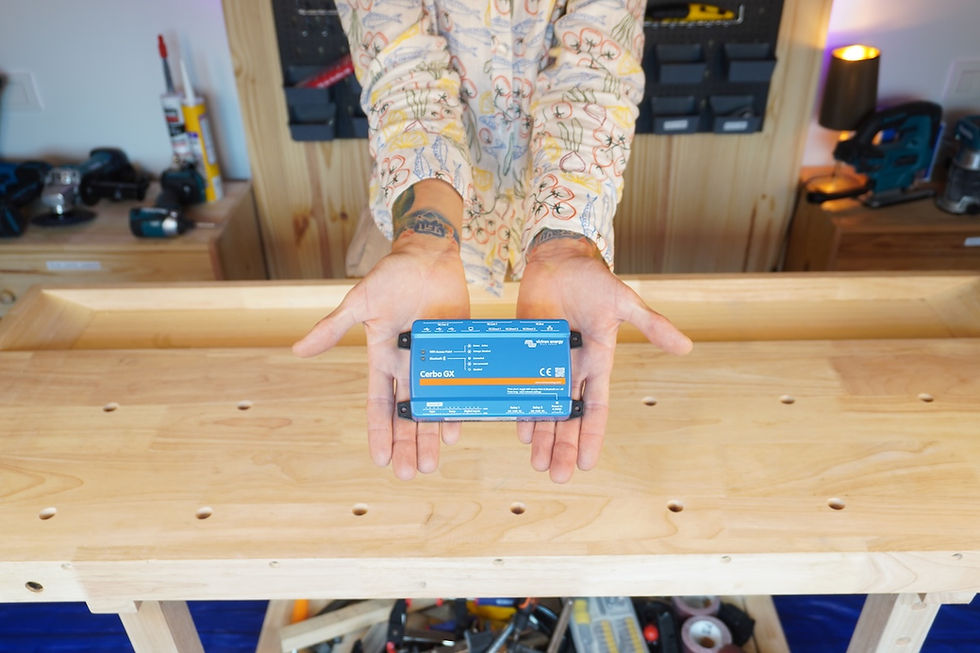
Many comprehensive kits now include some form of battery or system monitoring. This could be a simple battery monitor gauge (showing voltage and state of charge), or a high-end monitoring system. For example, top-tier kits might include a Victron Cerbo GX with touchscreen or similar, which lets you see real-time data on your battery, solar input, and power usage. Mid-range kits might include a Bluetooth shunt (so you can check battery status on your phone). While not strictly necessary to make the system work, a monitor is incredibly useful and I’m glad my kit included one – it turns the electrical bay into a mini “mission control” where I can easily check how many amps the solar is putting in or how much battery remains. If you’re on a tight budget, you might opt to add a monitor later, but it’s worth considering upfront. We've got a new article all about battery monitoring systems; take a look here.
Summing it up:
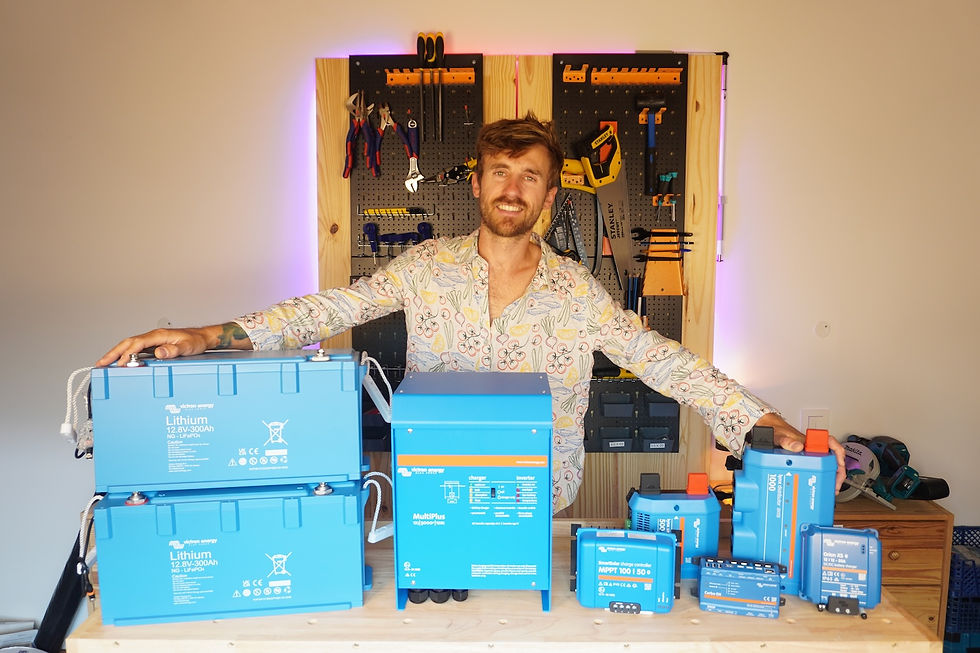
A full kit is more than just panels + battery. It’s an entire ecosystem of parts working in harmony. If you lay everything out, it can look a bit intimidating at first – when my kit arrived, I had a floor covered in wires, blue Victron boxes, fuses, screws, etc. (see image below) – but knowing it’s all meant to fit together gives you a big confidence boost.

As you can see, that’s a lot of pieces. If you were doing it from scratch, you’d have to figure out each item, ensure you didn’t forget any connectors or breakers, and hope everything is sized right. The kit does that heavy lifting for you. Next, let’s talk about how to choose the right size kit for your needs, because one size does not fit all.

Matching a Kit to Your Needs: Sizes & Types of Systems
Campervan electrical kits aren’t one-size-fits-all. They range from modest setups for weekend getaways to monster systems for full-time off-grid living. One of the first steps is to identify what level of electrical system you actually need. Here I’ll break down three common tiers – budget/basic, mid-range, and high-end – and what components you’d typically find in each. This should help you figure out where your own build fits, so you don’t under-buy or overspend.
Basic “Weekender” Kit
This is for vanlifers who only need to cover the essentials – think charging phones, running some LED lights, a water pump, maybe a small fridge for short trips. A basic kit might include a single 100Ah to 125Ah battery (often AGM if trying to keep cost down), a simple split charge relay or a smaller DC-DC charger (~20A) to charge from the alternator, and a small solar panel around 100–150W with a PWM controller or entry-level MPPT. Often there’s no inverter in the ultra-budget kit, or if there is, it’ll be a small 300–500W just for charging laptops or camera batteries. Shore power hookup might be omitted or limited to a simple battery charger. This kind of kit will run a 12V fridge and LED lights, but you’d have to be mindful of power use – it’s not going to support heavy draw appliances or multiple days parked up with no sun. On the plus side, basic kits are more affordable and simpler to install. Many folks start here and may upgrade later.

Mid-Range “Adventure” Kit
This is a popular sweet spot for part-time travelers or even full-timers with moderate power needs. Here you might see a 150–300Ah battery bank (lithium if budget allows, or multiple AGMs), around 200–300W of solar with a quality MPPT controller, and a beefier DC-DC charger (~30A or 50A) to keep that larger battery topped up while driving. An inverter in the 1000–1500W range is common, which lets you use things like a blender, laptop chargers, or occasional air fryer use (short bursts). A shore power charger (20–30A mains charger) is usually included for campsite hookups or when parked at home. Essentially, a mid-spec kit covers all three charging methods – solar, alternator, and shore – which gives you great flexibility. You can be off-grid for days with sun, drive to recharge when needed, or plug in if available. Many mid-range kits now lean toward lithium batteries because prices have come down and the performance is far superior (usable capacity, weight, charging speed). In fact, lithium is becoming the norm these days for anyone serious about off-grid power. With a mid-level kit, you can comfortably run a compressor fridge 24/7, lights, fans, device charging, and even a bit of luxury (say an espresso machine or induction cooktop on occasion) as long as you manage your usage. This is roughly the setup I had in a previous van and it served me well for full-time travel with careful energy budgeting.

High-End “Off-Grid Cabin” Kit
If you’re building an all-season, full-time live-in van with lots of electrical amenities (or you just don’t want to worry much about power), this is your tier. High-end kits often feature big lithium battery banks – 300Ah, 400Ah, even 600+ Ah in some cases (sometimes achieved with multiple batteries in parallel). Solar arrays of 400–600W (or whatever max your roof can fit) paired with a large MPPT are typical. For charging while driving, a 50A or higher DC-DC charger is used to take advantage of robust alternators (in big transits or sprinters, etc.). A powerful inverter, 2000W to 3000W, is included so you can run nearly any appliance you’d reasonably bring – induction cooktops, electric kettles, Instapot, power tools, even an AC unit in some cases.
In fact, my current system uses a 3kW Victron inverter-charger, which is overkill for many, but I chose it to allow electric cooking in the van. High-spec kits also pay special attention to safety and monitoring. You might get a full battery management system (BMS) with low-temp cutoff for lithium, a touchscreen monitor, multiple fuse/distribution blocks for complex circuits, etc. If shore power is in the mix, the kit will include a properly wired RCD/breaker panel and possibly a transfer switch or automatic AC switching (so your outlets can switch between inverter power and hookup power seamlessly).

Essentially, a high-end kit turns your van into a small off-grid home on wheels – you can live almost as you would in a house, electrically speaking, without constantly calculating amp-hours. The trade-off is cost: these systems cost several thousands of pounds/dollars. But for some (like me, doing an all-electric van with no LPG fuel), it’s absolutely worth the investment to have a robust, worry-free power system.

Comparing Popular Electric Kit Options
In the interest of fairness, I don’t just want to highlight the kit I used. Vunked supplied my system, and I’ve been tremendously impressed with both the quality and the service, but they’re not the only players in town. There are several other companies offering pre-built campervan electrical kits, each with their own approach. To give you a fair view of the market, I’ve lined up the small, medium, and large offerings from Vunked alongside comparable kits from Nohma, Van Junkies, Wired Campers, and Simply Split Charge. This way you can see how the different providers stack up at each level.
Company | Small electrical kit | Medium electrical kit | Large electrical kit |
Vunked | Off-Grid Maverick — 185 W solar, 18 A DC-DC, 12 V system. | Weekender Wanderer — 370 W solar, 30 A DC-DC, ~500 W inverter/charger. | Overlander Explorer — 370 W solar, 50 A DC-DC, 3000 W MultiPlus inverter/charger. |
Nohma | Full kit w/ 185 W solar, B2B & battery (no inverter, 12 V-first). Link | Full kit – 1600 VA EasyPlus, 440 W solar, B2B & batteries (mixed use / campsite + off-grid). Link | Full kit – 3 kVA inverter-charger, 530 W solar, B2B & batteries (or 24 V 3 kVA + 1320 W solar). Link |
Van Junkies | Budget Complete 12 V Victron Kit — Lithium, DC-DC (option), small solar variant available. Link | Starter Electrical Package — 105 Ah lithium + ~200 W solar + optional DC-DC. Link | Victron Complete Kit – MultiPlus II 3000 W & LiFePO₄ (or “Sprinter/Crafter/Boxer full off-grid kit” w/ monitoring & solar). Link |
Wired Campers | Victron 30 A DC-DC High-Current 12 V Off-Grid Kit (DC-DC core build). Link | Victron 30 A DC-DC & 30 A MPPT 12 V & 240 V & Solar Kit (balanced, hook-up/AC ready). Link | Victron Mains 3000 VA Off-Grid Kit w/ Orion & SmartSolar (MultiPlus-II 12/3000/120). Link |
Simply Split Charge | VKIT01 — Victron non-isolated 30 A B2B + fuse box (entry DC-DC system). Link | VKIT04 — Victron B2B + 240 V charger + 185 W solar + hook-up + fuse box (complete mixed-use). Link | VKIT45 / VKIT55 — Victron isolated B2B + MultiPlus inverter/charger (+ 185–370 W solar on VKIT45; higher-end MultiPlus options on VKIT55). Link |
When shopping, check the specs against your needs: how many watts of solar, how many Ah of battery, inverter wattage, etc., and imagine your typical day. Will you be charging laptops and camera gear? Running a 12V fridge non-stop? Perhaps working remotely (needing to charge a laptop, wifi router, monitor)? Or cooking electrically? List out your intended appliances and their power draw, because that will directly inform the battery size and inverter requirement. We have a handy daily energy consumption calculator you can check out to calculate your energy needs.
Don’t forget to account for charging methods too. I always recommend having at least two of the three possible charging sources (solar, alternator, shore) for redundancy. The good news is most complete kits these days include all three by default, or at least offer them as add-ons. According to our 2023 Roaming Home Study of van builders, about 84% use alternator (split-charge or DC-DC) charging, 78% have solar panels, and 58% include shore power in their builds. That tells me the majority of folks use a mix, which makes sense – it ensures you’re covered in various scenarios (driving in winter, parked in sun, plugged in at a friend’s driveway, etc.). A proper kit will integrate these seamlessly.
In summary, match the kit to your lifestyle. If you’re a weekend camper, you can save money with a simpler kit. If you’re going full-time off-grid or running energy-hungry gear, invest in a higher capacity kit. The beauty is that kit providers have usually done the homework to bundle appropriate components for each use-case. And if you’re in between, many kits are customizable – you might be able to start with a base kit and upgrade the battery or add a second solar panel, for instance.
Still figuring out your van electrics?
This is where most people get stuck — trying to piece everything together from scattered advice, second-guessing cable sizes, fuses, and system design.
The Van Electrics Masterclass walks you through the entire system step-by-step — so you can design and install it properly, with confidence.

Top Campervan Electrics Kit Providers
The campervan electrical scene has really blossomed in recent years. There are several companies now that specialize in delivering these complete kits. I’ll highlight a few notable providers (mostly UK-based, since that’s where TheVanConversion.com operates and where we are familiar with) and what they’re known for. Each has its own approach and product range, but all aim to simplify van electrics for DIY builders.
Disclosure: We were so impressed by the service that Vunked offers that we chose to partner with them officially at TheVanConversion.com. They are now the go-to electrical supplier we recommend to our readers & subscribers. But I’ll give you an honest overview of each company nonetheless
Vunked

Vunked is a small team out of Scotland focusing on bespoke campervan electrical systems. What sets them apart is their interactive online Builder tool – you input details about your van and what you want to power, and it automatically designs a tailored electrical system for you. It’s like having an expert do the system design in minutes. They’ll then assemble that system as a kit and ship it to you. I used Vunked for my latest build and was blown away by the service. The founders (Ross and Alan) personally review every design the tool generates, so you get human expertise ensuring everything is correct. Vunked’s kits are heavy on Victron Energy components (a very reputable brand), combined with quality lithium batteries (they often use Fogstar batteries, which we rate very highly) and all the fixings. What I love is they include a custom wiring diagram and an installation manual specific to your kit – this made my install much easier. They also provide support during installation; I had a few quick questions and got prompt, helpful responses – basically having an expert on call. Their pricing is competitive for the high-end gear you get, and they have kit options ranging from a small “Weekender” bundle up to full-time off-grid setups. Vunked currently has a 4.9/5 rating on Trustpilot with builders praising their thoroughness and support. If you want a done-right-the-first-time solution and like the idea of a guided design process, Vunked is fantastic.
Nohma

Nohma has positioned itself as “the campervan electrical system experts” and they offer a variety of kits as well as custom design services. They design thousands of systems per year and then distill that experience into ready-made kits. One cool thing: Nohma provides a 5-year full system warranty on their complete kits, which shows confidence in their designs. Their kits come with all components needed and, importantly, detailed wiring diagrams and installation guidance (free with purchase). Nohma offers different kit lines like Off-Grid, Mixed Use (a balance for those who sometimes hook up to campgrounds), AGM-based kits, Lithium-based kits, etc., so you can choose according to your preferences. They also have subsystem kits (just solar kits, or just inverter + hookup kits, etc., if you only need a part of the system). Nohma’s emphasis is on safety and engineering – they are known to use high-quality parts (a lot of Victron gear as well) and ensure the kits meet electrical standards. If you’re in Europe, they ship across many countries which is a plus. Pricing is on par with assembling it yourself from quality parts, and they advertise that their customers save an average of £562 by going through them (likely versus buying everything retail). I haven’t personally used Nohma’s kit, but Charlie and Dale are well-known in the vanlife space I have high regard for the content they produce on their website, it is of very high quality and they clearly put safety above all else.
Van Junkies

VanJunkies is a campervan accessories retailer that also sells complete electrical conversion kits, largely using premium Victron Energy components. They have pre-configured kits aimed at different van sizes and uses. For instance, they list a kit for smaller vans (like a VW Transporter or Transit Custom) with a 2000W Victron MultiPlus inverter, DC-DC charger, and around 250Ah AGM batteries, and another high-end kit with a 330Ah LiFePO4 battery and the same 2000W inverter for larger power needs. Van Junkies’ site provides a nice breakdown of what each kit includes and the benefits of going electric. They highlight things like sustainability (solar energy = no fumes or noise from generators), cost savings over time (free solar energy vs paying for campsites or fuel), independence (the ability to camp off-grid with 24/7 power), and safety (proper electric systems with monitoring are safer than DIY petrol generators). Essentially, they focus on high-quality Victron gear, so you can expect reliability. VanJunkies also mentions they can do custom designs and quotes, suggesting some flexibility. One thing to note is that VanJunkies, being a retailer, might not provide the same level of personalized diagram or phone support as a company like Vunked or Nohma – but they do have an electrical design service and are passionate vanlifers themselves, so they likely guide buyers to an extent. If you already know you want a Victron-based system and perhaps want to finance it (they even accept Klarna payments), VanJunkies is worth checking out.
Wired Campers

Wired Campers is another UK supplier that offers a range of wiring kits and full electrical kits. They gained popularity through forums and even sell some kits via marketplaces like eBay. Their focus is on modular kits – for example, you can get a basic split-charge kit for a budget build, or a more comprehensive kit that includes a 240V mains hookup, a 3000W inverter, etc. They sometimes offer pre-wired assemblies for certain parts of the system, which can simplify installation if you’re intimidated by wiring. Honestly, I absolutely love their website. They've put a huge amount of work into it in the last couples years and it now stands out as being among the very best. They have kits for just about every situation. For instance, they had a pre-wired board that includes an RCD breaker, inverter connections, etc., so you just connect your battery and loads. Wired Campers’ kits are also heavy on Victron components (sensing a pattern here? Victron is kind of the gold standard). Pricing is competitive, and because they cater to DIYers, you can often pick and choose modules. From community feedback I’ve seen, support is decent – they provide diagrams for their kits and will answer questions if you get stuck. One caution: they have many different kit options, so be sure you select one that truly includes everything you need (some cheaper ones might leave out a battery or a piece you need to buy separately). Overall, Wired Campers is a solid budget-friendly choice if you want flexibility; just double-check the specs.
Simply Split Charge

Despite the name, Simply Split Charge doesn’t only sell split relay kits – they actually offer complete campervan wiring kits for both basic and off-grid setups. They’re one of the long-standing companies in the UK van scene and are known for good customer service. One vanlifer on the UK Reddit forum mentioned “the company I used was Simply Split Charge and they were helpful when I phoned and asked questions.” That kind of accessibility is great if you anticipate needing help. Simply Split Charge kits cover everything from the leisure battery and split-charge relay/charger, to fuse boxes, cables, solar panels, etc. They also stock multiple brands (Victron, Sterling, Photonic Universe, etc.), so their kits can be a mix of components – but generally they stick to reputable parts. You can often find a kit that matches your van size: e.g., a starter kit for a small camper, or a “complete off-grid kit” with solar and inverter for bigger builds. Their pricing tends to be on the affordable side, perhaps using a bit less expensive components where possible (e.g., maybe a slightly cheaper solar panel brand to save cost). Still, many builders in the community start with these kits and report that they include all the bits and bobs needed. And as the Reddit user hinted, they are quite helpful if you need to ring them up for advice during install, which is a reassuring backup.
Those are just a few of the main players. There are others out there as well – for example, in North America, companies like Explorist.Life offer all-in-one system kits or bundles catering to common van build. And you might even find local van conversion shops that sell pre-designed wiring kits. The key is to do a bit of due diligence: read reviews and check the component list. A good kit should use quality brand components (they don’t all have to be Victron, but beware of kits that use off-brand inverters or unrecognizable battery brands just to cut cost). Also ensure the supplier provides a wiring diagram or at least a schematic – that’s a sign they know what they’re doing and want you to succeed. The reputable providers I listed all do this (either included in the box or downloadable).
Cost, Value, and Hidden Savings of Kits
Let’s address the elephant in the room: cost. Are these complete kits really worth the money? Couldn’t you potentially save a few bucks by buying all the parts yourself during sales and piecing it together? I’ve asked myself the same. After going through the process, my take is that a well-priced kit is absolutely worth it – and might even save you money when you account for everything.
Here’s why...
Competitive Bundle Pricing:
Good kit companies leverage bulk and distributor pricing, and they often pass some of those savings to you. For instance, I priced out a Vunked medium kit versus buying the equivalent components retail. The kit (with a 230Ah lithium battery, two 185W solar panels, a Victron 2000W inverter-charger, DC-DC charger, MPPT, all accessories) was about £2,127 from Vunked. When I added up those parts individually – battery (~£650), inverter/charger (~£310), panels (~£275), DC charger (~£180), MPPT (~£73), plus all the fuses, cables, etc. – the total was within £100 of the kit price. In other words, the kit cost virtually the same as sourcing everything myself. And that’s not even counting the shipping fees I’d pay ordering from multiple vendors or the fuel costs driving around to pick things up. Many kit suppliers bundle at a fair price with maybe a small premium for their effort, but it’s often negligible. They’re not overcharging for the convenience; they make their margin by buying wholesale and through volume. So financially, you’re usually not blowing your budget by choosing a kit.
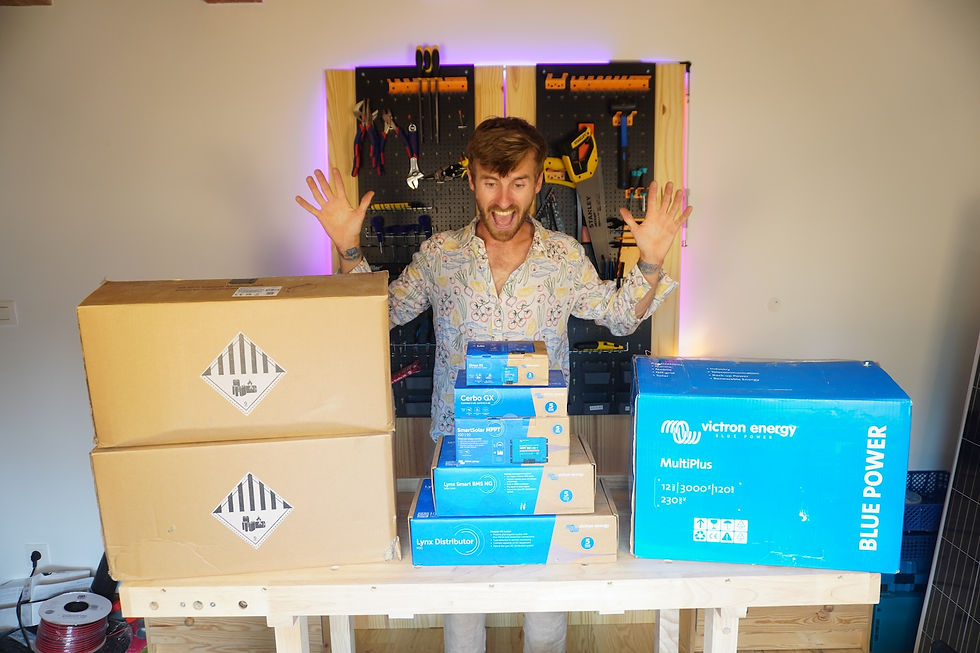
Below is a table with the full list of items I received from Vunked. It's a huge number of items, if I were to research & gather all those resources myself, it would take me an enormous amount of time.
List of items I received from Vunked |
Victron MultiPlus 12/3000/120-16 230V |
Victron Orion XS 12/12-50A Non-Isolated DC-DC Charger |
Victron Cerbo GX MK2 |
Victron GX Touch 50 |
Victron Solar Panel 185W-12V Mono |
Victron SmartSolar MPPT 100/30 |
Cable Gland |
Solar Switch DC |
Complete AC System Kit 16A (1× Power Inlet + 1× 15m Cable) |
3-Position Battery Switch 300A |
ATO 12-Way Fuse Holder (M4 Connection) + LED |
MEGA Fuse Holder (with protective cover) |
Victron Fuse Holder for MIDI Fuse |
Fuse Holder 1× MEGA 4× MIDI |
Battery Cable 95mm² Black |
Battery Cable 95mm² Red |
Power Lug 95mm² × M8 |
Power Lug 95mm² × M10 |
Battery Cable 70mm² Black |
Battery Cable 70mm² Red |
Power Lug 70mm² × M8 |
Battery Cable 16mm² Red |
Battery Cable 16mm² Black |
Power Lug 16mm² × M6 |
Tinned Cable 6mm² Black |
Tinned Cable 6mm² Red |
MC4 Connector M+F |
MIDI Fuse 40A/58V |
Victron MIDI Fuse 60A/32V |
Victron MEGA Fuse 400A/32V |
Cable H05VVF 3×2.5mm² |
Victron VE.Direct Cable 0.9m |
Victron RJ45 UTP Cable 0.9m |
Victron Lithium 12.8V/300Ah LiFePO4 |
Victron Lynx Smart BMS 500 NG (M10) |
Bipolar Battery Switch 400A |
Victron M8 Circular Connector M/F 3 Pole |
Victron RJ45 UTP Cable 3m |
220V Distribution Box |
One-Stop Shipping (Saves ££):
This is an underrated factor. When I DIYed my earlier electrical system, I paid separate shipping on a battery from one place, cables from another, etc. Those fees added up to quite a bit (I’d estimate I spent over £150 just on shipping costs for various bits). With a kit, you typically pay one shipping fee (or free shipping if it’s above a certain amount), which can save a lot. Not to mention, you’re more likely to avoid import duties or extra taxes since it’s one package (depending on where it’s coming from).
Getting the Right Parts (Avoiding Mistakes):
Here’s where I personally recouped a lot of value. In my DIY attempts, I inevitably ordered a few wrong or suboptimal parts. Case in point: I underestimated cable length and had to reorder more at the last minute (incurring express shipping costs) - a very easy thing to do. These mistakes can nickel-and-dime you. With a kit, the parts are correctly specified by experts. Vunked, for example, sized every fuse for me (400A on the inverter, 60A on the solar, etc.) so I didn’t have to guess. Everything that showed up was what I actually needed, and nothing was missing. That not only saved me money on mistaken purchases, but also saved my sanity. No more scrambling because I forgot a critical connector or bought the wrong gauge wire. The value of having it right the first time is huge.
Time is Money:
I can’t overstate how much time a kit saves. If you enjoy the research process, by all means you can do it – but I’ve spent weeks in the past researching every little component, comparing specs, finding vendors, waiting on deliveries… It’s a lot. This is time you could spend building other parts of the van or, you know, actually traveling. By having an expert essentially pre-select all the parts, you save dozens of hours of work. If you consider your time even at a modest value, the kit easily pays for itself there. In my case, I also saved time during installation because the provided documentation meant fewer head-scratching moments or trial-and-error. I probably shaved days off the build by not having to troubleshoot wiring issues or run to the store for missing parts.
Avoiding Expensive “Uh-Oh” Moments:
A poorly designed or assembled electrical system can cost you big down the line. Using an undersized cable that overheats, or an incorrect fuse that doesn’t blow when it should, can literally cause fires or damage expensive equipment. Fixing that kind of damage (or dealing with a breakdown in the middle of nowhere) is not fun – or cheap. Kits greatly reduce that risk by ensuring the system is properly engineered and safe. Think of it as a bit of insurance: you’re less likely to blow up your new £900 lithium battery because you wired something wrong. I consider that a form of value that’s hard to price but very real. Also, many kit vendors offer warranties on the system (Nohma with 5-year system warranty, Vunked passing along 5-year on Victron gear, etc.). If something fails due to a defect, they’ll help you replace it, which you wouldn’t get if you bargain-hunted random parts on eBay.
In summary, if you are the rare DIYer who has a pile of components already or access to trade discounts, you might save a bit going solo. But for most of us, a kit will at least break even cost-wise, and often save money when considering all factors. And even if a kit were slightly more expensive (say you pay a couple hundred extra for the convenience), I’d still argue it can be worth it for the support, time saved, and peace of mind. For me, the reduction in stress alone was priceless – instead of lying awake worrying if I ordered the right type of wire or if my system would have a hidden flaw, I could trust that it was all sorted.
Installation, Documentation and Support: The Human Side
Buying the kit is only half the story – you still have to install it in your van. This is where the documentation and support provided by the kit supplier can make a world of difference. In my experience, the best kits come with very clear instructions, and the company doesn’t disappear after they’ve made the sale. Here are a few things to look for and expect:
Wiring Diagrams and Manuals:
Every complete kit should include a wiring diagram. This diagram is your roadmap, showing how all the components connect: positive and negative cabling, fuse placements, grounding points, etc. Ideally it’s specific to your kit model. Vunked, for instance, provided me a custom diagram tailored to my exact components and van layout, which was incredibly helpful. Nohma also includes detailed wiring diagrams and an installation guide booklet with their kits. These guides typically walk you through step by step – e.g. “Mount the fuse box near your battery, connect the red 16mm² cable from battery positive to the fuse box main lug, insert a 100A fuse” and so on. For a first-timer, that hand-holding is gold. Even as someone who knows electrics, I still followed along to make sure I wasn’t missing anything. If a kit comes with nothing more than a parts list, that’s a red flag – you’d be left figuring out assembly on your own, which defeats much of the purpose. Fortunately, most reputable kit sellers take pride in their manuals because they want you to succeed safely (after all, their reputation rides on your outcome).

Labeling and Organization:
One thing I loved: many kits will label the bags or even the wires. For example, I had separate bags labeled “Solar connection kit”, “Fuse block wiring”, etc. This was super helpful when digging through a box of parts. It’s like IKEA furniture – the best kits have everything segmented and referenced in the instructions (“use Cable A to connect X to Y”). If you open a kit and find a jumbled heap of unlabeled wires, don’t panic – usually the manual will have a table or color coding to identify them. Take your time to sort out components before starting the install. I laid mine all out on the floor and matched each item to the diagram legend.
Customer Support Availability:
The reality is, you might still have questions or hit a snag during installation – maybe about a detail in your specific vehicle (e.g., “Where’s the best place to tap into the alternator on a 2019 Transit?”). This is where good customer support is worth its weight in lithium. Smaller kit companies like Vunked and Simply Split Charge have a reputation for being responsive. In my case, I emailed Vunked a photo of a wiring question and got a reassuring answer within a day. Many companies will even schedule a call if needed. The Trustpilot reviews for Vunked are full of mentions like “supported at every step” and “answered all my newbie questions with patience.” As a DIYer, knowing I wasn’t alone gave me a lot more confidence to tackle the project. When choosing who to buy from, I highly recommend checking reviews specifically for mentions of support and communication.
Community and Resources:
Some kit providers have additional resources – e.g. Facebook support groups, YouTube tutorials, or an online knowledge base. Nohma and others have extensive article libraries on campervan electrics, which can supplement your knowledge. Vunked’s team created some guides on checking your vehicle’s alternator type and such. These resources are great to review before you begin the install, so you’re well-prepared.
Professional Installation or DIY?:
The kits are designed for DIY installation, but remember that working with electrics requires care. If you’re not comfortable with any part of it, consider hiring a professional for a few hours just to assist or double-check your work. For example, hooking up the mains 230V inlet to an RCD breaker – if you’re not confident, get an electrician to verify it, because AC voltage is dangerous. Some van builders will do most of the 12V themselves and hire a pro to inspect or connect the 230V components. This hybrid approach can be wise. Also, ensure you follow the safety guidelines in the kit manual: disconnect batteries when working on wiring, use grommets when passing cables through metal holes to prevent chafing, torque down connections properly, and so on. These kits make it straightforward, but you still need to execute correctly.
Vunked also offer installation services in case you really don't feel comfortable doing it all yourself.
Tips from the Trenches
Having just installed a kit in my own van, here are a few personal tips to share:
Plan your component layout before drilling or mounting:
The kit will not dictate where to put things in your van – that’s up to you. I sketched a rough layout (battery under bed, fuse panel on wall, inverter in a vented cabinet, etc.) and measured cable paths to ensure the provided cables would reach. Tweak as needed; you might find you want the battery closer to the inverter to use the supplied cable length, for instance.

Take it step by step:
Don’t try to wire everything at once. Go bit by bit. Perhaps start by mounting and wiring the 12V fuse box and loads, then do the battery and main bus connections, then the charging sources (solar panels, alternator hookup, shore). Breaking it into subsystems helps. And always double-check connections against the diagram before turning anything on.
Label your cables:
I can’t echo this enough – label both ends of each cable as you install (many kits include little label stickers or you can use masking tape). It will save your brain from exploding if you have to troubleshoot later. Here's an example of how I label an appliance: I will label my fridge’s positive wire as “FRI-FB” (fridge to fuse box) and keep a spreadsheet of labels. At minimum, mark the major cables (e.g. “Solar +” on the red solar wire, etc.).
Fuse as directed:
The kit will specify fuse ratings – stick to them. If something blows immediately, do not throw in a bigger fuse without understanding why. That’s a recipe for fire. Instead, find the fault.
Secure everything:
Use the provided mounts, cable ties, and supports to secure heavy components and wiring. Vibrations in a van can shake things loose over time. A kit might include fancy busbar covers or mountable cable clamps – use them. A tidy electrical bay isn’t just OCD-pretty; it’s safer and easier to work on later.
The bottom line is, follow the guide, and don’t be afraid to ask for help. One reason I champion kits is because they come with that safety net – you have the designers who actually want you to succeed and are often just an email or call away. In contrast, when you DIY source everything, if something goes wrong you’re left figuring out which manufacturer to contact (the battery company? the inverter company?) and often they’ll blame each other. With a single kit provider, they are your single point of contact for any issues – that’s part of what you pay for.
Are Campervan Electrics Kits Right for You?
After all this praise, let me be clear: as much as I love the kit approach, it might not be for absolutely everyone. Based on both my own experience and seeing others in the community, here’s an honest take on who benefits most from kits and who might be fine without one:
Kits are ideal for:
First-time builders or “electronics novices” – If you’re not deeply familiar with electrical concepts, a kit is like having an expert hold your hand. It removes the intimidation of designing a system from scratch.
DIYers on a tight timeline – Maybe you’ve only got weekends to work on your van and need it done by spring. A kit shaves off a lot of decision-making and parts-hunting time.
Solo builders who value support – If you don’t have a buddy who’s an electrician to call, having the kit company’s support is the next best thing.
Anyone who “just wants it done right” – This was me on my latest build. I had the knowledge to do it myself, but I wanted the outcome to be a top-notch, reliable system without spending endless hours. Kits excel here by delivering a proven solution.
Those who want high-quality gear without the research – Let’s face it, researching every component can be a deep rabbit hole. Kits come pre-vetted. If you want a Victron-based, high-quality system but aren’t sure which models to pick, a kit makes that choice easy.
Builders with moderate budgets – You might be surprised, but kits aren’t only for people with money to burn. If you were already planning to invest in a decent electrical system (say £1500+), a kit will make sure that money is well-spent for long-term value and safety.
A kit might not be necessary for:
Hardcore tinkerers – If you genuinely love designing electrical systems, speccing every wire and component, and maybe you have very specific preferences (like you want a particular brand of every item), you might find a pre-designed kit too limiting. Some folks take pride in sourcing each part – if that’s you, go for it DIY style.
Ultra budget builds – If you’re converting a van on a shoestring and plan to scrounge for used components or mix-and-match cheaper alternatives, a brand-new kit might not fit your budget. You could piece together a minimalist system from second-hand parts for less, though be careful because “cheap and cheerful” can lead to issues if not done right. (Note: There are some budget-friendly kit options out there as well, which can still be worth it for the guidance).
Professional converters/tradespeople – If you convert vans for a living or are an electrician by trade, you likely already have suppliers, get trade discounts, and know exactly what you want. A kit might feel like training wheels in that case. Pros often prefer to spec custom systems to client needs.
Very unique or experimental setups – Have a super custom project? Perhaps integrating an existing battery bank you already own, or using an uncommon vehicle alternator, or you want a system built around a brand like Renogy or Goal Zero portable unit – these scenarios might not align with the kit offerings, which tend to use mainstream approaches (e.g., 12V Victron systems). For example, if you insisted on using a bunch of DIY server rack batteries and a Sterling charger, you’d be deviating from what kits provide. In that case, you might need to roll your own system design.
For probably 90% of typical van builds, though, a complete kit hits the sweet spot. The convenience, safety, and support are hard to overstate. If, as you were reading this guide, you found yourself nodding along to the pain points of electrical planning, then you are likely the kind of person these kits are made for. On the other hand, if you’ve already drawn out your own diagram on a napkin and relish the idea of sourcing components from five different places to save a buck, you might skip the kit – just be prepared for a bit more legwork and learning.
One more thing: it’s not an all-or-nothing decision. Some people buy a kit and supplement it with a few custom additions. For instance, you could get a base kit and then add an extra solar panel or a secondary battery if you need to expand capacity. Or you might buy the kit hardware but use a battery you already have. Many suppliers will accommodate tweaks (or at least consult with you on how to integrate extra components). So even if you have some existing parts, you can often still leverage a kit for the rest and for the guidance it provides.
Conclusion
Building a campervan electrical system can feel intimidating, but these days we have the huge advantage of these complete electrics kits that our 2010 selves could only dream of. After going through the process myself – from the chaotic DIY parts-scavenging of past builds to the streamlined kit-based install of my latest van – I’m genuinely convinced that a well-chosen kit is the best friend of the DIY van converter. It takes one of the most complex tasks and hands you a box of solutions rather than a box of problems.
In this guide, we’ve covered what goes into a campervan electrics kit, the different sizes and options, who the kits are ideal for, and how to get the most value out of them. The bottom line: if you want a reliable electrical setup and you value your time (and sanity), a complete kit is absolutely worth considering. It can turn a nerve-wracking project into a confident, step-by-step assembly. Personally, I don’t miss the old way of trial-and-error at all – my van’s electrics came together more smoothly than ever, and I have full confidence in the system when I hit the road.
As always, do your homework on the supplier you choose: look at the components they include, read up on customer experiences, and ensure it matches your needs. All the providers mentioned (Vunked, Nohma, VanJunkies, Wired Campers, Simply Split Charge) have enabled many successful van builds. It’s a great era to be converting a van when you have these knowledgeable folks in your corner.
If you’re gearing up to wire your own van and the thought still makes you a bit uneasy, then a campervan electrics kit might just be the perfect solution to make your vanlife dream a reality. I know it was for me with my latest build. My van “Elvis” now has an electrical system I truly trust – it’s safely powering everything from my fridge to my induction cooktop, and I didn’t have to lose sleep over whether I did it right.
Still unsure how to design your van electrics?
Start with the free wiring diagrams below.
Want to build your van electrical system properly from start to finish?
The Van Electrics Masterclass shows you exactly how to design and install a safe, reliable electrical system — step by step.