
The Complete Guide to Campervan Solar Systems
- Shane Monks O'Byrne
- Sep 9, 2022
- 29 min read
Updated: Apr 16
The amount of sunlight that strikes the Earth's surface every ninety minutes is enough to handle the world's energy supply for a year. A campervan solar system uses this bountiful energy to power your electrical system when you're on the road. Solar power for van conversions is an essential component of any build. In the Roaming Home 2023 study, we found that 78% of people install a campervan solar system. In this article, we'll learn about how solar panels work, how to choose the right solar panel kit, and campervan solar panel installation.

Shane is an NCC-certified electrical installer. He has built, taught, and lived in campervans since 2019.
This post contains affiliate links. We may earn a commission at no extra cost to you. To understand our policies on content, affiliate commissions, and liability, please review our Terms of Use.

Already know what you need? Check out our solar panel buying guide for recommendations on panels of specific sizes, as well as flexible panels and solar panel kits. We also have a buying guide for solar charge controllers, where we go in-depth into how they work and recommend our favourite models. Check it out here.
In this guide
Supplies List
 | Solar panels or solar panel kit |
 | |
 | For securing the solar cables to the roof |
 | Connecting solar panels & solar charge controller |
 | For passing solar cables through the roof |
 | Solar charge controller For managing and monitoring solar electricity input |
 | Protect the solar charge controller from surge |
| Protect the rest of the electrical system from surge |
 | A kill switch for your electrical system for maintenance or emergency |
 | Fuse holder with appropriate fuse Protects the leisure battery in case of surge |
 | Leisure battery terminal connectors For connecting cable to your leisure battery |
 | Common connection point for positive and negative cables |
 | Your chosen leisure battery Forms the core of your electrical system |
 | To protect all your 12V appliances |
 | For connecting cables to the bus bars |
The Anatomy of a Campervan Solar System
To install a campervan solar system, you need three main components:
Solar panels
A solar charge controller
Solar panels collect sunlight and convert it to electricity. They're wired to a solar charge controller, which manages that electricty and safely transfers it to your leisure batteries, where the electricity is stored. We'll discuss each of these components in full.
Part 1: How do Solar Panels Work?
Photovoltaic (PV) panels, also known as solar panels, convert energy from the sun into electricity which you can use to power your campervan. When the sun shines onto a panel, the energy is absorbed by the panel's cells. Sunlight knock electrons free from atoms in the cells, generating a flow of electricity. The solar cells form an electrical circuit in the panel, allowing the flow of electrons and creating electricity.
What Size Solar Panels for a Campervan?
In the Roaming Home 2023 study, we found that most people install a 300W campervan solar setup, followed closely by a 400W solar system. Overall, the results were quite varied, reflecting the wide range in campervan electrical system capacities.

When sizing solar panels for off-grid living, it's essential to balance your energy consumption with solar panel output and battery storage. Start by calculating your daily energy usage using our energy consumption calculator. Then, ensure your solar panels can generate enough energy to cover that demand, even on less sunny days.
How to Size Solar Panels
Estimate Daily Load: Add up the watt-hours (Wh) of all appliances and devices you'll use daily.
Factor in Solar Efficiency: Account for system losses (inverters, wiring), and local solar irradiance data (hours of sunlight per day).
Choose Appropriate Battery Storage: Ensure you have enough storage to handle several cloudy days in a row.
For full-time off-grid living, a 300-400W solar setup is common, but higher capacities may be needed depending on your consumption and location.
To help you figure out what size solar panels you will require for your van cconversion, we have built a solar panel calculator. First, you will need to figure out your expected daily electrical load which you can calculate using our energy consumption calculator. For a detailed look at solar array sizing as it relates to usage and leisure battery size, take a look at our electrical system sizing article.

How Much Energy Can Solar Panels Generate?
Solar panels perform differently depending on a variety of factors, including geographical location, time of year, weather, and tilt angle. Understanding how these conditions impact solar energy production can help you optimize your campervan's solar system and set realistic expectations for how much power you'll generate.
Key Factors Affecting Solar Output
Geographical Location
Solar energy is more abundant in some parts of the world than others. Places closer to the equator receive more consistent sunlight throughout the year compared to higher latitudes.
Example: In southern Spain, solar panels can produce up to 40% more energy annually than in northern Germany, due to the difference in sunlight hours and intensity.
Time of Year
Solar panel output fluctuates significantly with the seasons. In the summer, longer daylight hours and a higher sun angle increase energy production. In the winter, shorter days and lower sun angles result in reduced energy output.
Example: A 300W solar panel system in London might generate around 1.2kWh/day in summer but only 0.3kWh/day in winter.
Weather
Cloud cover: On cloudy days, solar panel output can drop by 50-90% depending on cloud density.
Rain: While rainy conditions reduce sunlight, rain can actually improve solar panel efficiency by cleaning off dirt and debris that could otherwise block sunlight.
Temperature: Contrary to popular belief, solar panels work more efficiently in cooler temperatures. While panels are most effective under direct sunlight, cooler temperatures increase their efficiency due to lower thermal losses. Heat increases the electrical resistance in solar cells, reducing their efficiency. For every 1°C drop below 25°C, solar panel efficiency improves by 0.3-0.5%.
Solar Panel Tilt Angle and Orientation
Solar panels perform best when they are angled directly towards the sun. The optimal tilt angle changes depending on your latitude and the season. Panels mounted flat on your van roof will produce less energy than those with an adjustable tilt, especially in winter.
Use a tilting mount to adjust the panel angle based on your location. If you're in the northern hemisphere, tilt panels at an angle equal to your latitude for optimal year-round performance.
Tools for Calculating Solar Potential
To estimate the energy your solar panels will generate given your specific conditions, use a tool like the Global Solar Atlas. These tools allow you to input your location and system specifications to get a detailed estimate of solar energy production under different conditions.
Optimal Solar Panel Angle
The ideal angle for a solar panel installation is roughly equal to your geographical latitude. If your panels are perpendicular to the sun and pointing directly at it, you will have a big increase in efficiency.

Conversely, setting up your panels on a tilt means you'll have to consider your van's orientation when you park. Some people are willing to sacrifice maximum efficiency for a more flexible setup. If you'd like to set your solar panels up on a tilt, check out Renogy's solar panel tilt mounts or look at building your own.

Regulatory Guidelines for Solar Installations in Campervans (BS 7671 & NEC)
When installing a solar system in your campervan, it's critical to follow both the BS 7671: IET Wiring Regulations (UK) and the NEC 690: Solar Photovoltaic (PV) Systems (USA) for safe and compliant installations. Below are the specific articles from each standard that are relevant to your campervan solar setup.
BS 7671 - UK Wiring Regulations
Article 712.411.3.2 – Earthing and Grounding: All exposed metal parts of the solar PV system, including the solar panel frames and the charge controller, must be earthed to prevent electrical hazards. Ensure grounding through the van chassis for safe operation.
Article 712.434 – Overcurrent Protection: All circuits connected to solar panels must include overcurrent protection (MCBs or fuses). For example, a 40A DC MCB should be installed between the solar panels and the charge controller to protect against faults or short circuits.
Article 712.521.2 – Cable Management: Solar cables should be protected from mechanical damage, UV radiation, and temperature changes. Use appropriate cable conduits or clips to secure cables to the van roof and route them safely inside the vehicle.
Article 712.433.01 - Isolation: A two-pole, DC-rated isolator is mandatory in all solar installations, regardless of how they're fused. A DC-rated isolator will explicitly state that it's designed for DC circuits. The isolator's voltage rating must be rated to 1.15 times the solar array's maximum open-circuit voltage (Voc) and 1.25 times the solar array's maximum open-circuit current (Isc). A good example of an appropriate PV isolator for this purpose is the Kraus & Naimer PV DC switch-disconnector. The isolator must be installed between the solar array and the charge controller, within 300mm of the cable entering the vehicle.
National Electrical Code (NEC) - United States
Article 690.13 – Disconnect Requirements: A solar disconnect switch must be installed between the solar panels and the charge controller, allowing for easy isolation of the solar system during maintenance or emergencies.
Article 690.31 – Wiring Methods: All PV wiring must be protected from physical damage and must be UV-rated if exposed to sunlight. Additionally, PV cables should be secured every 4.5 feet to prevent movement and wear.
Article 690.35 – Ungrounded PV Systems: If you're installing an ungrounded solar system (common in modern setups), make sure to use PV modules that meet the latest IEC 61730 standards and include appropriate overcurrent protection.
Article 690.8 – Circuit Sizing and Current: This article emphasizes proper sizing of conductors based on the maximum output current of the solar panels. For instance, if your panels can produce 30A, you'll need 10 AWG wire to handle the current safely.
General Guidelines for Solar Installations (Cross-regulation)
Overcurrent Protection: Both BS 7671 (712.434) and NEC (690.8) mandate overcurrent protection. An appropriately sized DC MCB (typically 40A) should be installed between the panels and charge controller, as well as between the charge controller and leisure battery.
Grounding: BS 7671 (712.411) and NEC (690.43) require proper grounding for all solar PV systems. For campervans, the solar panels and electrical components should be grounded to the chassis to prevent electrical faults and ensure safety.
Cable Size: Ensure correct cable sizing to handle the current produced by the solar panels, as specified by NEC (690.8) and BS 7671 (712.521). For example, if your solar array produces 40A, you may need 10 mm² or 10 AWG cables to ensure minimal voltage drop and prevent overheating.
Voltage Drop: Both standards stress minimizing voltage drop, especially in solar systems with long cable runs. Use thicker cables and keep the length between the panels, charge controller, and batteries as short as possible to maximize efficiency.
Double Pole Disconnect: NEC 690.13 (E) and BS 7671 (712.411) specify that both the positive and negative cables should be disconnected in case of isolation, making double-pole MCBs the recommended choice.
By adhering to these guidelines, your campervan solar system will be safe, efficient, and compliant with both UK and US standards, ensuring optimal performance and durability.
Monocrystalline vs Polycrystalline vs. Thin Film Solar Panels
There are three types of solar panels you can use for your campervan:
Monocrystalline
Polycrystalline
Thin film
Monocrystalline and polycrystalline are both rigid, while thin film panels are flexible.

Monocrystalline Solar Panels
Pros:
Most efficient campervan solar panel type
Long lifespan
Long warranty (20 years on average)
Cons:
More expensive
Heavier and bulkier than flexible panels

Polycrystalline Solar Panels
Pros:
Cheaper than monocrystalline panels
Long lifespan
Long warranty (20 years on average)
Cons:
Not as efficient as monocrystalline panels
Heavier and bulkier than flexible panels
Flexible Solar Panels (Thin Film)
Pros:
Very lightweight
Close to invisible from eye level due to low profile, perfect for stealth setups
Bendy, adapted for curved roofs
More rugged than rigid panels
Cons:
Less efficient
Shorter warranty (5 years on average)
We recently published a full guide to flexible solar panels, including explanations of their key properties, an installation guide, and recommendations for our favourite modules. Check it out here.

Campervan Solar Panel Kits
Increasingly, manufacturers are packaging solar panels into kits containing everything you need to connect them to your leisure batteries. These kits include appropriately-sized solar charge controllers, wires, and fuses, eliminating the need to size these components yourself.
Both Renogy and Victron offer kits bundling their solar products together. Both brands offer highly reliable options. Renogy offer affordable solar products designed for budget-conscious users, making them a great entry-level choice for small to medium off-grid systems. Victron, while more expensive, are renowned for premium quality, advanced features, and exceptional durability, making them ideal for demanding, high-performance applications.


Portable Solar Panels
Portable solar panels are a versatile option for vanlifers, offering flexibility in power generation. Unlike fixed roof-mounted panels, portable panels can be set up wherever sunlight is optimal, making them ideal for shaded parking spots or for users who want to move their panels throughout the day to follow the sun.
Advantages of Portable Solar Panels
Positioning Flexibility: You can position portable panels to maximize sun exposure, even if your van is parked in the shade.
Easy Setup and Scalability: Many systems are plug-and-play, and you can easily add additional panels if your power needs increase. They’re available in various wattages, typically ranging from 100W to 200W per panel, with higher-end systems reaching up to 300W.
Efficiency Gains: Portable panels can often be manually adjusted to the optimal tilt angle (equal to your latitude) for maximum efficiency, unlike fixed panels that might be stuck at a suboptimal flat or semi-flat position. This results in a 10-25% efficiency improvement depending on conditions.
Backup Power Source: Portable panels serve as excellent backups or supplements to roof-mounted systems, providing additional power during high-demand situations or when roof-mounted panels underperform due to shading.

Disadvantages of Portable Solar Panels
Setup Time: Portable panels require manual setup and takedown each time you move locations, which can be inconvenient for users looking for simplicity.
Storage Space: Since the panels aren’t fixed, you’ll need to find a safe, dry storage space inside the van when they’re not in use.
Manufacturers of portable power stations also make portable solar panels, often bundling them together in kits. Renogy, Bluetti, and EcoFlow all make high-quality portable solar panels in a range of sizes.


Campervan Solar Panel Wiring Diagram
You can wire up campervan solar panels either in series or in parallel.
Wiring Solar Panels in Series
In order to wire solar panels in series, we daisy chain them together. The positive from one panel runs into the negative of the next panel. We then run the last remaining positive and negative cables (on each end of the system) down to our solar charge controller via a cable entry gland.
When we wire campervan solar panels in series, the amperage (current) remains the same, but both the voltage and wattage increase. For example, each solar panel in the diagram below is a 100W panel. Each panel has a maximum voltage of 18.6V, giving us a maximum of 5.38A per panel. When we wire the four campervan solar panels in series, the voltage increases to 74.4V and the wattage increases to 400W.

In a nutshell, when we wire campervan solar panels (or any device) in series, they act as a single unit - like one huge solar panel.
Advantages Of wiring solar panels in series:
Can use smaller wire size due to lower current
Wiring is more simple, requiring fewer connectors and other components
Normally output higher power
Distance is less important to efficiency
Wiring Solar Panels in Parallel
In order to wire solar panels in parallel, we connect all the positives together and all the negatives together. The combined positive and negative cables run down to our solar charge controller.
When we wire campervan solar panels in parallel, the voltage remains the same, but both the amperage and wattage increase. Look again at our four sample solar panels. When we wire the four solar panels in series, the voltage remains at 18.6V but amperage increases to 21.52A and the wattage increases to 400W.

The big advantage to wiring in parallel is that the panels are not inter-reliant on each other; if one of the solar panels is dirty or in the shade or broken, the others are not affected. In contrast, when wiring in series, partially shaded panels reduce the efficiency of your whole solar array.
This is an important advantage, as in my experience I have found it very common that I am parked partially in the shade. However, this advantage comes with more technical wiring and the necessity to use thicker cables.
To connect parallel solar panels together, we have two options: MC4 connectors or a combiner box:
MC4 connectors or splitters: One method of connecting multiple panels on your roof is to use a device called an MC4 connector or splitter. An MC4 connector routes many wires into one. If you have 2 panels, you will need a 2-to-1 MC4 connector. If you have 4 panels, you will need a 4-to-1 MC4 connector.


Combiner box: Another way to marry solar cables together is to use a solar combiner box. This is a consumer unit specifically for solar panels, which both combines and fuses them. A combiner box is generally only needed in larger systems with a lot of solar panels. Van conversions can generally do with just a set of MC4 connectors.

Effect of Shading on Solar Panels
Shading has a significant impact on the performance of your solar panels. Even a small amount of shading, whether from trees, buildings, or dirt, can dramatically reduce your solar panel output. Understanding how shading affects different solar panel configurations is crucial for optimizing the performance of your campervan’s solar system.
When part of a solar panel is shaded, the energy output of the entire panel decreases because the shaded cells produce less electricity. In some cases, shading a small portion of a panel can reduce its output by 25-40%. This is particularly true when solar panels are wired in series, where the performance of the entire string of panels is reduced by the weakest link.
Shading Impact in Series vs. Parallel Wiring
Series Wiring: When solar panels are wired in series, they form a chain where the same current flows through each panel. If one panel is shaded, it reduces the current, affecting the output of the entire string. This means that even if only one panel is partially shaded, the energy production of the entire array can plummet.
Parallel Wiring: In a parallel setup, each panel operates independently, so if one panel is shaded, the others continue to generate power at their full capacity.
The Importance of Panel Placement
Given how shading impacts solar panel performance, proper placement of your panels is essential. Consider the following when installing panels on your campervan:
Avoid shaded areas: Even partial shading can severely limit energy production. Plan your mounting locations to avoid roof racks or other installations that may cast shadows.
Clean regularly: Dirt, bird droppings, and debris can also block sunlight, acting like shade. Regular cleaning maintains maximum output.
How to Minimize Shading Issues
Use Bypass Diodes: Bypass diodes are installed in many solar panels to minimize the impact of shading. These diodes reroute electricity around shaded cells, preventing the entire panel's performance from being affected. Look for panels with built-in bypass diodes for better performance in partially shaded environments.
Opt for Parallel Wiring: While parallel wiring requires thicker cables and more components, it can significantly reduce the impact of shading, making your system more efficient in less-than-perfect conditions.
Install Adjustable Mounts: Use tilting or adjustable mounts to reposition your panels and avoid shade. Adjusting the angle of your panels can also help optimize solar energy collection, particularly in areas where shadows move throughout the day.
Real-World Example of Shading Impact
Research by the National Renewable Energy Laboratory (NREL) shows that even light shading, such as a shadow from a nearby tree branch, can reduce panel output by 20-30%, depending on the size of the shadow and the wiring configuration of the solar system. In urban or shaded environments, parallel wiring or flexible portable panels can help mitigate these losses.
Half-Cut Solar Cells: What Are They and Why Do They Matter?
Half-cut solar cells are an advanced solar panel technology that enhances efficiency and durability. Instead of a traditional full-size solar cell, these panels use cells that are literally cut in half, reducing electrical resistance and improving performance in partial shading conditions.
When Did Half-Cut Cells Become Popular?
Half-cut solar cell technology was first introduced in commercial applications around 2014 and has since gained traction due to its ability to increase power output while maintaining the same panel size. Initially developed for large-scale solar farms, this technology is now widely available in high-efficiency campervan solar panels.

Are All Rigid Solar Panels for Campervans Half-Cut?
Not necessarily. While half-cut cell technology is becoming more common, not all rigid solar panels for campervans use half-cut cells.
Premium and newer high-efficiency panels (such as Victron, Renogy, and SunPower) often feature half-cut cell technology.
Budget or entry-level panels may still use full-sized solar cells, particularly older models. Flexible solar panels and polycrystalline solar panels tend not to have this newer technology.
How to Identify Half-Cut Cell Panels
Panel Layout – Half-cut cell panels have a distinct horizontal split (like two smaller panels in one).
Spec Sheet – Look for terms like "half-cut cells" or "HC technology."
Efficiency Rating – Panels with 21%+ efficiency are more likely to use half-cut cells.
Performance Comparison: Half-Cut vs. Standard Solar Panels
Feature | Half-Cut Solar Panels | Standard Solar Panels |
Efficiency (%) | 20-22% | 16-19% |
Shading Tolerance | ✅ Better (independent half-sections) | ❌ Worse (whole row affected) |
Durability | ✅ More resistant to heat & cracks | ❌ More prone to microcracks |
Cost ($/Watt) | $$ (Slightly higher) | $ (Lower cost) |
Which Campervan Solar Panels Use Half-Cut Cells?
Several high-quality brands in the campervan and RV market have adopted half-cut cell technology:
Renogy Eclipse 100W & 200W Panels – High-efficiency monocrystalline panels with improved low-light performance.
Victron BlueSolar & SmartSolar Panels – Known for superior build quality and half-cut technology for increased shading tolerance.
BougeRV 200W Half-Cut Solar Panel – Budget-friendly option with solid performance.
SunPower Maxeon Panels – Premium-level half-cut cell technology with industry-leading efficiency.
If you’re looking for a solar panel setup that maximizes efficiency in variable conditions, half-cut cell panels are an excellent choice for your campervan
Still figuring out your van electrics?
This is where most people get stuck — trying to piece everything together from scattered advice, second-guessing cable sizes, fuses, and system design.
The Van Electrics Masterclass walks you through the entire system step-by-step — so you can design and install it properly, with confidence.

Solar Panel Fusing
Fuses are essential safety devices that prevent excessive current from damaging your solar system and reduce the risk of overheating and fire.
However, whether you need to fuse your solar panels depends on how they are wired:
Parallel Wiring → Always requires fuses to protect individual panels from overcurrent.
Series Wiring → Usually does not require fuses, except in multi-string systems or if BS 7671 regulations apply.
Fusing Requirements for Series vs. Parallel Wiring
Wiring Type | Fuse Needed? | Why? |
Series Wiring | Not required (in most cases) | Current remains constant across all panels, so the short circuit current (Isc) never exceeds the panel’s max fuse rating. However, BS 7671 may still require fuses in multi-string setups. |
Parallel Wiring | Required | Current increases with each additional panel. A fault in one panel could lead to dangerous overcurrent, requiring fuses to protect individual panels. |
Why You Need to Fuse Solar Panels Wired in Parallel
When solar panels are wired in parallel, their total current output increases. If one panel shorts out, the remaining panels will push current into the fault, which could exceed the panel’s rating and cause overheating or fire.
To prevent this, inline MC4 fuses should be installed at the positive wire of each panel before they combine into a parallel junction (MC4 branch connector or combiner box).
Example Calculation for Parallel Wiring
Let’s say you have three 200W solar panels, each rated at:
Short circuit current (Isc) = 12A
Maximum series fuse rating = 15A
Total short circuit current = 12A × 3 panels = 36
If one panel shorts, the other two panels could push 24A into it, exceeding its 15A max fuse rating—this is why a 15A fuse must be installed on each panel before they connect in parallel.
Where to Place Fuses in Parallel Wiring?
Inline MC4 fuses (at the positive wire of each panel) – Protects individual panels from overcurrent.
Double-Pole DC Breaker (between panels & charge controller) – Allows full system isolation for safety and maintenance.

Why You Usually Don’t Need to Fuse Solar Panels Wired in Series
When panels are wired in series, the voltage increases, but the current stays the same as a single panel. This means the total current in a series system never exceeds the short circuit current (Isc) of a single panel, making additional fusing unnecessary.
Example Calculation for Series Wiring
Using the same 200W panels (12A Isc, 15A fuse rating):
3 panels in series produce 12A at 60V (voltage adds up, current remains the same).
Since the total current is still 12A, which is below the panel’s 15A max fuse rating, additional fusing is not required.
However, BS 7671 may still require fuses in multi-string systems, where a fault could cause excessive current flow between different series strings.
The Role of a Double-Pole DC Breaker (NEC 690.13(E) & BS 7671 712.537)
A double-pole DC MCB (breaker) is used to disconnect the solar array from the charge controller for maintenance or emergencies.
The MCB can be installed on a DIN rail inside a small garage consumer unit. Or a solar-specific MCB like the one shown below can easily be purchased online.

NEC 690.13(E) Requirements (USA)
A PV disconnect must isolate both the positive and negative conductors.
If a system requires a disconnect, it must disconnect all live conductors from all sources of supply.
A double-pole breaker rated for at least 250V ensures compliance.
BS 7671 712.537 Requirements (UK)
Requires a means of isolation between the solar array and charge controller.
Unlike NEC, it does not explicitly mandate a double-pole disconnect but does require all live conductors to be isolated.
A dedicated DC isolator switch or a double-pole breaker can be used to meet compliance.
When Do You Need a Double-Pole Breaker?
Required for Parallel Wiring – Ensures both positive and negative conductors are disconnected.
May be required for Series Wiring – If the MPPT charge controller does not have a built-in disconnect, a double-pole breaker is recommended for compliance with NEC 690.13(E) or BS 7671 712.537.
Minimum Rating for the Breaker
Must be rated for at least 250V (especially for series wiring where voltage increases).
Current rating should match your solar array output (e.g., 32A for a 400W+ system).
Should be installed on a DIN rail inside a small garage consumer unit for easy access.
Final Recommendations for Solar Panel Fusing & Isolation
Component | Series Wiring | Parallel Wiring | Why? |
Inline MC4 Fuses (per panel) | Not required | Required | Parallel wiring increases current; fuses prevent overcurrent faults. |
Double-Pole DC Breaker | Only if MPPT has no built-in disconnect | Required | NEC 690.13(E) & BS 7671 require full system isolation. |
Key Takeaways
Parallel wiring always requires fuses because of increased current.
Series wiring does not require fuses unless BS 7671 regulations apply.
A double-pole breaker is required per NEC 690.13(E) to disconnect both conductors.
If your MPPT has a built-in DC disconnect, you may not need an extra breaker.
By following these guidelines, you ensure your campervan’s solar system is safe, efficient, and compliant with both NEC (USA) and BS 7671 (UK) regulations.
Tilting Solar Panel Arrays
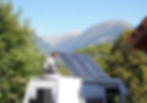
We recently built a tilting solar panel mount for Shane's new van. He'll be living in it full-time through Alpine winters, and he's running a high-capacity electrical system including an induction hob. We needed to optimise solar generation, and we found that he could boost his output by 55% during winter by tilting his panels towards the sun.
This data comes from some reliable sources; one study using identical solar arrays demonstrated that at a latitude of 45° north (Portland, USA and Milan, Italy), tilting the array to the South increased annual solar generation by 18% [1]. This benefit is greater in winter; a Swiss study demonstrated 30% increased solar generation in winter with a 30° tilt [2], and a Norwegian study demonstrated 30% increased winter solar generation with a vertical solar array [3]. We also did our own research using data from the PVWatts solar generation calculator to estimate output figures for a 500W solar panel array tilted south at a variety of latitudes, from near the Arctic Circle to the Mediterranean.

From the data, we can see that at high latitudes, a tilt angle of 40° gives us the biggest benefit over the whole year, whilst at lower latitudes, 30° is better. This trend would continue as we moved southwards, with decreasing benefits as we approached the equator.
However, we can also see that the effect of tilt angle changes over the year. At very high latitudes, tilting solar panels to 70° or 80° offers a benefit in winter, whilst in summer, 30° is best. Thus, a solar panel tilt angle that we can vary over the course of the year actually gives us optimal solar generation.
Take a look at our how-to guide to building a tilting solar panel rack for all the information.
Part 2: Solar Charge Controllers
A solar charge controller is a device which keeps our leisure batteries from overcharging by regulating the voltage and current coming from the campervan solar panels. It converts the powerful electricity from our solar panels into electricity our leisure batteries can use.
A good solar charge controller ensures that the voltage and amperage matches the charge stage of the battery. It is paramount that it does its job correctly to avoid dangerous battery overcharging, leaks, and fires.
What is the Difference Between a PWM and a MPPT Solar Charge Controller?
There are two types of solar charge controllers: MPPTs (Maximum Power Point Tracking) and PWMs (Pulse Width Modulation).
PWMs
A PWM is a relatively simple device that is essentially a smart switch. They pulsate on and off, recognising when to send power to the batteries (per the charge profile). They're about half the price of an MPPT, but about 30% less efficient. PWMs draw current from the campervan solar system just above the voltage of your leisure batteries.
MPPTs
A MPPT is a solar charge controller which digitally tracks the charge profile of the leisure batteries in order to be as precise as possible with its energy delivery. They are a lot more efficient than PWMs. MPPTs are more expensive, but accelerate solar charging of the battery up to 30% per day. MPPTs are slowly but surely taking over from PWMs entirely. MPPTs draw current from the campervan solar panels at the max voltage possible.
Our Top Picks
Both Renogy and Victron make PWM and MPPT solar charge controllers. We'd always recommend an MPPT charge controller due to their significantly improved efficiency over PWMs. For a more detailed look, including more recommended models, take a look at our solar charge controller buying guide.


What Size Solar Charge Controller do you Need?
Sizing your MPPT correctly turns out to require some fairly complicated maths. To simplify things we have built an MPPT sizing calculator which figures out exactly what MPPT you will need.

Solar Cable Entry Glands
Getting cables into your van from the roof cleanly and watertight matters just as much as panel choice. You’ve two good options: the common ABS “solar cable entry gland” and the premium Scanstrut Cable Seal. Both work; they just solve the problem differently.
Standard ABS Solar Cable Entry Glands
What they are: Low-profile plastic housings with a rubber grommet/membrane and a dome cover. Usually bonded to the roof with adhesive/sealant. Available in single and twin cable versions.

Pros
Cheap and widely available.
Low profile
Quick install with adhesive—no through-roof screws required.
Cons
Quality varies a lot (thin plastic, weak gaskets).
Grommets can harden/warp with UV if you buy the wrong ones.
Membrane cuts need to be precise; over-cut and you compromise IP rating (to put it lightly).
Scanstrut Cable Seal
What it is: A robust, IP-rated compression gland (machined base + top cap + shaped rubber insert). Typically screw-mounted with a sealed base; designed for harsh marine UV/salt environments.

Pros
Consistently IP66–IP68 (model-dependent) and highly UV-stable.
Compression seal grips the sheath properly—less risk of weeping over time.
Neater on finished builds; looks “OEM”.
Cons
Costs more.
Usually needs fixing screws into the skin (seal the pilot holes properly).

Which should you choose?
Budget/quick build?
A good-quality ABS gland, correctly bedded and supported, is absolutely fine.
Longevity/harsh conditions (snow, salt, strong UV) or “show-finish” builds?
Go Scanstrut. It’s stronger, more consistent, and easier to re-service.
Bare in mind, when it comes to making holes in your roof, the cheap choice, might not always be the right one. I've installed both on previous builds.
Solar cable entry gland installation
Drill a hole large enough for your solar cables, deburr and treat the edges. Add adhesive sealant to the roof of the van and secure the inlet to the roof. Feed the cables through the grommet or insert, tighten the cover (or compression cap, for Scanstrut).

You can read our full guide to solar cable entry glands here.
Campervan Solar Panel Installation (Step-by-step)
In this step by step guide, I will be showing you how to install solar panels on the roof of your campervan. First, we will look at how to install flexible (thin film) solar panels, then we will look at how to install rigid mono/polycrystalline solar panels. I have flexible solar panels on my campervan because they are more discreet than solid.
How to Install Flexible Solar Panels on a Campervan
Step 1: Clean the roof
Get up on your van roof with some warm soapy water. We want a clean bonding surface for our adhesive.

Step 2: Remove rust from the top of the campervan
Whether or not you're installing solar panels on your campervan, removing rust is always a good idea. If you need a refresher on how to do this, read this guide on how to remove rust from from a van.

Step 3: Stick strips of 3M VHB (Very High Bondage) tape on the van
Place strips of the double-sided 3M VHB tape on the roof of your van. This stuff alone will stick the campervan solar panels down for life.

Step 4: Stick the flexible solar panels onto the roof of the campervan
Carefully place the flexible solar panels on top of the 3M VHB strips and gently press them down.
Solar panel temperature: Cooler solar panels are more efficient. Flexible solar panels can get quite hot if there is no air gap underneath them. Luckily on the Ford Transit, there are ridges that run down the length of the van, providing an air gap of about an inch, through which air can flow. If your van does not have ridges, you can still install flexible panels, though they might not be as efficient. Alternatively, you could raise the panels up using metal risers.
Air tightness: Some people use high bondage glue instead of VHB tape. This is fine too. However, if you are using glue, make sure you pour it in strips, just like the VHB tape. Do not make an airtight seal with the glue, as water can get trapped in there, expand, and do damage to the panels. It will also reduce the efficiency of the panels due to higher heat.

Step 5: Stick down loose wiring on the roof using adhesive cable clips
Next, we want to get all that messy wiring out of the way. Use cable ties to bunch everything together and stick it to the roof with adhesive cable clips. I would advise using the 3M VHB tape to stick the cables down.
Step 6: Wire up the campervan solar panels and bring the cables inside the van
Wire up the campervan solar panels either in series or parallel, as discussed before. Most people use 10 mm² solar cable for this job.
Then, bring the positive and negative wires inside the van. The wires enter into the van through a solar cable entry gland. You can learn how to install the solar cable entry gland in this guide.

Step 7: Add an MCB to the solar wiring before the solar charge controller
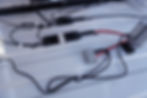
Add an appropriately sized DC double-pole MCB to the positive wire running to your solar charge controller. I used a 40A breaker because my solar array delivers a maximum of 33.3A. We want to place the breaker as close to the panels as we can get it, to protect as much of the wire as we can.
BS7671 requires double pole isolation between the solar panels and the solar charge controller. A double pole MCB (as shown in the diagram below) is a suitable device to use. You could also use a simple double pole isolation switch (with no breaker).

Safety note: Do not connect the solar charge controller to the panels until the leisure battery is connected. The input of power with nowhere to go will overload the charge controller.
Step 8: Connect the solar charge controller to your busbars
The next part of the solar panel installation is to wire the solar charge controller to your positive and negative bus bars. The busbars run down to your batteries. We add a 50A inline breaker to the positive line running to the bus bars. I used two 300A heavy duty bus bars and 10mm² cable. Use large cable lugs for the connections to the busbars. It's best practice to connect the heaviest loads to the middle of your busbar, and progressively lighter loads to the outer connection points.

Step 9: Connect your 12V fuse box to your solar charge controller
Connect your 12V fuse box to your solar charge controller. This will send power to all your 12V appliances (fan, heater, lights, etc.). I used 10mm² cable in my van build and added a 40A breaker onto the positive wire (as close as possible to the solar charge controller).

Connecting the fuse box to your MPPT is technically optional. You could run the fuse box directly from the bus bars. However there are two benefits of running the fuse box from the MPPT:
You can power your appliances directly from the solar panels when the sun is out, rather than running through your leisure batteries
Your MPPT's smart monitoring functionalities only work if it's directly connected to your appliances
Most people will also wire up a 12V switch board after the fuse box before running the wiring out to the individual appliances. This allows you to turn individual appliances on and off. Read about how to do this here.

Step 10: Ground your solar system
Many solar charge controllers do not need independent grounding as long as the common negative busbar in the system is grounded. Check the manufacturer’s guidelines for more information on your model.
How to Mount Rigid Campervan Solar Panels
First, attach metal brackets to the campervan solar panels. Renogy and Victron campervan solar panel kit come with a Z-bracket mounting system, which allows an inch of room underneath for airflow to increase the efficiency of the panels.

Bring the bracket-mounted solar panels up onto the roof of your van and mark with a pen where you need to drill into the van.
Drill into the spots you have marked on the roof with a drill bit appropriate to the size of your bolt.
Apply a good amount of sealant around the hole you have drilled before tightening down the bolt. This ensures that your holes are watertight. Alternatively, you could add a small piece of mastic/butyl tape over the hole.
Bolt the campervan solar panels into the roof (place the bolt into the hole from above, and screw the nut on from inside the van).

Here is a great video on how to install rigid solar panels on a campervan:
Once your rigid solar panels are mounted, the wiring process is the same as for flexible panels.
Solar Panel Lifespan and Maintenance
Solar panels are highly durable, with most monocrystalline and polycrystalline panels lasting 25-30 years. Their performance gradually decreases over time, typically losing around 0.5-1% efficiency per year. This degradation rate is factored into most warranties, which often guarantee 80-85% output after 25 years.
Year | Efficiency (%) |
0 | 100 |
5 | 95 |
10 | 90 |
20 | 80 |
25 | 75 |
*Assuming 1% loss in efficiency per year
Factors Affecting Solar Panel Lifespan
Weather: Extreme weather, such as hail or high winds, can cause physical damage, though high-quality panels are designed to withstand these conditions.
Temperature: Excessive heat can accelerate wear, particularly in thin-film panels, which are more temperature-sensitive than rigid panels.
Maintenance Tips
Clean Panels Regularly: Dust, bird droppings, and grime can block sunlight, reducing efficiency. Use soft water and a non-abrasive cloth to gently clean the panels every 6-12 months.
Inspect for Damage: Regularly inspect panels for cracks, broken glass, or loose connections. Damage can result in further degradation and performance loss.
Ensure Proper Ventilation: Panels can overheat if not properly ventilated. Ensure an air gap under rigid panels, especially in hot climates, to maintain efficiency.
Check Electrical Connections: Ensure that MC4 connectors and wiring are secure and protected from water ingress to avoid corrosion or short circuits.
Long-Term Performance
Even after 25 years, well-maintained solar panels can still operate at 75-85% capacity, continuing to power your campervan. Brands like Renogy and Victron Energy offer warranties covering performance over decades, making them reliable long-term investments.
Conclusion
We covered a lot, but you should now feel equipped to spec and install a campervan solar system. If you're still confused, consider our electrical masterclass for a detailed, step-by-step course on all aspects of campervan electrics. When you're confident you know what you need, take a look at Renogy's and Victron's solar panel kits for an easy installation, or check out our solar panel buying guide and solar charge controller buying guide for more recommendations. For a detailed look at solar array sizing as it relates to usage and leisure battery size, take a look at our electrical system sizing article. For your next step, you may like to choose an inverter or shore hook-up system.
Still unsure how to design your van electrics?
Start with the free wiring diagrams below.
Want to build your van electrical system properly from start to finish?
The Van Electrics Masterclass shows you exactly how to design and install a safe, reliable electrical system — step by step.
Until next time.