
Renogy Self-Heating Lithium Battery Review: The Best Battery for Winter Vanlife?
- Shane Monks O'Byrne
- Jan 10
- 19 min read
Updated: Apr 5
I don't know how many times I've woken up on freezing Alpine mornings in my van "Beans" to find my old AGM leisure batteries seriously struggling or completely dead. If you’ve ever tried running a campervan through winter on lead-acid, you’ll know the routine: weak solar, short drives, voltage sag, and constant “can I make it through tonight?” battery anxiety. This winter I tested the Renogy 12V 200Ah Smart LiFePO₄ Battery with Self-Heating (Bluetooth BMS) in my van, paired with a Renogy 40A DC-DC charger, specifically to see if a lithium upgrade can actually fix cold-weather power reliability—and in my case it absolutely did. In this review I’ll cover the real-world results from sub-zero use (charging, capacity, voltage stability, and how the self-heating behaves), the install considerations (why a DC-DC matters), the downsides (cost and system changes), and a direct LiFePO₄ vs AGM comparison so you can decide if this is the right winter battery setup for your own build.

Shane is an NCC-certified electrical installer. He has built, taught, and lived in campervans since 2019.
Transparency matters: Renogy provided me with the self-heating lithium battery mentioned in this article to test and review. As always, I’m sharing my honest, hands-on experience. They had no input on the testing, the content, or the verdict. What follows is my honest assessment after using it full-time in winter conditions here in Chamonix.
This post contains affiliate links. We may earn a commission at no extra cost to you. To understand our policies on content, affiliate commissions, and liability, please review our Terms of Use.

In this guide
TL;DR
I spent this winter testing the Renogy 12V 200Ah Self-Heating LiFePO₄ Battery in my campervan to see if a lithium upgrade could finally solve my cold-weather power woes. Short answer: absolutely yes. This battery (paired with a Renogy 40A DC-DC charger) has been a complete game-changer for winter vanlife. It turned my formerly unreliable electrical setup into a robust, worry-free system. Indeed I would go so far as to say that it has been the single biggest quality-of-life upgrade I've ever made to my van. Even through sub-zero nights in the French Alps, I’ve always had plenty of power for heat, lights, and devices – and every time I check, the battery is near full. The 200Ah lithium (LiFePO₄) chemistry provides huge usable capacity, fast charging, and a built-in self-heating system that allows safe charging even when the battery is below freezing. After years of struggling with cheap lead-acid batteries, the difference blew my mind – I only wish I’d upgraded sooner. Downsides? It’s a significant upfront investment (though still way cheaper than it would have been 5-10 years ago). But after experiencing how this Renogy battery transformed my winter vanlife, I can confidently say it’s worth every penny for anyone serious about off-grid power in cold weather.

The Vanlife Winter Battery Struggle
It’s mid-January in Chamonix, France. Outside, night temperatures plummet to -15 °C (5 °F) with a thick blanket of snow on the ground. Inside my van “Beans” (a Ford Transit L3H3), I’m cosy as can be bundled in blankets. At the same time, I can't shake the low level persistent anxiety I have hoping my leisure batteries can last the night. For the past 6 winters living in this van, every day was a battle for power. My old electrical setup was as basic (and budget) as it gets: a couple of cheap 12V AGM batteries and a simple VSR split-charge relay from the van’s alternator.

I've always turned off my fridge for the coldest months each year in order to save power, and even with that, by morning, the AGMs would be nearly drained from running just the heater fan overnight. With almost no solar input in winter (short, dim days and panels often covered in snow), I had to ration every amp. I’d spend days working from co-works, or cafes or friends’ places just to avoid using my own electricity. Driving helped, but in the Alps I don’t drive much in winter (plus snowy roads aren’t exactly inviting). I’d often resort to idling the engine just to send a few precious charging amps into the batteries. It was barely enough – the old batteries never seemed to charge fully and quickly lost what little charge they got. Every winter day felt like survival mode: How will I keep the lights on and the heater running tonight? This is the classic winter vanlife power dilemma, and I was deep in it.
Then it hit me: why am I still suffering like this? I run one of the largest van conversion websites globally, yet I was limping along with a bargain-bin electrical system (nice one, dummy). So, heading into this winter, I decided to make a change. In fact, I reached out to Renogy – and they more than happily obliged my request for a better setup. They sent over a brand new Renogy 200Ah Smart Lithium Battery (with Self-Heating) and a Renogy 40A DC-DC charger for me to install. I swapped out my dead lead-acids, put in the Renogy lithium (plus the DC-DC charger), and crossed my fingers as the first cold front rolled in.


Goodbye: cheap AGM, Hello: Lithium!
The result? Absolutely transformative. My van’s electrical system went from unreliable to ultrareliable literally overnight. Instead of nervously watching the voltmeter every evening, I now have a huge well of power that I trust to get me through the night – and it always does. Just a short drive the next day easily charges the battery back to full. Honestly, the upgrade was so dramatic it felt like going from a horse-and-cart to a Tesla. For anyone living or traveling in a camper through winter, upgrading to a proper LiFePO₄ battery bank can truly be a night-and-day improvement in quality of life.
First Impressions: What Is the Renogy 200Ah Self-Heating Lithium,?
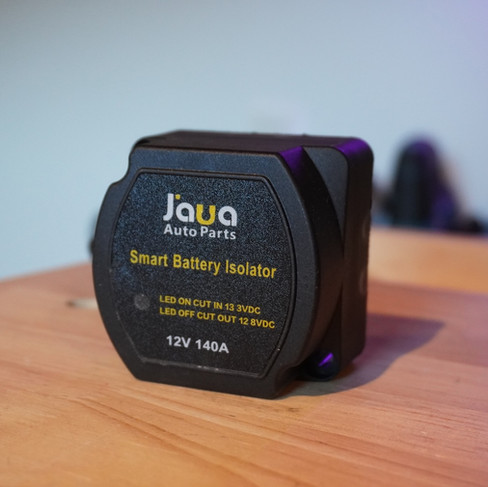
The Renogy battery I installed is a 12.8 V, 200 Ah Lithium Iron Phosphate (LiFePO₄) deep-cycle battery. In plain terms, it’s a beast of a house battery – 200 Ah is 2,560 Wh of stored energy, enough to run a 100 W device for 25 hours straight. It’s part of Renogy’s “Smart” lithium line, meaning it has an internal Battery Management System (BMS) that not only provides the usual protections (over/under-voltage, over-current, over-temp, etc.) but also Bluetooth connectivity (for monitoring via an app) and an integrated self-heating function for low-temperature charging. The model is often dubbed “200Ah Lithium with Bluetooth & Self-Heating,” and those features are exactly what set it apart for campervan use.

Physically, the battery came well packaged and felt solid and high-quality. Despite the huge capacity, it’s remarkably compact and lightweight for what it is. It measures about 18.4 x 8.4 x 8.2 inches and weighs 50.7 lbs (23 kg). To put that in perspective: my old setup was two 100Ah AGM lead-acid batteries weighing ~64 lbs each – 128 lbs total. So I shed roughly 60% of the weight while gaining usable capacity (more on that later). Lithium batteries have about 3 times higher energy density than AGM, which is a huge benefit in a van where weight and space are at a premium.

Functionally, the Renogy 200Ah is a drop-in replacement for a 12 V lead-acid battery bank (same nominal voltage). It has sturdy M8 terminal posts for the positive and negative connections. Internally, the 200A BMS is robust – it’s rated for 200 A continuous discharge and charge, with 270 A up to 30 seconds for surges. That means this battery can handle high-power loads (inverter, heater, etc.) with ease. By comparison, most lead-acid batteries struggle with high current draw and will experience significant voltage sag. I knew on paper that this lithium could deliver far more amps than I typically ever use, but seeing things like my 1000 W inverter now run without my lights dimming was still impressive in practice.

Another headline spec is the cycle life. Renogy rates this battery for around 5000 cycles at 80% depth of discharge (and even more if you cycle shallower). In other words, you could discharge 80% and recharge every single day for ~13 years and still have ~80% capacity left. That is insane longevity compared to lead-acid. Traditional AGM batteries might be good for 500 cycles (at 50% DOD) on the high end – I probably got even less out of mine. This longevity is one reason lithium (LiFePO₄) is actually cheaper in the long run despite the higher upfront cost. And indeed, after replacing my AGM bank three times in 6 years, I’d already spent more money than a lithium would have cost initially.
On the techy side, the battery’s Bluetooth “smart” features pleasantly surprised me. Using Renogy’s DC Home app, I can connect directly to the battery and see real-time stats: State of Charge %, voltage, current flowing in/out, temperature, and even whether the self-heating is active. It’s oddly addicting to check (the inner battery nerd in me rejoices). The Bluetooth range is a few meters, so I can check it from the front seat or even lying in bed. I also installed Renogy’s dedicated battery monitor display (but I find the phone app more convenient and informative). This is truly a “smart battery,” and it integrates seamlessly.

Installing the Battery (and DC-DC Charger)
Installation of the Renogy 200Ah battery was straightforward – if you’ve ever installed a car battery (or even if you haven't), you can handle this. I removed my old AGM batteries and simply hooked the Renogy’s positive and negative terminals to my van’s existing 12 V system bus bars. No external BMS to wire up (unlike some DIY lithium setups) since it’s all built in. The form factor was slightly different from my previous batteries, but it fit in the same general space. I did add some extra bracing to secure it (always secure your batteries so they don’t move while driving).

The more involved part was upgrading the charging system. I mentioned I had been using a VSR (voltage sensitive relay) to charge from the alternator – that was not suitable for lithium (read why in our guide to split charging). Instead, I installed the Renogy 40A DC-DC charger. This device acts as a smart charger between the van’s starter battery/alternator and the house battery. It takes the alternator’s output and boosts or regulates it to properly charge the lithium according to a multi-stage profile. If you’re new to this: a DC-DC charger is essentially the modern solution for campervan alternator charging. It’s required for most lithium batteries and for vehicles with smart alternators (all modern Euro 6 vans).


Left: My cheap old VSR ; Right: My new 40A Renogy DC-DC charger
The DC-DC charger was absolutely worth it – it charges my new battery fully and quickly, and isolates the starter battery properly. (A side note: a VSR simply connects the batteries when the alternator is running, but it doesn’t adjust voltage – meaning it often never fully charges a battery. A DC-DC will ensure the lithium battery actually reaches 100% by boosting to the appropriate voltage.)
Wiring the DC-DC was a bit of extra work (running a 8 AWG cable from the starter battery, mounting the unit, fusing, etc.), but nothing too daunting. I did not need an ignition trigger wire since my alternator isn’t smart – the DC-DC just senses the input voltage to turn on. I also left my existing Epever MPPT solar charge controller in place (Beans has a 400W solar array, though in winter it’s not contributing much). I did fiddle with the settings of the MPPT to set it for lithium though (very important you do this if upgrading from lead acid to lithium).


Successfully hooked up the Renogy 40A DC-DC charger and BT2 bluetooth controller
Once installed, the charging performance difference was immediately noticeable. With the engine running, I now see a solid 30-40A charging into the lithium battery. The DC-DC charger holds the voltage around 14.4 V during bulk/absorption, which crams energy into the battery fast. Now, a typical drive to the store or to my co-working space (maybe 20–30 minutes) will easily replenish a night’s usage. Even on shorter drives, I arrive with the battery at 100% or close to it. It’s such a strange new feeling: every time I check the battery monitor, it’s basically full. I’ve gone from constantly fretting about how to scrounge together amps, to having an abundance of power without even trying.
One more installation note: I mounted a temperature sensor probe from the DC-DC charger near the battery, but because the Renogy battery has its own internal temperature management, this was more for the charger’s internal adjustments. The Renogy battery’s BMS will protect itself anyway – including disconnecting if ever outside safe temp or initiating self-heating when needed. Still, I like having the charger aware of ambient/battery temp as a secondary precaution.
Performance in the Cold: Night-and-Day Difference
I’ve now run the Renogy 200Ah lithium through several weeks of proper winter conditions, with night temperatures regularly between -5 and -10 °C and a few dips to -15 °C, and the difference versus my old AGM setup is stark. The battery has been completely reliable throughout.
Stable voltage and usable capacity were the first things I noticed. Even in the cold, the LiFePO₄ holds voltage under load, so lights don’t dim, the heater fan runs normally, and the inverter or fridge doesn’t randomly cut out due to voltage sag (a frequent issue with my old lead-acid bank). Lithium simply maintains a higher, flatter voltage curve until it’s genuinely low, which makes the whole 12 V system behave better.
Overnight consumption is essentially a non-issue. My typical winter loads (heater fan, fridge, lights, device charging) amount to around 20–30 Ah overnight, which is barely 15% of this battery’s capacity. Even after a long, cold night I’m still comfortably above 80–85% state of charge. With my previous 2×100Ah AGM bank, that same usage was a meaningful chunk of my usable capacity and something I had to actively manage.
Recharging is equally transformative. With the Renogy 40A DC-DC charger, the battery accepts high current almost all the way to full. A 20–30 minute drive easily replaces a night’s usage, and longer drives quickly push the battery back to 95–100%. AGM batteries simply can’t do this; they taper heavily as they fill, which meant hours of driving and still no true full charge. In winter, when solar is weak and driving windows are short, this fast charge acceptance is a major advantage.
Low self-discharge also matters more than you’d think. I left the van parked for about a week over Christmas in sub-zero conditions. When I returned, the battery was still essentially at 100%. No noticeable loss, no cold-soak penalty. Older lead-acid batteries would almost certainly have dropped in both charge and effective capacity over that time.
Finally, Bluetooth monitoring removes all guesswork. The Renogy app gives live state-of-charge, voltage, current, temperature, and heating status, which is especially valuable in winter. Instead of guessing how the system is coping, I know exactly what’s happening at any moment—and that confidence alone is a big upgrade for cold-weather vanlife.

Still figuring out your van electrics?
This is where most people get stuck — trying to piece everything together from scattered advice, second-guessing cable sizes, fuses, and system design.
The Van Electrics Masterclass walks you through the entire system step-by-step — so you can design and install it properly, with confidence.

Self-Heating Feature – How It Works and Why It’s a Game-Changer
One of the big concerns with using lithium batteries in cold weather is charging below freezing. Lithium Iron Phosphate (LiFePO₄) batteries cannot be charged at sub-zero temperatures without risking permanent damage (lithium plating can occur on the anode). The battery will still discharge and power your devices in the cold (albeit with slightly reduced performance at extreme cold), but you must be careful about charging. In a campervan scenario, “charging” happens whenever you run the engine (alternator charging) or if you have solar and the sun comes out, etc. If the battery itself is below 0 °C, a normal BMS would simply refuse to charge (protect itself by disconnecting). That’s good – it saves the battery – but it also means you wouldn’t be able to recharge your battery until it warms up.
Renogy’s solution, and a killer feature for winter vanlife, is the self-heating function built into this battery. Essentially, the battery can use a small portion of incoming charge current to heat itself whenever it’s too cold to charge. This allows you to safely charge your 12V lithium battery in cold weather – extending the usability into deep winter where others might have to completely disconnect or baby-sit their batteries.

Here’s how it works: the Renogy’s BMS continuously monitors internal temperature. If you start charging (from alternator, solar, generator, any source) and the battery’s core temperature is below about 5 °C (41 °F), the BMS will automatically divert some of that current to internal heating films to warm the cells. The heater will stay on until the battery’s core temp rises to ~10 °C (50 °F), then it switches off and lets all the current go into normal charging. It only activates when there’s incoming current available – it does not drain the battery to heat itself when idle (a very important design choice). In fact, the Renogy battery’s heater won’t turn on at all unless the charge current is at least a few amps and the battery is below the threshold. Renogy specifies a minimum ~4–6 A charging current is needed to trigger heating. This prevents the battery from wasting its own energy to heat itself when no charging source is present (which makes sense – you don’t want a battery heater to run all night and kill your battery).
In my experience, I got to witness the self-heating in action on a few occasions. After returning to Chamonix from the Christmas holidays, I came back to the van after it had been off (and cold-soaked) for over a week. The interior and the battery were around -3 °C. I opened the Renogy app and was greeted with a very big warning screen telling me to be very cautious charging as the battery is extremely cold.

I started the engine, and after a minute the DC-DC charger kicked on. I checked the Renogy DC Home app – it showed the battery at about -2 .5°C internal, and I saw an indicator “Heating” on the app.

The charging current stayed at 0A initially while the battery warmed up. Over the next 15–20 minutes, I watched the battery temperature reading steadily climb. Once it went above ~5 °C, the charging current ramped up (the DC-DC started putting out the full 20–30A it could at idle), and the “Heating” indicator turned off as the battery passed ~10 °C internally. After that, the battery charged normally. The whole process was seamless – I didn’t have to do anything except start the van. The battery managed its own protection.
This is huge for practical use. It means I don’t have to worry that “Oh no, it’s below freezing, I must not start charging or I’ll damage my battery.” The Renogy takes care of itself. Self-heating is a fairly new feature on lithium batteries, and I’ll note that lead-acid batteries don’t have or need this – they can charge at colder temps (with reduced efficiency) but none of them actively heat themselves. In fact, among traditional batteries, AGM is one of the best in cold – it can accept charge down to -15 °C (~5 °F) whereas flooded lead-acid and gel struggle below freezing. But even AGM will be hurting in extreme cold and no lead-acid offers a solution to that aside from insulation or external heaters. The Renogy lithium basically outsmarts the cold – combining the chemistry’s advantages (high energy, long life) with an intelligent workaround for its disadvantage (no charging below 0°C).
A few more details on the self-heating: it draws about 60–80 W when running (roughly 5–6 A at 12 V). In my case, with a 40A alternator charger, dedicating ~6A to heating is trivial – plenty of overhead to still charge the battery at a good rate simultaneously. The heating films are internal, placed against the cells, so it warms the battery fairly quickly (Renogy cites about 8°C rise per hour at full heater power). From what I observed, it took maybe 30 minutes to go from ~-2°C up to ~5°C internally.
Overall, I consider the self-heating feature essential for winter vanlife lithium setups. It provides peace of mind that your expensive battery is protecting itself and it extends your usable charging window to the coldest of conditions. If you’re in a mild climate where it never freezes, you wouldn’t need this. But for anyone using a camper in winter (ski trips, full-time in mountains, etc.), I’d say a self-heating LiFePO₄ battery is the best battery for winter vanlife scenarios hands down. This Renogy battery delivered on that promise – I charged it in temps where a normal lithium would have been locked out.

Strengths and Limitations: An Honest Take
After using the Renogy 200Ah lithium battery in daily winter vanlife, here’s my candid list of pros and cons:
Pros
Massive Usable Capacity:
200Ah of LiFePO₄ is like having 4x the usable energy of a similar-size AGM bank. I can comfortably run heat, lights, laptop, and more through long winter nights without worry. No more daily “battery anxiety.”
Self-Heating for Cold Weather:
This battery literally heats itself to allow charging below freezing. For winter vanlife, that’s a game-changer – I can charge in sub-zero temps without damage, something standard lithiums cannot do (and no lead-acid offers). It makes this the best battery for winter vanlife scenarios in my book.
Fast & Efficient Charging:
Paired with a DC-DC charger, the Renogy gobbles up charge current quickly and gets back to 100% fast. No lengthy absorption phase like lead-acid. It’s ~95% efficient, so minimal waste heat. A short drive or a bit of generator/solar time actually yields a significant recharge.
High Power Output:
With a 200A continuous discharge rating, I can run high-draw appliances (inverter, etc.) with stable voltage. It handles big spikes (eg. coffee maker) without breaking a sweat. My inverter no longer triggers low-voltage alarms under load.
Low Self-Discharge:
I can leave the van parked for weeks in the cold and lose almost no charge (≤3% per month). The battery holds energy extremely well, which is great for intermittent use or storage.
Built-in Smart BMS & Bluetooth:
The internal BMS protects the battery from abuse (over/under-charge, temp, etc.) and takes the guesswork out. Bluetooth monitoring via the app is excellent – I get detailed insight into my system from my phone (capacity %, in/out current, battery temp, etc.). It’s fun and adds confidence that everything is functioning properly.
Lightweight & Compact:
At ~23 kg, it’s significantly lighter than equivalent lead-acid batteries. I saved roughly 35 kg overall in the van – and it fits more easily than a bulky multi-battery AGM bank.

Long Lifespan:
5000 cycle rating means I likely won’t have to replace this battery for the life of the van. It feels good knowing my power system is set for the long haul, and I’m not contributing old batteries to the waste stream every few years.
Renogy Reliability:
Renogy is a well-known brand in the off-grid power world - indeed we've been promoting them at TheVanConversion.com for the past 5 years. They back this battery with a decent warranty (3-5 years) and the build quality feels really solid (IP67 waterproof, vibration resistant, UL certified, etc. per specs). It’s designed for RV/marine use, so it’s not a flimsy “DIY” battery – it’s a robust unit I feel safe using daily. We've been promoting Renogy on this
Cons
High Upfront Cost:
There’s no way around it – lithium batteries are expensive initially. Though they've come down in price massively in recent years, the Renogy 200Ah isn’t cheap (though it’s competitively priced for lithium). And you’ll likely need to invest in a DC-DC charger if you don’t have one, which adds cost. For budget-conscious builds, the price can be a hurdle. However, I’ll note again that over time it can pay for itself in longevity and performance.
Requires Proper Charging Setup:
You really need to pair this with a DC-DC smart charger rather than a simple VSR. So it’s a bit more complex than dropping in an AGM and forgetting about it. That said, installing a DC-DC charger is a one-time task, and it’s becoming standard in modern van builds due to smart alternators and the popularity of lithium anyway.
Cold Charging Still Requires Caution:
While the self-heating is brilliant, you do need to ensure any charging source can provide at least ~5–6A to trigger it. In practical terms, this isn’t an issue for alternators or decent solar, but if you had a very small trickle charger or solar panel in low light, it might not kick on the heater. In extremely cold environments (< -20 °C), the battery won’t charge or discharge below those limits (it will shut off to protect itself). For 99% of users this is fine, but Antarctic explorers take note of the spec limits.
Size and Form Factor:
The battery is roughly the size of a large group 4D battery. It fit my layout, but it is a single big block. In some vans, two smaller 100Ah batteries might be easier to place in separate spots than one big 200Ah. Renogy does make 100Ah self-heating versions too, which could be more flexible for certain layouts. So just ensure you have space allocated for this unit.
Honestly, I had to nitpick to find “cons” – I’ve been that happy with this upgrade. The cost and setup complexity are real factors, but absolutely worth it in my opinion. The advantages in daily living far outweigh those one-time inconveniences.
Final Thoughts: Is This the Best Battery for Winter Vanlife?
After living with the Renogy 200Ah self-heating lithium battery through a harsh winter, I can confidently say this is the single best upgrade I have made to my van in 6+ years. It took my electrical system from constant struggle to blissful abundance. For the first time, I went through winter without worrying about power: my heater ran every night, my lights are on as long as I want, my laptop and camera batteries stay charged – all with juice to spare. The psychological relief of not living in fear of a dead battery is hard to quantify, but it’s huge. Vanlife in winter is tough enough; this battery removed one of the biggest stressors.
Is it the best battery for winter vanlife? In my experience, yes, absolutely. It addresses the key pain points winter vanlifers face: limited charging opportunities, cold temperatures, and high power demands for heating and lighting. The 200Ah capacity provides a deep well of energy storage, the LiFePO₄ chemistry delivers it efficiently, and the self-heating feature ensures you can recharge in cold weather without a hitch. It’s a complete solution to the winter battery blues. There may be other great lithium batteries out there, but Renogy has really nailed the winter-use case with this one. It’s no surprise that many van builders and full-timers (myself now included) consider Renogy’s lithium batteries among the top choices for off-grid rigs.
Reflecting on my journey: I only wish I had done this sooner. I was hesitant because of the cost and because “if it ain’t broke don’t fix it.” Well, my old setup was broke (or at least breaking me), and I didn’t fully realize how much better things could be until I made the leap. The future of campervan power is lithium – and with prices coming down and features like self-heating making them all-weather capable, there’s little reason to stick with antiquated lead-acid for most builds. If you are planning a van electrical system now, do yourself a favor and strongly consider going lithium from the start. And if you’re a fellow winter warrior who has been limping by on lead-acid, I can’t emphasize enough how much this upgrade could improve your daily life.
In the end, the Renogy 200Ah self-heating LiFePO₄ battery has proven itself to me. It kept my winter campervan battery setup running smoothly through some of the coldest, darkest weeks of the year. No more emergency cafe trips just to charge my laptop, no more shivering in the dark to conserve power. I can enjoy the comforts of my cosy van, even as the snow piles up outside. That, to me, is worth every penny and effort spent on this upgrade.
Still unsure how to design your van electrics?
Start with the free wiring diagrams below.
Want to build your van electrical system properly from start to finish?
The Van Electrics Masterclass shows you exactly how to design and install a safe, reliable electrical system — step by step.
Until next time.