
A Complete Guide to Campervan Insulation (2026)
- Shane Monks O'Byrne
- Nov 10, 2022
- 23 min read
Updated: Apr 8
Van conversion insulation is absolutely critical to building a cosy campervan. In this guide we will look at the best campervan insulation on the market. We'll go over the theory behind van conversion insulation and give installation instructions for insulating your van's roof, walls, and floor. By the end of the article, you'll be ready to insulate your van in time for winter. Read more about campervan winterization here. For a detailed look at insulating your van's floor, have a look at our new step-by-step van floor insulation guide.

Shane is an NCC-certified electrical installer.
He has built, taught, and lived in campervans since 2019.
This post contains affiliate links. We may earn a commission at no extra cost to you. To understand our policies on content, affiliate commissions, and liability, please review our Terms of Use.

In this guide
In Summary: The Best Campervan Insulation
We're going to be diving deep into all things insulation in this article, giving you a very thorough understanding. If you'd prefer to cut right to the chase:
I recommend using Polyiso foam board fixed with insulation stick pins for most of the big exposed areas in your van. It is particularly useful for van floor insulation and for the roof.
For tight areas and air gaps, I recommend using 3M Thinsulate or Hempitecture HempWool.
I recommend installing a draught excluder to stop heat transfer around the doors.
Make sure you have reflective window covers, or install a double-glazed window like the Dometic S4.

What is Insulation?
Insulation is any material that is designed to prevent heat transfer. This could be keeping heat in for the purpose of keeping your van cosy in winter or keeping heat out to stay cool in summer.
What to Consider When Choosing Camper Van Insulation
There are 7 things we should consider when choosing van conversion insulation:
Thermal properties: How 'insulating' is it?
Ease of installation: Will it fit where we need it to go?
Health risks: Will it cause itchiness or chemical off-gassing?
Fire resistance: Is it flammable?
Water absorption: Is it hydrophobic or hydrophilic?
Eco-friendliness: Was it sustainably made and is it recyclable?
Cost: Everything comes at a price.
In the Roaming Home 2023 study, we found that recycled plastic was the most popular thermal insulation (41% of vans), followed by polyiso board (21%).

Camper Van Insulation Compared
Below is a table comparing almost every van conversion insulation material on the market. Throughout this guide we will explore the pros and cons of each option and discover the best campervan insulation.

A Crash Course in Insulation Iheory
Before we hop in and look at specific insulating materials, it is important to understand some of the key concepts behind the surprisingly complex world of insulation.
Thermal Conductivity (k-value)
Different materials conduct (or transfer) heat at a faster or slower rate depending on their thermal conductivity. A lower thermal conductivity (k-value) results in a lower rate of heat transfer and yields the best campervan insulation.

From the table above, we can see that wool, air, and styrofoam are excellent insulators while the materials at the top (brass, copper, etc.) are very poor insulators.
The key takeaway here is that metals are very poor insulators. Heat can pass through them easily, so we need to make sure to use the best campervan insulation possible to prevent this.
R-value
R-value refers to a material’s ability to resist heat transfer at a certain thickness. It takes the K-value and the thickness of the object into consideration. A higher R-value will yield the best campervan insulation. R-value is the most common value we refer to when discussing insulation.
Heat Transfer Processes
Conduction: The transfer of heat by direct contact
Convection: The transfer of heat via air or water
Radiation: Heat that travels in the form of infrared waves
In order to get the best van insulation, our goal is to reduce all three of these factors as much as possible.

1. Conduction
By understanding K-values and R-values we already have a good understanding of how to reduce conduction to give us the best van conversion insulation. By putting an insulating material on the bare metal of the van, we can slow the transfer of heat by conduction.
It is important that we insulate as much of the van as possible, as anywhere left un-insulated will act as a thermal bridge. A thermal bridge is an area of an object which has higher thermal conductivity than the surrounding materials, allowing heat to pass more easily. It is the path of least resistance and might be a spot we can't insulate, like a metal strut.

2. Convection
Most of us know that hot air rises while cold air sinks; this is known as convection. This happens because hot air is less dense than cold air.
Air Loops
Inside the hollow structures of a van, such as the metal support frames, this convective movement of air causes a phenomenon known as air loops. Warm air rises up by convection, then cools and drops as it comes in contact with a cold surface by conduction. This causes a looping movement of air.

Air loops can greatly affect the efficacy of van conversion insulation. To get the best campervan insulation, we need to reduce air loops as much as possible.
In practice, this means filling any cavities in the van with insulation to reduce the effect. Make sure you fill the cavity as fully as you can, for air loops can still occur around the insulation if it doesn't fill the entire area. At the same time, make sure you don't squash and compress insulation material to fit the space. Compressing insulation increases its density and reduces the R-value. Leave the insulation nice and loose and fluffy.

Draught Exclusion
Another place we typically find convective heat transfer is anywhere air can flow from the inside to the outside of the van. Apart from the obvious fan in the roof, the air gaps around the side and back doors allow a large amount of heat transfer to occur.
In order to get the best campervan insulation possible, we need to cover these air gaps. The air gaps around doors are particularly malicious when there is a large temperature difference between the inside and the outside of the van. There are three ways you can block a draught in a campervan:
1. Furniture
The best way to block air flow through the door gaps is with a physical barrier like furniture. In my van, I built storage at the back doors to stop the draught. I noticed a huge difference in van temperature after I built these.

2. Draught excluders
Draught excluders are the bomb. They are a really cheap and effective way to stop heat transfer. In fact, these alone could be the best campervan insulation method. Do yourself a favour and grab a set.

3. Wall hangings
This simple hack can make your campervan a lot warmer! Hang tapestries over the side and back doors to stop the draught and act as an insulator. The thicker the tapestry, the better the draught exclusion. You can hang the tapestry up using screw hooks.
3. Radiation
Radiative heat transfer is a process where heat waves may be absorbed, reflected, or transmitted through a colder body. Hot bodies like lightbulbs, a fire, or the sun emit electromagnetic heat waves.
Some materials are particularly good at blocking radiative heat to pass through (white and reflective materials), while others are very poor (transparent and black materials).

Emissivity (e-value) is the value given to an object to describe how susceptible it is to emitting and absorbing radiative heat. The e-value is a scale from 0 to 1; a lower number means a material will absorb less heat. In order to get the best campervan insulation possible, one should also consider radiative heat transfer.
In practice, this means using a reflective material like Reflectix or Low-E to reduce radiative heat transfer. You can also buy foil-faced PIR foam board, which combines conductive and radiative thermal insulation.

Radiative insulation like Reflectix only works when there's an air gap between it and the next layer. If you're using solid insulation like foam board everywhere in your van, Reflectrix isn't necessary. If you're using softer insulation like Thinsulate or plastic wool, Reflectix can be useful as a base layer. Many people using soft insulation line the entire inside of their van with Reflectix before installing anything else.
Thermal Imaging
Reddit user u/PlasticBarista borrowed a thermal camera to see how his campervan fared. The results were fascinating.


Here are the key takeaways from the thermal imaging:
The thermal bridging of the wooden framing is clearly visible. Everywhere the wood touches the metal, heat is escaping.
More heat escapes up high, rather than down low.
A lot of heat escapes through gaps in doors, particularly high up in the van. The top of the back doors seem to allow the most heat to escape.
A lot of heat escapes through the glass and through the roof fan (not shown in the photos above). This highlights the importance of window covers and installing a fan cover. It also demonstrates the value of double-glazed windows like the Dometic S4, whose insulation factor is more than twice that of signle-glazed windows.
Moisture Control
The topic of Reflectix leads us nicely onto moisture control. It is imperative that you keep moisture as low as possible in a campervan.
Doing so increases the life of your vehicle, improves the efficacy of some types of insulation, and decreases the chance of mould and rot. There are four things you can do to protect a van from moisture:
1. Keep it warm inside
The first and most important way to control moisture in a campervan is to keep it warm inside. Warm air can hold more moisture than cold air, which means that instead of water condensing on surfaces, it is held in the air. Mould grows when water is present on insulation and wood for too long. If your heater has a thermostat on it, leave it on the lowest setting even when you['re not in your van during the cold months.

2. Ventilation
Ensure you have ample ventilation inside. Optimally, you want at least one air inlet and one air outlet to allow proper ventilation. This could be a fan and a sliding window, or something similar.

It is common to install a floor vent in a van, as this allows you to take in cool air from under the van during the summer months. Read more about ventilation in our guide on fans and venting.
3. Buy a dehumidifier
I have a dehumidifier in my campervan and it has been a lifesaver during the wet months. It just sits there, running silently, sucking water out of the air. It's a simple and effective way of keeping the inside of your van dry.

4. Use a vapour barrier
Vapour barriers are another controversial technique used in van conversion insulation. When done right they are highly effective, when done wrong they are detrimental.
A vapour barrier is a material that wraps the van conversion insulation and prevents moisture from getting to it. It's common to use Reflectix on top of the insulation layer as it can double up as a radiative heat transfer barrier on exposed surfaces.
In theory, vapour barriers can be super effective. The problem is that most people will probably not get a perfect seal, which causes a big problem as water gets trapped in the insulation and can't escape. Only install a vapour barrier if you are absolutely sure you can get a 100% seal. Else, it is better to just let the insulation breathe.
We recently published a very comprehensive guide to vapour barriers, including details on how they work, who they're for, who they're not for, and how to install one perfectly. Check it out here.
Types of Insulation
There are many types of insulations used in residential and commercial projects. However for the purpose of van conversion insulation, we can concern ourselves with just four:
Foam board
Van insulation roll
Spray foam van insulation
Loose fill insulation
Foam Board
Foam board insulation is an incredibly popular form of van conversion insulation due to its efficacy. It is a rigid panel of insulation that is made of either polystyrene, polyisocyanurate, or polyurethane. There are three types of foam board insulation:
XPS board
EPS board
In our 2023 study, we found that 21% of vans use polyiso board, 18% use XPS board, and 12% use EPS board.

Pros
Foam board is an excellent insulator, with some of the highest R-ratings
Foam board has good resistance to mould
Foam board is a rigid surface that is excellent at preventing air leaks
Foam board is frequently lined with a reflective foil which lowers its e-value and reduces moisture uptake
Cons
XPS and EPS foam board insulation are a bit of an environmental disaster due to their hydrofluorocarbon content. Polyiso is much better.
Can be more expensive than other types of insulation
Brittle

What is the Best Foam Board Insulation?
Polyiso board (PIR) is the best foam board insulation, and one of the best van conversion insulations overall. It has a very high R-rating, is fire resistant, and is a lot better for the environment than XPS. The best known polyiso board manufacturers are Kingspan, Ecotherm, and Celotex. Take a look at our article on van floor insulation for a detailed explanation of why we rate polyiso so highly.

Since foam board is probably the best campervan insulation, I suggest using it as much as possible: on your floor, roof, and walls. You can stick the board insulation to a surface using insulation stick pins.

Most insulation products actually perform a bit better the colder it gets, but polyisocyanurate breaks that rule. Below 15°C its performance starts to deteriorate badly. By the time you get down to -20°C it has lost a huge amount of its insulating capabilities. Note that this refers to the temperature of the polyiso board itself. I have used Polyiso in my van in -20°C weather, and it works perfectly as long as I keep the insude of my van warm.
Van Insulation Roll
Van insulation roll, also known as blanket or batt insulation is woolly in texture and usually comes in rolls. The following are all types of batt insulation:
Sheep's wool
Mineral wool
Fibreglass
Earthwool
Recycled plastic
Recycled denim
Batt insulation is excellent for filling awkward spaces in your van, as you can stuff it places that board insulation couldn't go.
What is the best van insulation roll?
3M Thinsulate insulation rolls and Hempitecture HempWool are likely the best batt insulations on the market.
3M Thinsulate is very malleable, has a high R-rating, is water resistant, and poses no health hazard. I suggest getting yourself some rolls of the stuff and using it to fill any awkward spaces in your campervan. It is particularly useful for filling any air cavities in the van, preventing air loops.

In the Roaming Home study, we found recycled plastic to be the most popular batt insulation and fibreglass to be the least popular (for good reason).

Hempitecture HempWool is another excellent insulation option. It's a sustainable choice that stands out for its health and environmental benefits. Made from 90% natural hemp fiber, HempWool is not only safe to handle without gloves but also boasts no volatile organic compounds (VOCs) or toxins. Its superior thermal properties ensure no slumping or sagging, effectively maintaining your van's temperature throughout the year.

Spray Foam Van Insulation
Spray foam van insulation is polyiso foam in a can. It is an expanding insulation that is rather satisfying to use and a powerful insulator. As the foam expands, it forms little bubbles known as cells. The Roaming Home study found that 16% of van conversions use spray foam.

Pros
High R-value
Fits in tight places
Air barrier
Cons
Expensive
Health hazard when installing
Long time to install
Very permanent
Bad for the environment
Closed-cell spray foam can cause 'super-heating' which could cause bulging/warping of the metal of your van. Don’t go too crazy with the spray foam. In extreme cases, it can actually pop the panels off the ribs.
Many people in the van conversion community choose to insulate their van entirely with spray foam. There are two types of spray foam van insulation:
Open cell spray foam
Lower R-value than closed-cell (R-3.8)
Better for the environment
Closed cell spray foam
One of the highest R-values on the market (R-6)
Terrible for the environment
Doesn’t allow water to pass through. If you do a good job spray foaming your entire van, you may not need a vapour barrier
Using spray foam van insulation can be a serious health hazard. Make sure all your skin is covered and you are wearing a high quality mask and goggles when installing. Spray foam off-gases for a few days, so ensure good ventilation during installation and for the following days. It becomes safe when stable.
Expanding foam is tricky to use. I recommend sticking to foam board and batts. Where expanding foam can be useful is filling the hard-to-get-at gaps in your van where you can't even fit batt insulation.
Loose Fill Insulation
Loose-fill insulation is not commonly used in campervans, however it can be a great alternative insulation and is good at filling up little gaps. It is the most environmentally-friendly way to insulate your van. Loose fill insulation is similar in texture to batt insulation except it is 'loose' rather than coming in rolls. You can simply grab a handful of it.

The following are the most common loose fill insulations:
Cellulose
Mineral wool
Fibreglass
Sheep's wool
Pros
Environmentally friendly
Fits in tight places
Cons
Hard to install
Susceptible to moisture - need vapour barrier
Can be a messy installation
Loose-fill insulation is packed into the space behind gardening mesh nailed or stapled to wooden battens. The loose-fill insulation fills the gap behind the netting.

Once the netting is in place, a small hole is cut and a leaf blower or dedicated loose insulation blower is used to blow the insulation behind the netting.
The Environmental Impact of Insulation
The environmental impact of insulation has become a hot topic in recent years. Many homeowners these days are trying to achieve high energy-ratings, typically through proper insulation. This makes the home more environmentally friendly and can actually increase the value of the home.
However, blindly insulating your home with whichever insulation is at hand is not the answer. There are very distinct environmental differences between insulations. When considering the environment in choosing an insulation, we typically consider:
Reducing greenhouse gas emissions
Using recycled or sustainable materials
Reducing Greenhouse Gas Emissions

Some types of insulation have a notoriously bad manufacturing process which emits a huge amount of greenhouse gas. One of the very worst being XPS foam board. It is important that we choose an insulation with a reasonably low GWP (Global Warming Potential). The lion’s share of insulation emissions come from foam insulation. In order to expand the foam, harmful blowing agents are used, hydrofluorocarbons being the most well known and most harmful.
Using Recycled or Sustainable Materials
Another environmental factor to consider when choosing an insulation is the use of recycled or sustainable materials in the manufacturing process. Insulations such as recycled denim, recycled plastic, cellulose, or wool are prime examples.
Health risks of insulation
It is important to consider the health risks when installing and living with insulation. Many types of insulation can be quite harmful.
Fibreglass and mineral wool
Fibreglass and mineral wool should ideally not be used in campervans. This is because the shaking of the vehicle causes glass to come loose and become airborne. Many brands of fibreglass contain formaldehyde, a known carcinogen. There has also been some data come out recently about the adverse effects of mineral wool, with workers handling the compound being at risk of developing acute symptoms as well as developing harmful long term health conditions.

Mineral wool is a good insulator and can be easier to get a hold of than other kinds of batt insulation. If you do use it, it must be sealed in behind a vapour barrier to prevent any of the fibres from escaping.
Spray foam
Spray foam exhibits a lot of off-gassing for a few days after installation. It can be a serious health hazard during this time due in part to the blowing agents, though it becomes safe when stable.
Insulation with fire retardants
Many insulations have added fire retardants to improve their fire rating. Many of these fire retardants are harmful to health. For instance, boric acid is typically added to cellulose insulation. Many types of foam insulation also have fire retardants; Polyiso boards contain TCPP. XPS and EPS boards contain polyFR, an eco-friendly alternative to HBCD that also poses grave health risks.
Here’s what you can do to mitigate the dangers of insulation:
Make sure you wear appropriate PPE gear when installing insulation; mask, gloves, goggles, and protective clothing
Ensure good ventilation in the area you are insulating in the days surrounding the work
Ensure the insulation is sealed behind a protective barrier - a vapour barrier does the job perfectly
Optional: Get a professional to do the job for you.
Fire Ratings of Insulation
All insulations are given a fire rating. This describes how safe the insulation is. The most established fire rating system is the Euro class system. Check to ensure your insulation has a good fire rating before purchasing it. Do not rely solely on the insulation comparison chart in this chapter, as the same type of insulation can have very different fire ratings depending on the manufacturer.
Still figuring out your van build?
This is where most people get stuck — jumping between blog posts, YouTube videos, and forums, never quite sure what to do next.
The Van Conversion Mastery Course gives you a clear, step-by-step system to design and build your van from start to finish — without the guesswork.

How to Insulate Your Van's Floor
Step 1: Lay strips of Reflectix (optional)
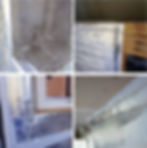
In many vans there are troughs and ridges in the floor. If we place foam board insulation directly on the floor, there will be many air pockets present underneath. We can fully utilise these air pockets by laying down Reflectix to lower the e-value of the floor and trap some air between the floor and the foam. This will give us the best van floor insulation.
Make sure you use foil tape on the ridges between the troughs to get a complete seal.

Step 2: Lay down wooden furring beams
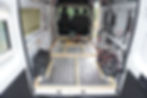
The next step is to lay the foundational wooden furring. Place the wooden frame all around the perimeter of the floor and then proceed to run lengths of it horizontally and vertically on the floor. I recommend using more wood rather than less on the floor. We screw our floorboards and furniture into these beams - it gives the rest of the van structural integrity.
Ensure the height of the wooden furring matches the height of the insulation you will use. For example, I used 5cm polyiso board (Celotex), so I made sure to use 5cm wooden furring.

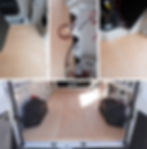
Step 3: Install foam board insulation
Next up is installing the insulation. Using the measurements from your floorplan, cut polyiso foam board to shape so that it fits into the furring cavities.

You can mark a straight line on the polyiso board using a chalk line. Then, cut along the chalk line using a handsaw. Make sure you wear a mask when cutting the insulation.

After you have fitted all the polyiso board, you may still have some gaps in places where the timber is not flush with the foam board. In this case you can fill those gaps with some roll insulation or expanding foam.
Step 4: Install a plywood subfloor
The subfloor consists of sheets of plywood that go under your floorboards. Cut the plywood to shape using a chalk line and circular saw and screw the sheets into the wooden furring.
Accurately shaping your subfloor plywood to your van's floor can be a challenge. There are complex shapes to negotiate around your wheel arches, doors, and at the bulkhead. I have always done this job using a scribe tool, which does work if you get the technique right.

A scribe tool like this one is relatively easy to use and gives you good results as long as you're very accurate with your tracing. In my most recent conversion, I did have trouble with pieces of subfloor which needed to be scribed on more than one side. For example, the piece which sits against the front bulkhead and the sliding door needed to be scribed on both its front and right hand edges to fit into the complex shapes here. I found it difficult to figure out how to offset my scribing so that the scribed shapes were correctly placed on both the x and y axes. The process ended up involving a lot of trial and error and many adjustments.

If I were to do this again, I'd use EXPLORIST.LIFE's brilliantly simple cardboard template method. They used big pieces of cardboard to make a perfect template of the shape of their van's floor. Using a Stanley knife, they gradually trimmed away at the cardboard until it perfectly matched whatever shape they were working on. Once they were happy with the fit, they taped the shaped piece to the next sheet of cardboard until the whole floor was covered. They then pulled the whole cardboard assembly out and traced its shape onto their subfloor wood. It's an elegant solution to a tricky problem, and I wish I'd thought of it myself.
We recently published a new, fully comprehensive article on van floor insulation where we detail the process we followed in our new build. Check it out here.
How to Install Van Wall Insulation
Step 1: Build the wooden support frame
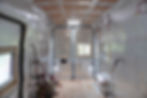
First, we need to build a wooden support frame running up the sides of our van walls. Our cladding or wall material, as well as wall fittings, screws into these beams. I used 2x1 timber for the furring.

The timber is screwed upright along the sides of the van. There will be three levels of timber due to the curvature of the van: lower, middle, and upper. You can attach the timber to the metal rungs of the van by drilling in self-drilling screws. Or, do it the normal way and drill a pilot hole in both the wood and the metal, then screw in a self-tapping screw. I actually prefer the second way as the screws are more sturdy once installed.

Step 2: Install polyiso foam board panels
Most of our van wall can be insulated with polyiso board. Cut the foam board to size with a chalk line and handsaw and stick it on as much of the wall as you can. You can stick foam board to the walls of your van in three ways:
Insulation stick pins (recommended)
Double-sided sticky tape (recommended)

It's worth noting that regardless of how flush to your walls you make your battens, you'll typically have about 10cm of space to fill with insulation. In this van build, I lined the sheet metal walls with 5cm polyiso foam board, and then used wool to fill up the rest of the space. In my new van build, I did two layers of polyiso.

Both of these methods are valid. Packing wool insulation on top of the foam board base is much faster, but polyiso has a much better insulation factor. My new van is designed for winter use in the Alps, so warmth was a priority. However, cutting and shaping all the polyiso board to get a complete fill between the van's external metal and the battens was very, very time consuming. If you're not planning on using your van in cold climates in winter, I'd suggest that an initial layer of polyiso with batt insulation on top is fine.
Step 3: Fill the gaps with batt insulation or spray foam
Inevitably, there will be gaps on the wall where foam board can't go. Fill these gaps with batt insulation; 3M Thinsulate and Hempitecture HempWool are the absolute best option for this job. If there is any tight gap where Thinsulate or HempWool won't fit, you can use spray foam van insulation.

Remember that our goal here is to insulate as many pockets of air as we possibly can. We need to prevent air loops in as many places as possible.
Note that if you use rock or mineral wool for your batt insulation, your van's vibrations will shake it loose over time, producing microscopic fibres which are a serious health hazard. In that case, you'll need to install a vapour barrier on top of your insulation layers to keep the rock wool in.
Step 4: Add a vapour barrier (optional)
The last step is to add a vapour barrier to prevent moisture from getting into the insulation, or to keep rock wool sealed in. If you only used foam board or spray insulation and not batt or loose-fill, you probably don't need a vapour barrier. Sheep’s wool also handles moisture well. We've got a full article on vapour barriers, when and how to install them, and our preferred materials; check it out here.
Remember, if you are going to install a vapour barrier, make sure you do it right. Otherwise, just let the insulation breathe.
Cut lengths of Reflectix with scissors and stick it to the wall with foil tape. Make sure you cover every single gap and make it airtight.
How to Insulate Van Doors
First, remove any plastic or ply lining that may have come stock with the van. This gives you access to the interior of the door. Check the lining around the door to see if there are any air gaps where moisture and cold air could get in. If there are any gaps, seal them with tape, or do a super permanent job with metal epoxy putty. Then, fill the interior with insulation - polyiso and batt insulation should do perfectly.

How to Insulate Van Wheel arches
The wheel arches are a rather awkward space in a van. There are a few different techniques you can employ to insulate them. I built a wooden frame around each wheel arch, ply-lined it, and filled it with wool insulation. If you want to get fancy and efficient, you could use the awkward space to house wheel arch water containers.

How to Install Van Roof Insulation
Step 1: Install the wooden support beams
The first step is to install the wooden support beams along the roof. Make sure that the timber beam you use matches the depth of your foam board insulation.

You will find 4-5 metal structural support beams running up the length of your van. The wooden furrings will be bolted to these support beams. Drill into the metal support beams from each side of the metal so that we can slot a bolt through.
You must slot a bolt right through the structural support, rather than simply screwing into one side of it.

Drill the same sized hole in the appropriate location on the timber furring and slot a long bolt through the wood and metal. Screw on a nut to secure it in place.

Step 2: Stick strips of Reflectix to the troughs in the roof (optional)
Like with the floor, there are ridges and troughs in the roof. There will be a small air gap in the roof when we install our polyiso board insulation; we can fully utilise this air gap (lower the e-value and create a small air insulator) by sticking Reflectix to the roof.
Step 3: Stick polyiso foam board to the roof
You can stick foam board to the roof of your van in three ways:
Insulation stick pins (recommended)
Double-sided sticky tape (recommended)

Stuff any air gaps with 3M Thinsulate, Hempitecture HempWool or spray foam. Seal up any gaps in the insulation with foil tape.
How to Insulate the Bulkhead of a Van
The bulkhead is the big cavity above the cab, and is a tricky shape to insulate.
Stick wood furring (same depth as the board insulation) to the roof and base of the bulkhead with Sikaflex (you will need to prop the roof furring up with something while it dries).
Stick polyiso board to the base and roof (using stick pins or similar). Alternatively, you could use spray foam, which will be easier to install due to the curvature of the roof.
Ply-line the inside of the bulkhead.
Sound Deadening
Vans can be noisy, rattly things when you are driving. Sound deadening mats reduce noise while on the road substantially. I definitely recommend installing some. Read more about how to sound deaden your van here.

Conclusion
This article should have told you everything you know about insulating your van. If you're curious about sound deadening, which should be done before insulation, check out our guide article here. We also highly recommend checking out our new ultimate guide to van floor insulation for a much more detailed look at that aspect of your build. If you're still confused, check out our insulation masterclass for an in-depth, step-by-step course on insulating your van.
Planning your van conversion?
Start with the free Van Conversion Diagram Pack below.
Want a clear step-by-step path for your full build?
The Van Conversion Mastery Course walks you step-by-step through the entire build process — from planning and layout to electrics, insulation, water, gas, carpentry, and more.
Until next time.