
The Ultimate Guide to Campervan Water Systems
- Shane Monks O'Byrne

- Oct 13, 2022
- 36 min read
Updated: Apr 8
Hot water, cold water, showers, campervan taps, pumps, waste water, filtration, piping, and much more. This guide is your complete one-stop shop for campervan plumbing. Learn everything you could ever want to know about campervan water systems with the help of our campervan plumbing diagrams and explanations of all the key components.

Shane is an NCC-certified electrical installer.
He has built, taught, and lived in campervans since 2019.
This post contains affiliate links. We may earn a commission at no extra cost to you. To understand our policies on content, affiliate commissions, and liability, please review our Terms of Use.

In this guide
Supplies List
 | For filling up with water |
|---|---|
 | For holding fresh water & grey water |
 | Selection of bulkhead fittings Fittings for inlets and outlets on the water tanks. 0.5-1.5 inch required. |
 | For displaying water levels in the tanks |
 | For displaying water levels in the tanks |
 | For allowing water to be drained for the grey water tank without 'glugging' |
 | For piping hot and cold water around your water system |
 | Selection of barb-to-pipe fittings For connecting PEX pipe to bulkhead fittings and appliances |
 | For navigating joints in your campervan water system |
 | For preventing the back-flow of hot water |
 | A few barbed valves For inline valves and drains |
 | Mute the noise from the diaphragm water pump |
|---|---|
 | For protecting your campervan water pump kit from particulate matter |
 | Diaphragm continuous pressure campervan water pump |
 | For connecting shurflo pump and accumulator |
 | For reducing wear on the water pump and making water flow consistent |
 | Remove water contaminates to 0.5 microns |
What is a Campervan Water System?
Simply put, a campervan water system pipes water from a storage container out to a tap or shower. A simple water system may just have a foot pump and cold water going out to a tap, while a complex system will have a diaphragm pump feeding hot and cold water to a shower and sink. The complexity you wish to add is up to you.
Four Campervan Water Systems
1. The Water Dispenser
Okay, it’s not really a ‘plumbing system’, but it is as simple as it gets! You can pick up a water dispenser bottle online very cheaply. Put water in the top, get water out the bottom. No more need be said.

2. The Foot Pump
The manual foot pump is a nice option that gives you cold water flowing out to a campervan tap. No electricity is required because the pump is operated manually with your foot! We have two large plastic portable containers, one for grey water and the other for fresh water. Whale is a popular manufacturer of foot pumps. The one shown in the diagram is the ‘baby foot pump’, you could also purchase a ‘gusher foot pump’ which delivers more water.

3. The 12v Submersible Water Pump
The 12V submersible water pump is a really great option that gives you cold water flowing out to a microswitched faucet. The 12V campervan tap is connected to a submersible pump, when the faucet is turned on, water flows! The submersible pump simply sits in a large plastic portable container full of fresh water. We will look at the wiring of the microswitch faucet later in this guide. Whale also makes the 12v submersible water pump.

4. The Heated Sink and Shower - Campervan Water System Diagram
This is the god-tier campervan water system. This system gives you pressurised hot and cold water running out to a sink and shower. There are mounted fresh and grey water tanks; the fresh water tank is filled from an inlet in the side of the van and has an electrical water level gauge. The grey water from the sink can run either to our grey water tank, or outside the van. The cold water running to the sink tap is filtered, and we can get a mix of hot and cold water (to our liking) to our pressurised sink and shower.
Wow. How good does all that sound!
Though this campervan plumbing diagram can be a little complex to understand at first, it is incredibly fun and rewarding building the system; it feels like plugging Lego blocks together. We are going to go deep on the different components of this system throughout the chapter.

What Do I Need for a Campervan Water System?
Now that we have seen the four campervan water systems, let's explore some of the components of each diagram. We will explore the following essential concepts in depth:
Fresh water tank
Grey water tank
Water pump system
Sink and faucet
Water heater
Shower
Water piping
Pipe fittings
Water level gauge
Water filtration
Pipe insulation / heating
Water tank sanitisation and smell management
Let's go!
Campervan Fresh Water Tank
Surprise, surprise; a fresh water tank holds fresh, potable water… It is the most essential part of a campervan water system
Sizing a Fresh Water Tank

Generally there are three sizes of campervan water tank: small (5L), medium (20L), and large (75L). I personally have four portable 20L fresh water containers in my campervan. If I were to do another conversion, I would install a large 75L fixed fresh water container instead and add a fill point in the side of the van.

Where should I put the fresh water tank in a campervan?
You have two options for where to put your fresh water tank:
Inside the van
Underslung to the bottom of the van
Having a campervan water tank underslung (undercarriage) to the bottom of the van is a little more complex to install, but a really nice option that gives you more space inside the van.
Northwest Conversions sell undercarriage water tank kits that are excellent quality and easy to install

However, if you are a winter vanlifer (like me) an underslung water tank is probably not the best idea as you are pretty snookered if it drops below freezing outside! Indeed, Winter vanlifers should keep all parts of the water system inside the van. Installing your fresh water tank inside the van is a safer bet and an easier install.
Note: If you are installing an underslung tank, make sure it is opaque (ie. not clear). Clear tanks in the sun will quickly grow algae which is very harmful for your health if drunk.
In the Roaming Home 2023 study, we found that 62% of people install their campervan water tank inside, 38% install it underslung to the vehicle.

Small/medium campervan water tanks can simply be housed directly under the sink. Larger water tanks are normally housed at the back of the van and out of the way.
Let's look at how to mount a large water tank under a van.
Anatomy of a large campervan water tank
A large fixed campervan water tank should have four water outlets:
A Large filling inlet, where we fill the tank with water. This is normally piped to the water filling inlet installed in the side of the van
A smaller outlet running to the appliances (shower/tap)
A vent outlet (the water that runs out of the tank needs to be replaced by air). If you have a filling inlet in your van, it often comes with a vent pre-installed which means you don't have to install a custom vent
And sometimes a drainage outlet which is used when you want to drain the water tank for cleaning

Note: A campervan water tank filling inlet and outlet drain operate by gravity. Ensure your filling inlet is mounted higher than the water tank, and ensure your drain outlet is mounted lower than the tank.
If you are based in North America, you may be inclined to install a city water entry socket. This is a pressure reducing water inlet that allows you to hook up to city water mains (unlimited water!)

A large water tank may also have metal water level probes pre-installed on the side. These metal bolts (with spade connectors on the end) are in case you want to install a water level sensor in your van. We will look at how to install a water level sensor later in this guide.

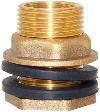
How to manually install inlets in a campervan water tank
Sometimes you will end up with a blank water tank that has no outlets pre-installed. In this case, you will need to install them yourself. This can actually be a good thing as it means you get to choose the diameter of the outlets, rather than relying on the supplier.
If your campervan water tank does not have outlets, you can easily install them by first cutting out an appropriate sized hole in the plastic container with a hole saw. The holesaw you use should match the OD (outside diameter) of the outlet fitting you will be using. eg. if the OD of the fitting is 1", use a 1" holesaw!

Next install an appropriate outlet fitting. Here are the typical sizes we use for the inlets and outlets for our fresh water and grey water tanks.
Fresh water tank fittings
Water outlet: 1/2" water tank connector fitting
Water inlet: 1.25" water tank connector fitting
Grey water tank fittings
Grey water inlet: 1.25" water tank connector fitting

The campervan water tank connector comes with a backing flange that normally goes inside the container and into which we screw. However, if you have no access to the inside of the water container (because there is no access hatch installed), worry not! Without using the backing flange, you can still screw the fitting into the cavity you cut in the container. If you have used the appropriate hole saw size, you should have a perfect seal. Make sure the rubber O-ring is placed between the connector fitting and the water container to get a nice seal.
If the cavity in the water container is a little small, you can heat the plastic a little (using a small blow torch) and then tighten the fitting in place (a pipe wrench is best to tighten fully). If you heat the plastic first, you are actually doing some minor plastic welding which can improve the seal.
After the fitting is in place, I would recommend adding sealant around it to ensure a watertight joint.

How to install an underslung campervan water tank
Broadly speaking, there are two ways to underslung a campervan water tank to a campervan:
Option 1: Mounting brackets and hook bolts
This is the most sturdy way to install an underslung water tank, however you need to make sure the mounting brackets are perfectly sized for the water tank you have; this can be a challenge if purchased separately.

To install the mounting brackets, we will need to drill some holes on the underside of the van (be very careful where you drill!). The hook end is placed into the drilled hole and simply hangs there. The water tank is then placed against the underside of the van, and the brackets are secured (thus holding the tank) onto the hook bolts using the nuts provided.
The undercarriage water tank from Northwest Conversions comes with mounting brackets and bolts.
Option 2: Hanger straps
Hangar straps may be a little less sturdy, but are guaranteed to work no matter what size campervan water tank you have.

How to mount a fresh water tank inside your van
Some people choose to keep their fresh water tanks inside the campervan, either for ease of installation, or because of freezing conditions in winter. If you choose to mount your campervan water tank inside, make sure you secure it tightly to the vehicle so it doesn't move when driving. You can use cargo lashing straps to keep it in place (these can also be used to secure your gas bottle).

Wheel well water tanks
If I were able to go back in time and redo my water system, I would most certainly add wheel well water tanks. These days they have become increasingly popular due to their efficacy in using up a really awkward space! I really couldn't vouch for them any more. Northwest Conversions also make these wheel well water tanks.

Campervan grey water tank
A grey water tank holds all the dirty water that pours down the drain from your sink and/or shower. Note that this is not the same as a black water tank (which holds the waste from your toilet). We will not be discussing black water tanks in this chapter.
The grey water tank is usually a little smaller than the fresh water tank, the sizings tend to be the following:
Small grey water tank: 5L
Medium grey water tank: 10L
Large grey water tank: 45L
The specifications and mountings for a grey water tank are much the same as a fresh water tank. The main difference is that a grey water tank is more likely to have an access hatch to allow you to get your arm in there and give it a good clean. If it doesn't have one, you can use a hole saw to cut an appropriately-sized hole in the container. Add a bead of sealant around the new hole, and then simply pop the access hatch into the cavity. If the fit does not feel solid, you can also screw the access hatch into the container (add a bead of sealant over the screw heads when you're done).

Air vent
The filling inlet point contains the air vent required for the fresh water tank.
However, we will need to install an air vent manually on our grey water tank. This prevents ‘glugging’ when we are draining the tank. It is a simple installation. Just like the other inlets and outlets of the water tanks, we will need to install a water tank connector fitting first. We then screw an air vent into that connector fitting.

Drain
We also need to install a drain on our fresh and grey water tanks. For this we will connect some 1.25" PVC pipe to the grey water tank with a 1.25" PVC-to-pipe fitting. This PVC pipe runs outside our van to a spigot. We can secure / mount the spigot to the underside of the van using P-clips.

Electric drains
Okay, so electric drain valves (solenoid valves) are entirely optional (and not included in the plumbing diagram supplied). However if you are building out the ultimate-bells-and-whistles campervan... why not? With the flick of a switch you can drain your grey water tank (make sure your van is perched somewhere that is okay to drain!).
The installation is quite simple. Using a PVC-to-pipe fitting, we connect the PVC drain pipe to each side - one coming from the grey water tank, and one running out as the mouth of the drain.

Note: When we are connecting two plumbing components together (eg. the solenoid valve and the pipe-PVC fitting), it is very important that the components are made of the same material. Metal to metal, or plastic to plastic. Never connect plastic and metal fittings together or you risk threading the plastic fitting and creating a leaky connection.
Campervan water pump system
Next, let's look at the three types of pumps related to the plumbing diagrams shown at the start of this chapter: manual pumps, submersible pumps, and diaphragm pumps.
In our 2023 study, we found that of those with a water system, most people install a diaphragm pump (48%), followed by the submersible pump (46%).

Manual water pumps
There are three types of manual water pumps, all of them are very straightforward to plumb. The three types of manual pumps are:
Whale is the most popular manufacturer of manual campervan water pumps.
Baby foot pumps
The baby foot pump is the cheapest campervan water pump. It is not very powerful in terms of how much water it delivers, but it is very small! The baby foot pump has a 1/2" barbed inlet and outlet, onto which we attach 1/2" PEX tubing. The inlet side runs to our water container, the outlet side runs up to our cold-only faucet. We attach PEX pipe to the faucet with a 1/2" barb-pipe connector fitting. We will be discussing connector fittings and how to use them at length later, so don't worry about the 'how' for now.

Gusher foot pumps
The gusher pump is plumbed in the exact same manner as the baby foot pump. However it is a far superior pump, normally delivering 4 gallons of water per minute!

Faucet pumps
The faucet pump is really handy! It combines a manual pump and faucet into one! And the plumbing is even easier than the other two options. We simply run 1/2" PEX tubing from the water container up to the faucet. That's it.

12V submersible water pump
This is the style of water pump I have in my campervan. I really like it - cheap, cheerful, and it does the job. The 12V submersible water pump is connected with 1/2" PEX tubing to a special 12v electric tap (microswitch tap). Shurflo's electric faucet is commonly used, however I personally think this one looks a bit nicer.

To wire a submersible pump to a 12V microswitch tap all we need is a strip connector with three pins. Here is the wiring diagram:
How to wire a 12v submersible water pump
To wire a submersible pump to a 12v electric tap all we need is a strip connector with three parts. Here is the wiring diagram:

If you haven't read this guide on connecting wires, go check it out. It explains how to use strip connector blocks and ferrules (the wire connector needed for the installation).
Diaphragm 12V water pumps
The diaphragm 12V water pump is used in a campervan water system with a heated sink and shower (the fourth campervan plumbing diagram).

Let's zoom in on the campervan water pump part of the diagram. The component marked 'shurflo pump' is the diaphragm 12V water pump.

There are four key components to a campervan water pump system:
I would recommend buying the brand Shurflo for all of the above four items. If you only buy Shurflo, you can be sure that the appliances will connect together very easily.
Pump silencer
A pump silencer is designed to reduce noise and vibration in plumbing systems. Diaphragm pumps can be quite loud - these devices help! They are simple hoses that reduce the rattle.

You should buy two pump silencers (they normally come in a pack of two anyway). The first silencer goes on the water tank side of the pump system, the other goes on the sink/shower side of the pump system.
The first pump silencer screws directly into the water strainer, the second pump silencer screws into the accumulator. The pump silencer has 1/2" fittings, in keeping with all Shurflo appliances.
Campervan water pump strainer
A water strainer keeps your pump clean, clear, and eliminate unnecessary repairs by keeping debris and other particles out of the pump. The bottom of the strainer is transparent so you. can see when you need to clean it. It simply screws directly onto the diaphragm pump.

Note: Ensure you arrange all strainers and filters upright. This is for two reasons;
Firstly, when you service them they will be full of water, if they are not mounted correctly, they will spill their contents everywhere when you unscrew them!
Secondly, mounting them horizontally puts unnecessary tension on the threaded connection. When they are filled with water they are considerably heavier and over time could break the plastic thread with the abuse of being in a bouncy van.
Diaphragm 12V water pump
A diaphragm 12V water pump operates like the diaphragm in the human body; when the diaphragm expands, air enters the lungs / water enters the pump. When the diaphragm contracts, air leaves the lungs / water is pumped out to appliances. A diaphragm pump keeps the water system pressurised at all times. It is just like having running water in a house.
The diaphragm pump is a 12V electric appliance, accordingly, it needs to be connected to power from our 12V leisure batteries. A diaphragm pump has no ON/OFF switch built in. It starts automatically when the pressure drops, and it shuts-off automatically when the appropriate pressure is reached. That being said, you should probably run the pump to a switch so that it can be turned OFF when you're not using your campervan or to prevent the pump from running indefinitely when the fresh water tank is empty.

The self-primed Shurflo diaphragm 12V water pump pumps 3 gallons per minute at 45 PSI. It has a built-in check valve to prevent back-flow and is relatively low-noise when compared to other makes.
Accumulator
An accumulator is a mechanical device that smooths out the flow of water from a diaphragm pump. Because a diaphragm pump pumps like lungs or a heart, it causes water to eject in spurts. The accumulator fixes this issue. It has the added benefit of increasing the lifespan of your pump, saving battery power, and reducing the noise of the pump.

The accumulator is attached to the diaphragm pump using a Shurflo pipe-barb wingnut connector on each appliance (with a short length of 1/2" PEX pipe connecting the two).

How to pressurise an accumulator: The accumulator comes depressurized out of the box, so you will need to pressurise it. First connect up the accumulator to the system; leave all faucets and valves in the campervan water system open. Next, you will need to pump up the accumulator, just like you would a football! Pressurise the accumulator to 30 PSI. An air compressor will do the job perfectly. An all purpose air compressors will do the job perfectly.
Barbed valves
As you may have seen from the campervan plumbing diagram at the beginning, there is a barbed valve (1/2") on either side of the diaphragm pump system. This allows us to isolate and empty the campervan water pump in order to clean it or repair it if needs be.

Sink
Let's explore sinks and campervan taps. You can read the full guide to campervan sinks installations here.
The sink one chooses for their campervan is more a matter of interior design (and budget) rather than functionality.
Broadly speaking, you have two options:
Sink only
Sink & faucet combo sink
Still figuring out your van build?
This is where most people get stuck — jumping between blog posts, YouTube videos, and forums, never quite sure what to do next.
The Van Conversion Mastery Course gives you a clear, step-by-step system to design and build your van from start to finish — without the guesswork.

Sink only
If you choose this option, you will need to do all the plumbing yourself - nothing will come pre-built. However it does mean you can buy a beautiful/ornamental sink to make your van really pop. The TORVA sink also comes with a drain assembly for easy installation.

Classic campervan sink with built-in faucet
This is the most common sink you will find in campervans around the globe. It has a lid which folds down (giving you more room in the kitchen). It also has a built-in hot/cold faucet (you can get a cold-only version too). The faucet is electrical, thus wired in the same we saw for the submersible pump. However if you are using this with the hot/cold sink & shower campervan water system (aka a pressurized water system), you don't need to wire up the tap switch.

Tec Vanlife Sink - Sink with extendable faucet
The Tec Vanlife sink is one of the more useful things you can install in your van. The faucet is extendable which makes washing your dishes a lot less of a headache. It also comes with a bamboo chopping boards that sits flush into the sink when not in us. A great use of space.

Sink drain
Needless to say, the drain is a vital part of any sink. The drain in a campervan water system runs out to the grey water tank (or outside the campervan if we are installing a more sophisticated system).
To install a sink drain we need two components:

The drain assembly is placed inside the sink (from above) and the backing flange is screwed into the assembly from below. Plumber's putty should be used for this connection - it is applied to the inside of the drain assembly as shown in the image below.

Smell management
U-bends
A U-bend/P-trap is a U-shaped piece of pipe (normally PVC) that goes under your sink. A U-bend constantly has some water in it (from whenever you last used the sink). The point in this water is to stop odours from the grey water tank from escaping up the drain pipe.

HepVo valves
In vans, HepVo valves are more commonly used. They are super compact U-bends purpose built for campervans! They prevent odours and liquids from coming back up the drain.

The HepVo trap is connected to the drain assembly and to PVC piping running to the grey water tank.

Split drain
A split drain is a Y-valve that allows us to route the drain water either to our grey water tank, or simply outside the van (if we are in a location where it is okay to do so!).

Exterior drain
We run 1.25" PVC pipe down to the Y-valve. From here, we run another section of PVC pipe outside the vehicle. The PVC pipe can be secured to the underside of the van with P-clips.

You will probably need to use a couple of angled PVC fittings to get the pipe to go where you want. We will be discussing these later.
Grey water tank drain
On the other side of the Y-valve, we run a length of PVC pipe to our grey water tank. It connects to the tank with a 1.25" pipe-PVC fitting and a tank connector.
On the way to the grey water tank, we install a check valve. A check valve prevents the backflow of water in the system.
Campervan tap
There are four types of campervan taps we can consider for a van conversion:
Pump faucet
Microswitch faucet
Heater faucet
Regular faucet
Pump faucet:
We saw the pump faucet before, it allows us to manually pump water from the faucet itself.

Microswitch faucet:
We also saw the microswitch faucet before. This faucet is required if we are using a submersible pump. Electric microswitch faucets are generally cold-only.
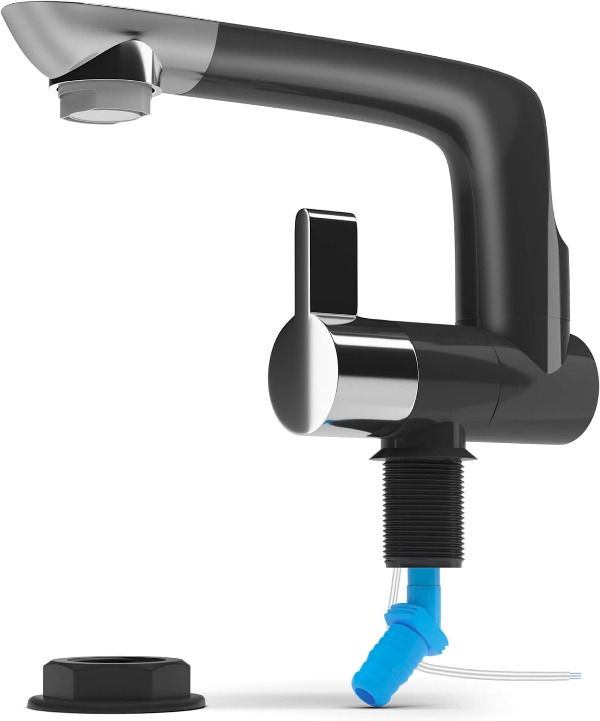
Both a pump and microswitch faucet are quite simple to install. We run a length of 1/2" PEX pipe to the cold-only faucet directly from our fresh water tank. The microswitch pump is wired up to our batteries per the wiring diagram we saw previously.
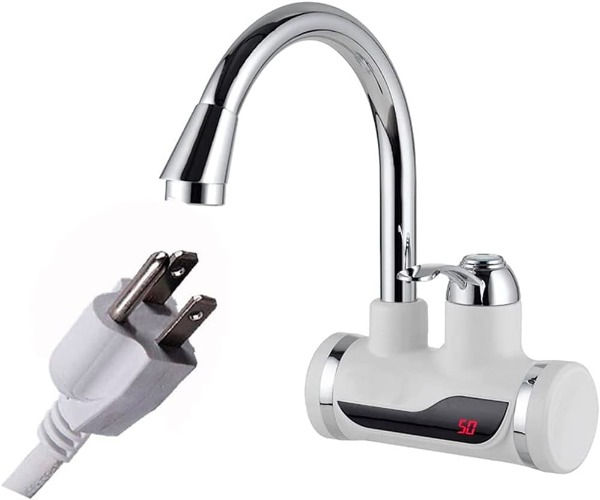
Heater faucet:
The heater faucet is really cool. You plug it into an AC plug socket (inverter) and you get immediate hot water straight from the tap! It heats the water in less than three seconds and even tells you the temperature of the water on a digital display. Really, really unreal.
Note: You need at least a 3000W inverter to use this type of faucet as the device is typically rated at 2500W.
Another note: You could get away with using a submersible pump with this type of faucet (rather than the diaphragm system), however you would need to install a switch for the pump as the heater faucet does not have a microswitch. In other words, you would have two gadgets to operate the faucet: the switch to operate the pump, and the faucet lever to control the temperature and allow flow.
Here is a guide on how to install an inverter if you are interested in setting one of these bad boys up!
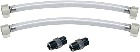
A heated campervan tap only has a single cold water pipe running to it. A faucet connector pipe is used to connect the water source to the faucet. We then connect a 1/2" PEX pipe to the faucet connector using a metal barb-pipe fitting.

Regular faucet:
The last type of faucet is just a plain ol’ regular faucet. There is no electric microswitch in these, they need pressurised water running to them to function. Because of that, they are generally only used with the diaphragm pump system. You can get a cold-only faucet or a hot/cold faucet.

A regular faucet is much the same installation as a heated faucet except with two water inlets: a hot and a cold. Both the hot and the cold PEX piping are connected to the faucet using faucet connectors.
Campervan water heaters
You have four options for supplying hot water to your campervan water system:
Heater faucet
Tankless water heater
Water heater with a tank
Hydronic heater
In the Roaming Home study, we found that 45% of people have a campervan water heater installed in their van conversion.
No hot water
Before we hop in and examine the three types of campervan water heaters, I think it is worth pointing out that not having hot water is always an option. You can boil a kettle to wash the dishes, and use campsites, gyms or coworks for showering.
Heater faucet
We discussed the heater faucet before so I won't spend time on it here.
Instant hot water from the faucet, using 2500W of electricity. That's all you need to know.
Tankless campervan water heater
Tankless water heaters deliver (nearly) instant hot water whenever you turn on the tap or shower. There is no holding tank for water and thus they take up less space than their 'with-tank' counterparts (discussed next). Tankless water heaters predominantly run on propane gas.
The most popular tankless water heater by far is the Camplux portable tankless water heater. It's an absolutely fantastic tankless water heater delivering 46°C at up to 110 PSI (I recommend not running the shower on full blast to conserve water).
One of the many nifty things about the camplux heater is that it doesn't need to be plugged into your campervan electrical system; it is self sufficient and powered by two D cell batteries.

Let's zoom in and have a look at the Camplux tankless campervan water heater up close...

There are three 1/2" ports on the bottom of the heater:
Gas
Water IN
Water OUT
The gas inlet can run out to your propane gas cylinder via a compression pipe.
The water IN port brings in pressurised fresh water piped from the diaphragm pump. I recommend running 1/2" PEX from your pump to the heater and attaching it with a metal 1/2" barb-pipe fitting.
The water OUT port pipes pressurised hot water to our shower and faucet. The Camplux campervan water heater comes with a shower head attached by default - since we are installing a faucet and our own custom shower head, we can do away with the head they supplied. We attach 1/2" PEX pipe in the same manner we did for the water IN port.
Vented vs unvented tankless water heaters
Propane-powered tankless campervan water heaters operate by combusting propane. Carbon monoxide is produced in this process, which is very dangerous. Therefore, many propane water heaters come with vents to remove carbon monoxide from the campervan safely (through a roof flue). In contrast, the Camplux is an unvented campervan water heater.
A better and safer shower installation should instead use a vented campervan water heater. It pipes an exhaust pipe outside the van to get rid of that nasty carbon monoxide. While Camplux heaters are the most popular campervan water heaters, vented water heaters are the most correct water heaters. Indeed, in many countries, installing a Camplux inside (without a vent) may be against regulations.
However, on their website, Camplux states that their heaters can be installed indoors if a flue pipe or duct is installed and the area is well ventilated.
If you choose to install a Camplux heater, I recommend installing it on one of the back doors where you don’t need to worry about venting.

The Girard RV tankless propane water heater is one of the most popular vented campervan water heaters. The RecPro RV water heater is another very popular option.

Diesel combi heaters: blow heater & water heater!
If you've got the cash, you could buy a diesel heater that works both as a blow heater and as a water heater. The most famous manufacturer of these types of heaters is Truma. The Truma Combi 4 is a well-renowned and very well reviewed combi heater.
Another renowned combi heater is the Webasto Hybrid 5. I love these blow heater / water heater hybrids! If you've got the cash you should definitely check them out.
Campervan water heater with tank
A water heater with a tank keeps water constantly heated inside the holding tank (when turned ON). It is fully electric and does not rely on propane gas like the tankless heater does. The most popular tanked water heater is the Camplux 2.5 Gallon mini tank electric water heater.
The camplux heater is 1.5kw and thus requires an inverter sized at 2kw. It provides pressure up to 150 PSI.
I have a close friend who uses one of these and he loves it. He has even wired up a sensor so that the water heater will automatically turn ON when the leisure batteries are fully charged (pretty cool!)
A campervan water heater with a tank is plumbed in the exact same way as the tankless water heater (without the gas fitting). There are 1/2" fittings to which we can attach our hot and cold pipes.

Check valves
A check valve prevents the backflow of water in a system. In a campervan water system we should install a check valve on the water IN pipe running to the campervan water heater - somewhere near the water heater. This prevents the backflow of hot water from the heater, and consequently prevents us from drinking lukewarm water.

Showers
Next, let’s look at how to plumb a heated shower head and drain.
Note: I encourage you to check out this guide to campervan showers to learn everything about showering on the road. For now, before hopping into the plumbing for a permanent shower installation, I want to quickly highlight a quick-and-dirty way to get a shower in your campervan:
The 12V shower pump
This is a very simple, battery-powered shower. It is essentially just a 12v submersible pump attached directly to a shower head. Genius! Chuck the pump into a bucket of water and you're good to go!
I've used these showers many times and they are great! You can even get water hot if you throw a portable immersion heater in the bucket of water for a few minutes!

If you want one step up from the electric pump shower, you could check out the portable propane water heater. This heated shower has a little gas bottle inside and delivers instant hot water. It hooks up to either AC or DC power.
Now then... let's have a look at some 'proper' showers!

Shower head
A shower consists of two parts:
Mixing valve
Shower head
A shower mixing valve allows you to set the temperature and flow to the desired setting. It takes in pressurised hot and cold water and delivers mixed water to the shower head.
Here is a cheap and cheerful shower and mixing valve kit.

We run hot water from our campervan water heater and cold water from our diaphragm pump through 1/2" PEX piping. It connects up to the mixing valve using 1/2" barb-pipe connectors.

The mixed water runs up to our shower head through a shower hose.

Shower drain
In the floor of our shower unit we install a drain assembly. This is installed in much the same way as the sink assembly.
We attach a HepVo valve to the drain via an elbow drain adapter (1.25”). We can then run this out to our grey water tank with some 1.25” PVC pipe.
Note: The PVC drain pipe from the shower connects with the sink drain pipe via a Y-fitting, before heading to the grey water tank.

Water piping
While water piping has been made of many different materials over the years, and many different types are still used, broadly speaking there are just three materials that we need to consider for a campervan conversion:
PVC
Copper
PEX
PVC pipe
PVC (Polyvinyl chloride) pipe is a cheap and lightweight pipe. It can be either rigid or flexible (braided).
Rigid PVC pipe, often referred to as Wavin pipe, is commonly used in campervan drainage systems.
Flexible PVC is another great option for water plumbing. It is sometimes used instead of rigid PVC because it is less brittle.

Note: PVC must only be used for cold water, it should not be used with water above 50°C.
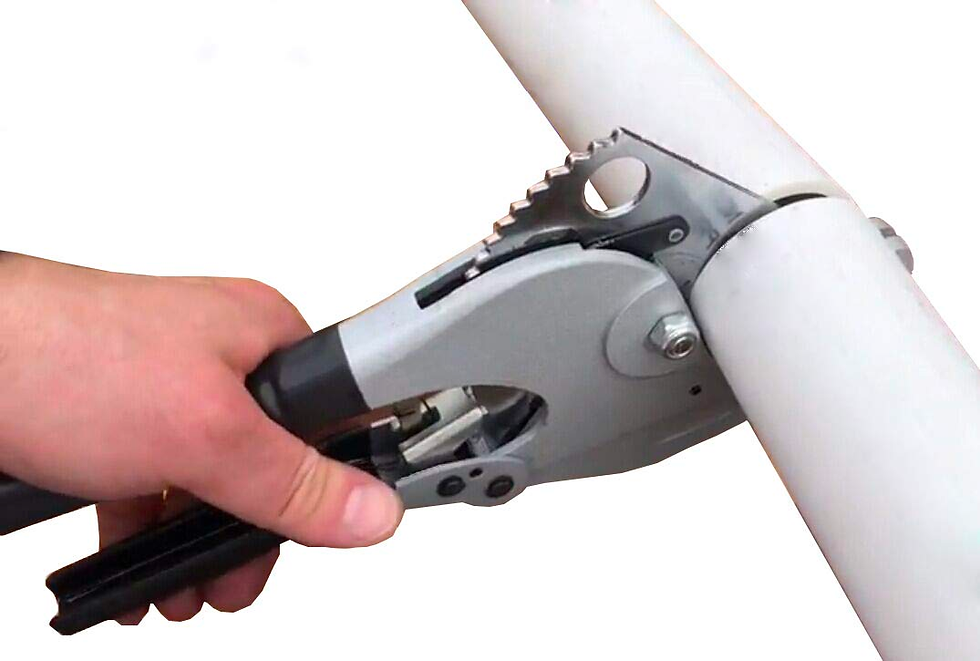
PVC pipe is cut with a PVC cutting tool.
Copper pipe
Whilst copper pipe is more commonly used for gas plumbing in campervans, it can also be used for water plumbing. Unlike rigid PVC, copper pipe can be bent using a pipe bending tool. Copper pipe is cut with a pipe cutters. Copper pipe can be connected with compression fittings, flared fittings, Sharkbite fittings, or welding/soldering. We will be doing a deep-dive on how to use copper pipe in a later chapter on campervan gas systems. Copper pipe is not commonly used for water piping in campervans.

PEX pipe
PEX (Cross-linked Polyethylene) is the most common type of pipe used for campervan water systems. It is cheap, flexible, easy to cut, easy to install, and superior in freezing conditions (it can expand). PEX can be used with hot water up to about 85°C.
PEX is cut with a PEX cutting tool.

I recommend picking up a roll of both red and blue 1/2" PEX for your campervan water system; red for the hot water, blue for the cold.

However, for all its benefits, PEX cannot be recycled and cannot be exposed to UV (keep it out of the sun!).
There are two types of PEX that we will concern ourselves with:
PEX-A
PEX-B
While both are very similar, we need to ensure the fittings we use are compatible with the PEX type we are using.
The key difference between PEX-A and PEX-B lies in the elastic ability for a PEX-A pipe to return to normal after expansion. This is a particularly useful feature for connecting to PEX/barb fittings, using a connection method called the 'expansion method' which we will discuss in a bit.
Pipe fittings
Pipe fittings are used anywhere our pipe connects to another component; it could be the pump, sink, campervan water heater, or even branching the pipe in two (Y-shape). They are essential in any campervan water system and important to get your head around.
Push-to-connect fittings
Push-to-connect / quick connect fittings are incredibly easy to use. You simply push the pipe into the connector until you hear a 'click' and the pipe is secured in place. The connector contains a collet (teeth) to hold it in place and an O-ring to form a watertight seal. They are used for connecting pipe to pipe and most commonly used for tee connections.

The two most popular manufacturers of push-to-connect fittings are John Guest and Sharkbite. Sharkbite's metal construction makes it far sturdier and less likely to leak. Sharkbite can be used for copper, PVC, and PEX pipe whereas John Guest should not be used with copper pipe.

Note: Make sure the pipe is well prepped before inserting it into the push-to-connect fitting. This means a nice, clean, and even cut of the pipe with no burrs around the edges. Make sure you use the appropriate pipe cutter to get this clean cut. If you want to do a precision job, you can deburr the edges using Sharkbite's deburr tool.
Another note: There is a movable plastic stiffener inside a Sharkbite push-to-connect fitting, If you are using the connector with copper pipe, you should take this plastic stiffener out with a pliers.

PEX fittings
It is essential to understand how to use PEX / barbed fittings for a campervan water system - they are the most common type of fitting. Barbed fittings allow us to connect PEX pipe to all our appliances.

The PEX pipe is inserted over the barbed end of the fitting and secured in placed using one of these three methods:
Crimping
Clamping
Expansion
Both crimping and clamping are mechanical ways of connecting PEX pipe to a barbed fitting. They are very similar methods.
1. PEX Crimping
First slide a PEX crimp ring over the PEX pipe, then insert the barbed fitting inside the pipe with the crimp ring over the connection. Clamp down on the crimp ring (all the way) with a PEX crimping tool. PEX also sells a tool called the go-no-go tool to verify the crimp is secure.

2. PEX Clamping
Clamping is very similar to crimping.
First slide a PEX Cinch Clamp over the PEX pipe, then insert the barb/PEX connector inside the pipe with the cinch clamp over the connection. Clamp down on the side of the cinch clamp (all the way) with a PEX cinching tool to secure the connection.

3. PEX Expansion
Note: The expansion method is only for use with PEX-A pipe. PEX-A pipe returns to shape after expansion
We can use a PEX expansion tool paired with a PEX ring to temporarily widen the PEX tube, place it over the PEX expansion fitting and wait for it to return to normal shape. This creates a BOMBER waterproof seal. No need for crimping or clamping like PEX-B. For this reason I love PEX-A.

Here's a video on how to connect PEX-A to an expansion fitting.
Compression / Press fittings
I will only touch on compression and press fittings briefly as they are not as commonly used in campervan water systems.
Compression fittings
A compression fitting is a very solid fitting to use in your campervan water system. Compression fittings can be used with PEX, copper, and PVC pipe. Indeed I recommend using them on your copper pipe for your campervan gas build-out. If you are using copper pipe for your campervan water system, then you will need compression fittings, however if you are just using PEX, I think they are overkill.
It is recommended to add some joint compound / pipe dope on the compression sleeve (olive) when you are screwing the fitting in place with a pipe wrench.

Press fittings
Press fittings are installed with a press tool and press sleeves.

PVC Fittings
PVC fittings are used with PVC pipe. It is common to use PVC pipe for a campervan drainage system. Remember, PVC should only be used with cold water. There are two types of PVC pipe: rigid and flexible.

Rigid PVC fittings
Because rigid PVC pipe does not bend, there are a plethora of fittings we could use to allow us to navigate bends.
How to attach a rigid PVC fitting to PVC pipe:
Ensure the pipe is well prepped, deburr the edges of the pipe and ensure the cut is clean.
Liberally apply two coats of PVC primer to the male and female parts of the connection.
While the primer is still wet, apply two healthy coatings of PVC cement to the male and female parts of the connection.
Join the two pieces together using a quarter turn motion.
Hold the two pieces firmly together for 30 seconds to prevent the pipe from popping out.

Flexible PVC fittings
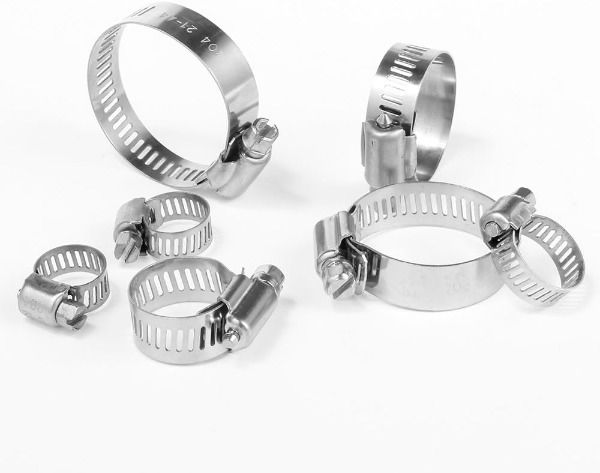
Flexible PVC, also known as braided or reinforced PVC is a great option for the cold water parts of your system. You can use barbed fittings (just like PEX) to connect flexible PVC pipe to another appliance. To secure the flexible PVC pipe to the fitting, tighten a worm-drive hose clamp over the connection.
Pipe thread fittings
A ‘connection’ is the part of a fitting that connects to a pipe or to an appliance.
We have already looked at many types of connections for connecting pipe to the fitting:
Push-to-connect
Barb
Expansion
Compression
Press
But there is another type of connection that is commonly found on a fitting: a pipe thread connection.
We use barb-pipe fittings to connect PEX pipe to a bunch of things in our campervan water system; including the faucet, shower, water heater, pump, etc. Basically everything.

NPT vs BSP
NPT = National Pipe Thread (USA).
BSP = British Standard Pipe (Rest of the world - mostly).

Male vs female pipe thread
Every pipe thread will be either male or female. A seal is made between two components when a male and female end are connected together correctly.
Male pipe thread is normally abbreviated to MPT.
Female pipe thread is normally abbreviated to FPT.

Inside diameter (ID) vs Outside diameter (OD)
When we are discussing male pipe thread (MPT) we care about outside diameter (OD). This is the diameter/width of the outside of the male connection.
When we are discussing female pipe thread (FPT) we care about inside diameter (ID). This is the diameter/width of the inside of the female connection.
When connecting male and female ends together, we must ensure the ID and OD match up.
In most of Europe, millimetres are used for fittings, in the USA, inches are used. Inches are more commonly used worldwide though because the UK also uses imperial.
1/2" diameter is the most common pipe/fitting size used in campervan water systems.
Tapered vs. parallel connections
There are two types of pipe thread: tapered and straight.
Accordingly, we have:
BSPT (British Standard Pipe Tapered) and BSPP (British Standard Pipe Parallel).
NPT (National Pipe Tapered) and NPS (National Pipe Straight)

Tapered thread
Tapered thread is the most common type of thread used in plumbing.
The seal with tapered thread is accomplished using PTFE (teflon) tape, joint compound / pipe dope, or sometimes hemp/wicking.
PTFE tape: Wrap PTFE tape around the male tapered thread 4-6 times and screw it into the female tapered thread. Tighten the connection together using a pipe wrench. Be very careful when tightening! Over-tightening can break the threads and cause a leak. Do 2-3 more turns after the connection is hand tight.

Pipe dope: Pipe dope, also known as pipe thread sealant or jointing compound can also be used to connect tapered thread connections. You simply apply some of the sealant to the male threads and screw it into the female tapered thread. Tighten the connection together using a pipe wrench.
Straight thread
There are two primary places we will encounter straight thread in a campervan water system:
Faucet connector hoses
Water tank connector fittings
The seal in straight thread connections is accomplished with the use of an O-ring. No sealant or PTFE tape needed, we simply screw the male and female ends together and tighten with a pipe wrench. The O-ring forms a watertight seal.
If you are using a garden hose or a garden hose fitting anywhere in your campervan water system, this is also straight thread.
Garden hose thread (GHT): Garden hose thread (GHT) is a straight thread used for garden hose connections. It looks quite similar to an NPS / BSPP thread, however you cannot use GHT with NPS/BSPP. The thread is different and the length of the connection is shorter.

Plastic vs metal connections
Pipe fittings can be made of either plastic or metal (brass).
When we are connecting two fittings together, we must ensure that the fittings are made of the same material: Metal fitting to metal fitting. Plastic fitting to plastic fitting.
How to install a water level gauge in a water tank
A water level gauge will tell you how full/empty your grey water and fresh water tanks are. If you are using permanently mounted tanks, this is quite an important piece of functionality! It is particularly important for the grey water tank if you don't want icky pasta-water coming back up the drain.
There are two types of water level gauge sensors that we can install on a water tank:
Float sensor
Tank probes
Let's have a look at how to install both of these.
Water tank float sensor
A water tank float sensor consists of two parts: a float sensor (sending rod) and a water level gauge.
Note: It is probably best to use a float sensor for the fresh water tank only. In a grey water tank, ‘gunk’ can sometimes get stuck in the sending rod which will cause it to malfunction.

Installing a float sensor
To install this device, we must cut an appropriately sized hole in the top of the water tank using a hole saw. Place the sending rod into the cavity and mark with a pen where the bolt holes are. Take the sending rod out and drill out those bolt holes (make sure you use the perfect size drill bit as there is no nut to secure the bolts).
We then place the rubber O-ring on top of the hole and insert the sending road into the cavity. Secure the sending rod in place with the bolts provided. Apply some sealant around the edges for further peace-of-mind.
Installing the water level gauge
The float sensor has two wires (red and blue) coming from it. The water level gauge has five wires coming from it.

Connect the black wire on the sensor to the black wire on the gauge (the signal).
Connect the pink and blue wires on the gauge to 12V ground (negative bus bar on your fuse box) .
Connect the red wire on the gauge to a Positive wire coming from your batteries/fuse box.
Note: The yellow and orange are just for the backlight so we probably don't need those.
Here's a guide if you need a refresher on how to connect electrical wires.
Water tank probes
Let's look at the second way of monitoring the levels in your water tanks: Water tank probes. This method also consists of two parts: a Water tank probes and a water tank sensor monitor.
You should install 4 water tank probes up the side of the water tank in question. When the water hits a probe, a light is activated on the water tank monitor. When the tank is full, four lights will be illuminated, when the tank is empty, no lights will be illuminated. The probes act like switches.

A water tank probe is a type of nut known as a well nut. They're super cool; when you tighten them down, the rubber on the interior of the nut expands to hold it in place and create a watertight seal.
Drill out three appropriately sized holes up the side of the water tank - place them 1/3, 2/3, and 3/3 of the way up the tank. Drill one more (fourth) hole near. the bottom of the tank - this is for ground. Place the tank probes into the cavities, attach the wiring from the tank monitor to each, and tighten the probe’s nut down.

The water tank sensor monitor from RecPro is really really cool. It has three buttons to allow you to check the levels of three different tanks (fresh, grey, and black water tanks). How nifty is that!?! Accordingly it comes with three strands of cables to go to each of the three tanks.

Each strand of cable contains five wires: yellow, green, red, orange, white. Each wire has a ring connector on the end to connect easily to the level probes.
Connect the yellow wire to the 1/3 probe.
Connect the green wire to the 2/3 probe.
Connect the orange wire to the 3/3 (full) probe.
Connect the white wire to the ground probe.
Connect the red wire to your Positive 12V power source.

The RecPro monitor even has a switch to control your pump so you can keep all your water appliances in one place.
I would recommend using water level probes for your grey water tank as a water tank float sensor is more likely to go wrong over time as jetsam and flotsam from the grey water tank get stuck in the sending rod.
Overall, I'm a really big fan of RecPro's monitor.
Campervan water filters
If you travel to places where water quality might be a concern (Spain, Australia, parts of the USA), then a water filter is highly recommended. A campervan water filter will purify your fresh water and make it 'potable'. Check out our comprehensive guide on water filter systems for much more information.
In the Roaming Home 2023 study, we found that 25% of people have a water filter installed in their van.
There are three main ways we can purify water:
The inline campervan water filter and 3-stage water filter are mechanical in how they purify the water (no electricity needed).
The UV purifier needs to be plugged into a power source.
The inline and 3-stage filters have a simple water IN and water OUT connection on each end. They both use Garden Hose Thread (GHT). You should place the filter upright, somewhere close to the faucet in your campervan.

The UV purifier also has a water IN and water OUT NPT connection on each end.
Recirculating showers
Instead of just turning on your shower and allowing all the water to fall down the drain, a recirculating shower captures, circulates and cleans your water!
The world of recirculating showers is still in its infancy, but a few companies are starting to pop up for home installations. This is definitely the future, in a world where water is increasingly becoming a scarce commodity.

I have seen several accounts of van builders who have built DIY recirculating showers. They’re truly incredible!
A recirculating shower requires multi-stage water filtration in order to function safely.

Pipe insulation / heating
Armaflex
If you are using your campervan in colder climates, I would highly suggest insulating your pipes with Armaflex. It is an excellent pipe insulator that is very easy to install. It will prevent your water from freezing up and keep your hot water hotter for longer! It is a foam insulation that simply slides over the pipe.

Heat cable
If you want to go a step further and really make sure your pipes don't freeze up, you can run a length of electric heat cable along the length of your exposed pipe. This is normally only done for piping that is exposed under the van.
Preparing your water system for winter is a core element of the campervan winterization process. Read more about winterization here.
Water tank sanitization
After extended periods of use, your fresh water tanks could have some bacterial build-up which could be detrimental to your health. It is best to clean out your water tanks every six months, here's how:
Prepare a bleach solution: Bleach must always be added to water when used. The ratio is 100:1. Or 10ml bleach to 1L water.
Fill up the fresh water tank to the top with the bleach solution. Let it sit overnight.
Run the taps to transfer the bleach solution from the fresh water tank to the grey water tank. Let that sit overnight too.
Fill the fresh water tank with potable water several times and run it through the system to clean it of any remaining bleach.
Conclusion
This guide should equip you with all the information you need to design , install, and maintain a campervan water system. Check out our dedicated articles on water filters, showers, toilets, and sinks for detailed information on those subjects. If you're still confused, consider our water systems masterclass for a detailed step-by-step course on the whole process.
Planning your van conversion?
Start with the free Van Conversion Diagram Pack below.
Want a clear step-by-step path for your full build?
The Van Conversion Mastery Course walks you step-by-step through the entire build process — from planning and layout to electrics, insulation, water, gas, carpentry, and more.
Until next time.

![The Ultimate Guide to Campervan Showers [2026]](https://static.wixstatic.com/media/9fd7ff_d7e9ec0524ae4664af3929052dd4c43e~mv2.jpg/v1/fill/w_980,h_653,al_c,q_85,usm_0.66_1.00_0.01,enc_avif,quality_auto/9fd7ff_d7e9ec0524ae4664af3929052dd4c43e~mv2.jpg)
