Essential Van Conversion Tools: The Ultimate Toolkit for Your Van Build
- Chris Wallace-Tarry

- Sep 24, 2025
- 15 min read
Updated: Apr 8
We're about halfway through our latest build here at The Van Conversion, and it's our most professional yet. A big difference between this conversion and the ones we've each done in the past is the quality of our tools. Shane previously built vans using the tools in his parents' garage, whilst the only power tools I had during my last conversion were a power drill and a jigsaw. We've both learned a lot since then, and our current workshop is quite the upgrade. In this article, I'll share the van conversion tools which we've found most useful during our build. We'll discuss power tools, hand tools, and attachments, plus the specific little bits of hardware we're using for the first time that I wish I'd known about during my previous conversions.

Shane is an NCC-certified electrical installer. He has built, taught, and lived in campervans since 2019.
This post contains affiliate links. We may earn a commission at no extra cost to you. To understand our policies on content, affiliate commissions, and liability, please review our Terms of Use.

If you're just getting started, you may want to check out our guide on van conversion tools for layout planning, or read Shane's new guide on base vans for your build.
In this guide
Power Tools for a Van Conversion
Power tools are the workhorses of your van conversion; the tools you'll use every day. Shane and I often remark upon how difficult carpentry and metalwork must have been when hand tools were the only thing around. We went with cordless power tools for our new workshop, a choice we're very happy with. We'll discuss cordless vs. corded tools in a later section. Below are the tools we've been using, roughly in order of how much we use them and how indispensable they've been.


Cordless Power Drill
We use our drill every day. It's essential for drilling holes in metal when adding exterior modifications to your van, as well as for all carpentry tasks. It also handles hole sawing and pilot hole drilling.
We went with Makita's DHP484Z model, rather than the cheaper DHP487Z, for its higher RPM and torque. We wanted a tool we could be sure could handle all the metal drilling we're doing. The LED torch on our drill comes on when you pull the trigger, which has been very useful when working in darker corners or under the van.

Cordless Jigsaw
A jigsaw is the other power tool we'd consider truly indispensable. It's the best tool by far for cutting big holes in your van, into which you'll fit windows, skylights, flares, and roof fans. It's also great for making quick cuts in wood, and is unique among saws in its ability to cut curves.
Our Makita jigsaw has the essential safety lock, speed settings for slowing down whilst cutting metal, and adjustable travel for making shallower cuts.

Cordless Workshop Vacuum Cleaner
We use our little cordless wet/dry vacuum cleaner so much that we've affectionately named it Noo-Noo. Noo-Noo proves himself indispendable multiple times a day: getting rid of sawdust after drilling or sawing; cleaning up metal swarf after metal cutting; keeping the floor of the van clean of outside debris. We don't know where we'd be without him.
A lightweight, handheld vacuum cleaner which, crucially, doesn't have an unwieldy tube attached, is incredibly convenient for van work. It's easy to take up onto the roof, and easy to carry around whilst routing out swarf from nooks and crannies all over the van.

Cordless Impact Driver
This is the first impact driver I've used over a standard electric screwdriver, and I'm a convert. An impact driver uses a hammer motion to massively increase torque and driving strength. It's a remarkable tool; screws go in almost instantly and can be driven into the wood past the head, eliminating the need for counter sinking. This has really saved us time, and the difference is evident during screw-heavy jobs like laying the van's plywood underfloor.

Cordless Angle Grinder
We didn't buy an angle grinder when kitting out our workshop, but we've essentially stolen a friend's. Various structural components in the van, like segments of internal wiring conduit and external attachment points, have interfered with our installations and can only be removed with an angle grinder. We've also used it extensively for cutting to size the metal framing components of our solar panel array.
An angle grinder cuts metal, even hardened steel, terrifyingly quickly. Additionally, because it's a circular blade rather than an up-and-down saw, we can use it to precisely cut away material from a backing surface we want to leave untouched.


Mitre Saw
We won't say that a mitre saw is among the essential van conversion tools, as you can achieve similar results with a circular saw/jigsaw and a mitre block. However, we've found ours incredibly useful and time-saving.
A mitre saw allows you to quickly make precise, angled cuts in wooden beams and planks. Even when making simple crosscuts, we get out the mitre saw for its lightning speed and perfectly straight cuts. Quick and precise angled cutting allows us to easily make mitre and bevel joints, which are cleaner and stronger than a 90° butt joint.

Circular Saw
This isn't truly essential either, but it's another example of a van conversion tool that we've ended up glad to have. Like a jigsaw, a circular saw makes straight cuts in metal and wood, but it does it much more quickly and precisely. With the addition of a guide rail, the cuts can be made perfectly straight, which isn't possible with a jigsaw. We want our carpentry to be of the highest possible standard, so this precision is important.
So far, we've used the circular saw when cutting the long boards for the van's underfloor, and we'll get plenty more use out of it when we come to cladding the walls and building furniture.

Random Orbital Sander
Our final power tool, and another nice-to-have. Sanding by hand is fine, but it can be very time-consuming and unpleasant if you're doing more than a quick once-over to remove splinters. We've used our random orbital sander a lot already, for tidying up rough, untreated wood and quickly bevelling corners, and we'll use it a lot more once we start tackling the carpentry in earnest.
Hand Tools Needed for Van Conversion
Moving on from power tools, we also use a wide array of hand tools whilst working on the van. These are much cheaper than power tools, and the brand has less of an impact on quality. This means you won't have lost out much if you buy a tool you don't use, so you can worry less about whether or not these tools are essential. Once again, I'll be ordering these roughly by how much we've used them.

Metal File
Essential for cleaning up cut metal edges and removing burrs and swarf, which can otherwise rust. Buy a file with a flat side and a curved side, as the curved side is great for working on rounded corners and circular holes.

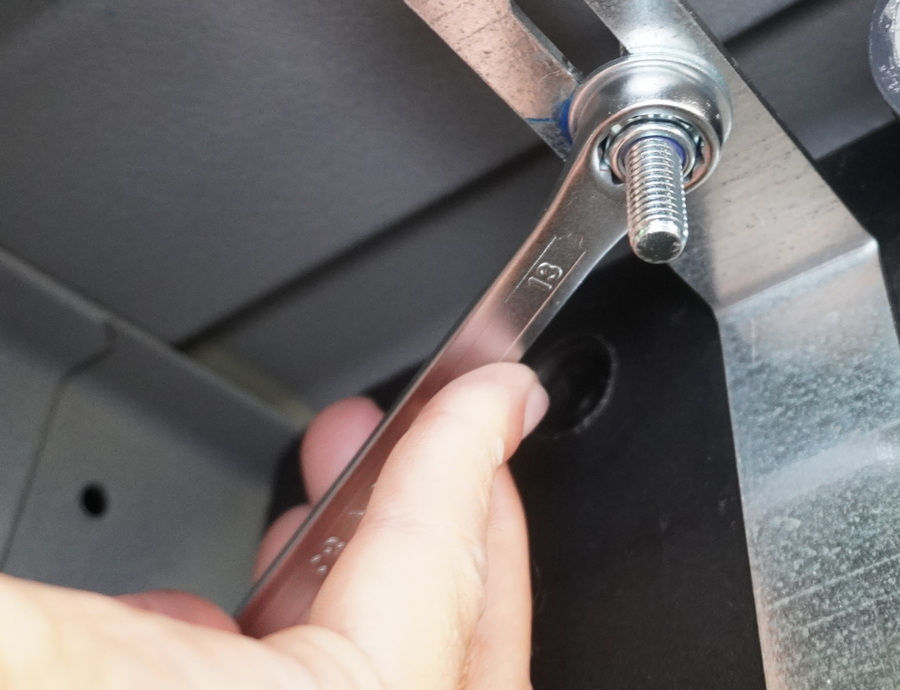
Ratcheting Spanner Set
A ratchet spanner is much more comfortable for tightening up bolts than a normal spanner, as you don't have to take the spanner off the bolt as you turn. We bought a set which includes an array of sockets, a full set of screwdriver bits, and all the adaptors for making everything work together. It's an incredibly useful camper van tool kit, and we've used it for every bit of metalwork we've done so far.
Combination Spanner Set
If you go with a more minmal ratchet spanner set, it's still a good idea to have a set of combination spanners. These are spanners with a traditional, open-ended head on one end and a box or ring head on the other. These spanners can reach into tighter spots than a ratchet spanner can, and are useful for holding a nut stationary whilst you turn the bolt.

F-clamps
For holding things in place during cutting and whilst glue sets. Ours get plenty of use whilst woodworking, but we've also used them to hold our flares in place whilst the sealant set.
F-clamps are quicker and easier to adjust than C-clamps, but are more solid than 'quick grip' clamps.
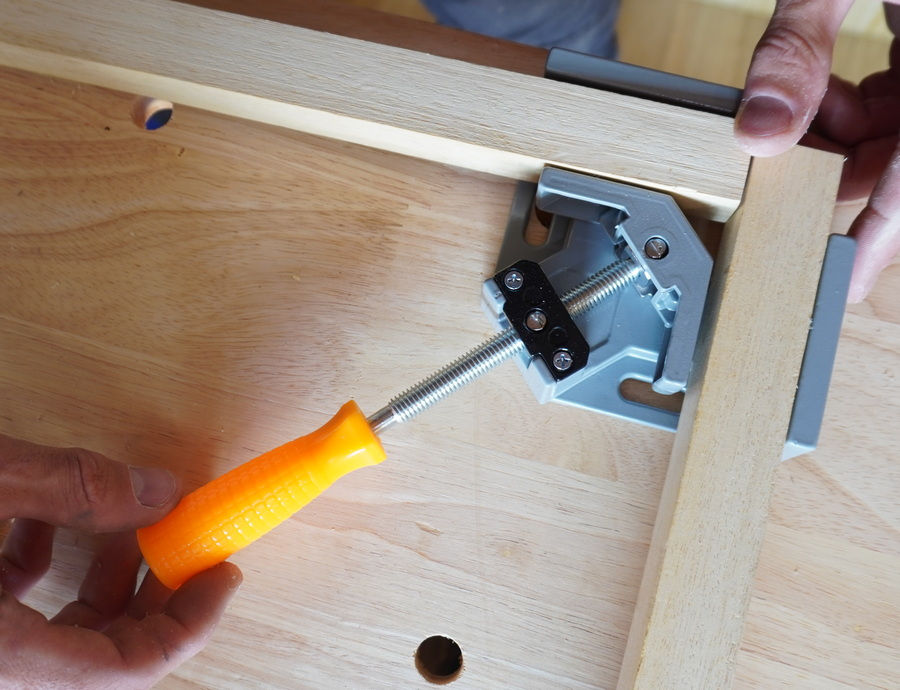
Corner Clamps
I wish I'd known about these during my previous van conversions. Corner clamps hold wooden beams securely at 90°, so you can easily screw and glue them at perfect right angles.

Rivnut Gun
This tool allows you to install rivnuts, a kind of threaded insert. We've found them incredibly useful, as they allow you to turn a simple drilled hole into a threaded anchor that accepts a bolt. We've used these to great effect for building a roof rack out of aluminium square tubing, where we couldn't get inside the tubing to fix nuts in place.

Stanley Knife
Every workshop needs a Stanley knife. We use ours for cutting the ends off sealant canisters, stripping wires that are too thick for wire cutters, cutting insulation foam, and a lot more general use besides.

Awl Set
Surprisingly useful! Ours get used a lot for clearing clogged sealant nozzles, but they've also got significant use for precisely marking drill points in metal. Position the awl, give it a bang with a hammer, and you've got a little dimple in which to begin drilling, exactly at the spot you measured.

Wood Saw
A wood saw is the best thing for cutting solid insulation board, like polyiso, XPS, and plasterboard.

Sealant Gun
Lots of unexpected things may happen during your van build, but you can be certain of one thing; you're going to use a lot of sealant. Get yourself a metal sealant gun with a traditional trigger and plunger mechanism; simple is best in this case.

Sealant Squeegee Set
To go with your nice new sealant gun, we found this set of flexible squeegees very useful for getting clean finishes on our sealed seams. A wetted finger is good too, but sometimes you want something more precise.

Digital Calipers
We didn't bother with these at first, but after squinting at a bolt held against a tape measure one too many times, we bought a pair. Drill bits, bolts, piping; lots of circular objects need measuring, and this tool gives you a precise number in a second.

Stubby Screwdriver
I thought this was frivolous at first, but I find myself reaching for the stubby all the time. You don't always want to get out the big toolbox and root around for a bit and something to attach it to. A little stubby with a selection of common bits in the handle is a pocketable tool which is very useful for quick fixes.

Combined Wire Stripper and Crimp Tool
This is one of a couple of tools that are essential for campervan wiring work. We've found that this type of self-adjusting wire stripper works really well for all wire gauges, and the crimper integrated in the handles has been up to all the crimping we've done so far.

Curved Wire Cutters
The above combined tool incorporates wire cutters, but a dedicated pair will serve you much better when cutting thicker cables, like the ones that connect to your batteries.
Still figuring out your van build?
This is where most people get stuck — jumping between blog posts, YouTube videos, and forums, never quite sure what to do next.
The Van Conversion Mastery Course gives you a clear, step-by-step system to design and build your van from start to finish — without the guesswork.

Van Build Tools for Measuring and Marking
You only need a few workhorse tools for all the measuring and marking that's part of any quality van conversion. The tape measure is a given, but there's a couple of other items that we've been very glad to have.

Tape Measure
Your bread and butter. Get one which is as long as the length of your van, to ensure you never fall short when measuring your biggest pieces.

Carpenter's Set Square
This is an excellent tool for measuring and marking at right angles. A standard tool in all carpenters' workshops.

Long Straightedge
We've come to love our long ruler. Once you get into flooring, cladding, and carpentry, you'll be marking out a lot of long, straight lines. A tape measure is far from the best tool for this because it's flexible, curved in cross section, and moves around a lot. A long ruler makes many carpentry jobs easy.

Scribe Tool
Van builders need a scribe tool more than most carpenters. There are many irregular surfaces in a van that you'll want to make your floor and furniture flush with. A good scribe tool is the only precise way to achieve this.
Van Conversion Checklist: Bits and Attachments
Your van conversion tools need to be able to do the jobs you set them. Make sure you buy quality attachments for cutting both metal and wood; trying to use one for the other will ruin your attachments and your materials.

Metal Cutting Jigsaw Blades
HSS stands for High Speed Steel; it's the best material for making sure your blades stand up to the tough task of cutting steel.
Wood Cutting Jigsaw Blades
Blades for cutting metal won't cut wood quickly, and are likely to burn it as a result. Get a set of dedicated wood blades.

Drill Bit Set
Our advice is to get a box containing multiples of each size drill bit, in both HSS and wood varieties. You'll inevitably break the thinner ones and blunt the thicker ones over the course of your build.

Hole Saw Blades for Wood and Plastic
Hole sawing is pretty much guaranteed during carpentry jobs and whilst working with plastic plumbing components. Many sets like this are advertised as bi-metal, but don't be fooled; they won't get through your van's steel walls and floor.

Carbide Hole Saw Blades
True metal-cutting hole saw blades are expensive, so don't plump for a full set. Instead, buy only the sizes you need to install your chosen exterior components.
Van Conversion Checklist: Other Useful Items
We'll finish up with a list of useful items which you might not think to buy, but which have proven invaluable during our conversion. Many of these are things I wish I'd known existed during my previous conversions. The problem of getting into something for the first time is that you don't know what you don't know. Many times, I knew what I wanted to achieve, and I could imagine a piece of hardware that would solve the problem, but I didn't know what it would be called or exactly the form it might take. Threaded inserts are a perfect example of this; read on to find out more.

Threaded Inserts: Rivnuts
A rivnut or rivet nut is a rivet that can be inserted from one side of a piece of metal, and which contains an internal thread. Where normally you'd have a simple unthreaded hole which would need a bolt on one side and a nut on the other, a rivnut securely holds a screwed-in bolt the same way an ordinary nut does.
Rivnuts are of great use for joining two elements where one side is inaccessible. For example, we built a custom roof rack using square aluminium tubing. Bolting this to the roof in the traditional way would require access to the inside of the tubing, in order to affix a nut. Instead, we drilled our holes, inserted rivnuts, and bolted into these from the outside. It's a clean, minimalistic solution that we're very happy with.

Threaded Inserts: Insert Nuts for Wood
An insert nut follows the same concept as a rivnut, but is used in woodworking. During my previous van build, I needed to fix a thin sheet of copper to the wood cladding of my van's walls. I didn't want to use screws, as the metal was too thin and I wanted the copper to be removable for periodic polishing. The solution was to drill holes in the wood, and screw insert nuts into these holes. The wood panelling could now accept a bolt from one side.
Insert nuts are a great way of fixing together materials that are too thin or soft to take screws well. They're also reusable, and provide a cleaner finish than screws in any context where the screw tip would visibly protrude.

Nyloc Nuts
These are nuts which incorporate a nylon insert which deforms as the bolt screws in, holding the nut securely against vibrations. In van builds, these are borderline essential, as vibrations from driving can very well loosen nuts over time. We've preferentially used nyloc nuts for all bolted fixtures on the outside of our van; the ladder, rear door rack and ski box, roof rack, and underslung water tank.

Mastic/butyl Tape
This is great stuff. It's a waterproof, putty-like material that comes in a roll like tape. Use it to quickly form a flexible seal on uneven surfaces. We probably wouldn't use it as the sole exterior seal for an installation, as it doesn't cure into a hard form and we'd be worried about its durability. However, it's perfect for evening out the uneven surface of your van's roof when you need to install a skylight or fan.

Pocket Hole Jig
Another thing I wish I knew about during previous conversions. Butt joints are often ugly and weak, and risk splitting the wood. I've often messed them up by failing to drive the screw straight and having it punch out of the wood at weird angles. Additionally, a butt joint is impossible if neither piece is narrow enough to accept a screw from the outside.
Drilling into pockets is a clean, precise way of attaching two pieces at 90°, no matter their dimensions. You can fit plugs into the holes, making the joint almost invisible.

Cold Galvanising Spray
We've iterated many times on our rustproofing process. An early discovery was that anti-rust paint comes in a fast-drying, easily-applied spray paint form. We've sinced used various kinds, which often seem not to adhere well.
Many sprays advertised as 'anti-rust' are mostly enamel-based, containing very little anti-rust zinc. These sprays make a waterproof layer which rust can get in under, as opposed to treating the metal itself. True, long-term rust resistance can only be achieved with a cold galvanising spray containing around 90% zinc that binds to the metal surface.

PPE
Protect yourself when using power tools. Drilling and cutting metal is easily loud enough to damage your ears. Angle grinding and sawing produces sparks and splinters which can easily injure your eyes. Spinning blades and drill bits can shatter violently, blinding you if you're unlucky. Earmuffs, goggles, and gloves are cheaper than hospital visits or treatments for hearing and sight loss.

White Spirit
White spirit is a universal solvent that gets rid of sealant, paint, varnish, and pretty much anything else you'll apply to your van. We mostly use it for getting these things off our skin at the end of work days, but it's also good for cleaning surfaces after messy jobs.

Small Portable Power Station
We think portable power stations are great for vanlife in general, but we've also got a lot of use out of ours during the latest build. It's very useful for testing electrics before permanently wiring them up. We've already used our little BougeRV power station to test the actuators for our solar panel array and skirting board-integrated lights. We'll continue to use it to make sure our circuitry works before covering it all up with cladding and floorboards.
Van Conversion Tools: Cordless vs. Corded
We've used entirely cordless power tools for our latest van build, and we're fully sold on them. I've used corded tools on previous builds, and the cords are always getting caught under the van's tyres or on the legs of my workbench as I move around. If it rains, I have to worry about where the end of the extension lead is and be careful to keep it dry. There's enough to think about when you're working on a van, without also having to manage long trailing cables.
Our Makita power tools run off rechargeable batteries, and we've found that the capacity is usually enough to last a whole day. If it's a heavy day of high-resistance work, such as drilling metal, we sometimes have to change a battery out. For this reason, we bought four of the rechargeable batteries, which has always been enough to keep everything running. At the end of the day, we plug the spent batteries into their charger, and they're fully charged the following morning.

The tools themselves don't cost more than their corded equivalents, but the batteries aren't cheap. You'll pay about £120 for a pack of two 5Ah batteries, plus about £30 for a charger. We love using our cordless tools, and are satisfied with the investment.
The Best Brand for Van Conversion Tools
Let's get the most important thing out of the way: buy tools from a respected brand. These are tools which will be doing a lot of tough work; you want to be able to trust them. Any budget brand or no-name tool you find on Amazon will be skimping on battery quality, motor durability, and toughness of materials. It's not worth the headache.
When looking at the big power tool brands, you'll find that there isn't a huge amount differentiating them. Bosch, Makita, DeWalt, Milwaukee, Ryobi, and Einhell are all long-established manufacturers with wide ranges. All of them offer cordless consumer tools, running off 18V rechargable batteries in the 2-5Ah capacity range. Bosch, Makita, Milwaukee, and DeWalt position themselves towards the semi-professional market. As such, their tools are more robust and will be able to handle longer days of heavier work over a much longer lifespan. These tools will hold high power outputs longer and overheat less, which matters if you're doing heavy metalwork or using your tools frequently over years. We went with Makita for their wide tool range and long-term durability, reflecting our plans to do multiple van conversions in the future.


If you're planning on just doing one or two van builds in the coming years, and if you don't envision doing heavy-duty metalwork, you'll be perfectly well-served by a DIY-focused brand. Ryobi's ONE+ system and Einhell's Power X-Change range are quality tools which come at a cheaper price, reflecting lighter, less frequent use.
Once you've bought a set of batteries and a charger, you're locked in to that manufacturer, as the batteries aren't compatible between brands. Therefore, the most important thing is to go with a range you can buy and return easily and locally. Make sure that your chosen brand has all the tools you want, including ones you may want later. Once you've chosen, buy three or four batteries in the 4-5Ah range, a charger, and the tools we recommended at the start of this article.
Final Thoughts
This has been a fairly exhaustive list of the van conversion tools we bought for our workshop. I've tried to include things we bought partway through the build, which will hopefully save you time during yours. The main takeaways are: buy quality for heavy work, don't overspend on power tools, and stay safe. Let us know in the comments if there's anything you think we've forgotten.
You may like to peruse our other articles on van build planning; we've got articles on layout planning, project management, choosing a base van, and insurance. Good luck, and happy building.
Planning your van conversion?
Start with the free Van Conversion Diagram Pack below.
Want a clear step-by-step path for your full build?
The Van Conversion Mastery Course walks you step-by-step through the entire build process — from planning and layout to electrics, insulation, water, gas, carpentry, and more.
Until next time.